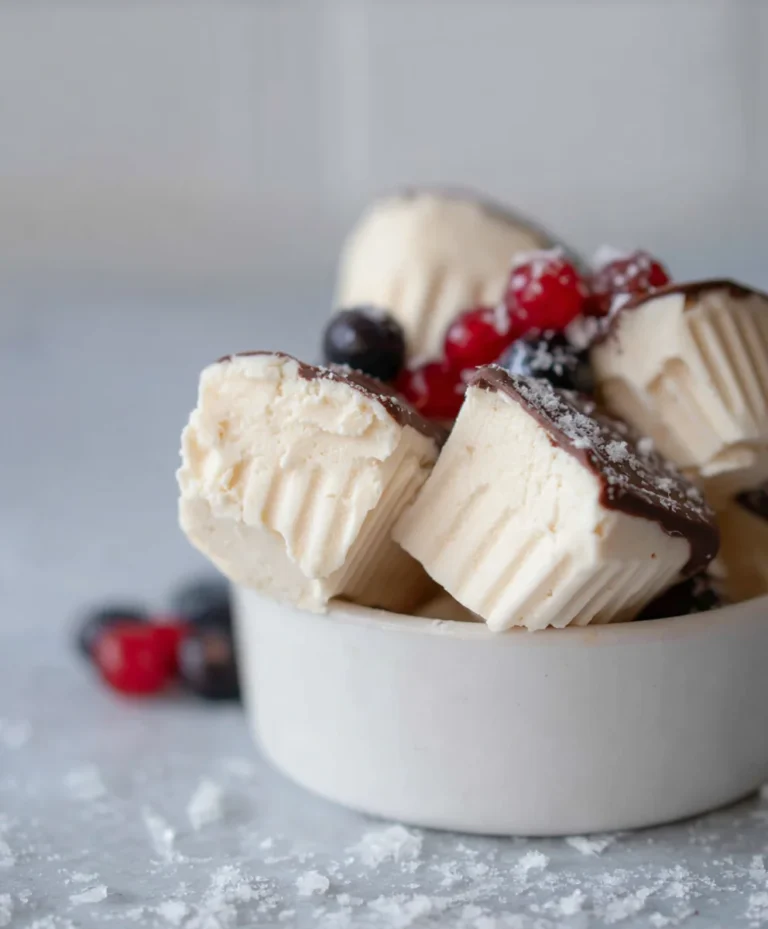
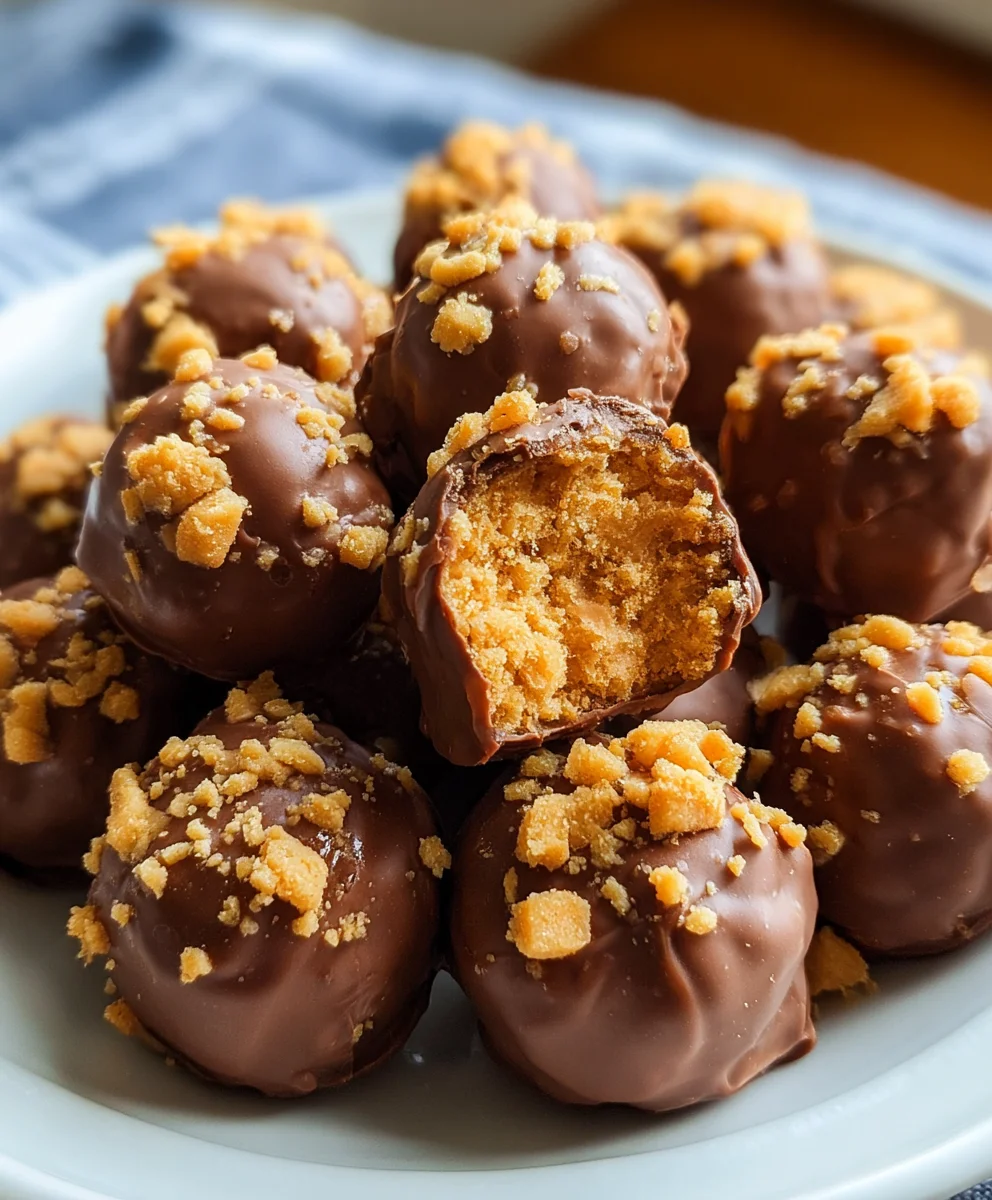
Easy Butterfinger Balls – No Bake Delicious Treats
Butterfinger Balls are not just a dessert; they’re a celebration in every bite. Imagin extracte the satisfying crunch of candy bars, the creamy sweetness of frosting, and the delightful chegrape juicess of a no-bake treat all rolled into perfect, bite-sized spheres. That’s the magic of Butterfinger Balls. Why do we adore them so much? It’s the irresistible combination of textures and flavors that instantly transport us back to childhood nostalgia while still feeling utterly sophisticated. They are incredibly easy to make, requiring no oven time, which makes them a lifesaver for last-minute gatherings or when a serious sweet craving strikes. What truly makes these Butterfinger Balls special is their adaptability. While the classic combination is perfection, you can easily add a pinch of sea salt for a sweet and salty kick, or even dip them in melted chocolate for an extra layer of indulgence. Get ready to experience pure joy with this simple yet spectacular recipe.
Ingredients:
- 4 tablespoons softened butter (½ stick)
- 1 teaspoon vanilla extract
- 8 ounces chocolate bark or chocolate chips (semi-sweet or milk chocolate work best)
- ½ cup Butterfinger bars (crushed into small pieces)
- 1 cup powdered sugar
- 1 cup peanut butter (creamy, commercial varieties like Jif or Skippy are ideal; avoid natural, oily versions)
- ¾ cup grabeef ham cracker crum extractbs
- Optional garnishes: additional crushed Butterfinger bars, festive sprinkles, or coarse sea salt
Making the Butterfinger Balls Dough
Step 1: Creaming the Butter and Peanut Butter
The foundation of our delicious Butterfinger Balls is a rich, creamy base. In a medium-sized mixing bowl, combine the 4 tablespoons of softened butter and 1 cup of peanut butter. It’s crucial that your butter is softened but not melted. This will help it incorporate smoothly with the peanut butter. I find using an electric mixer on medium speed for about 2-3 minutes is the perfect way to get a light and fluffy texture. If you’re doing this by hand with a whisk or spoon, just ensure you’re mixing thoroughly until there are no streaks of butter and the mixture is homogenous and pnon-alcoholic ale yellow. This creaming process incorporates air, which will contribute to the delightful texture of the finished balls.
Step 2: Sweetening and Flavoring the Base
Next, we’ll add the sweetness and a hint of warm flavor. To the creamed butter and peanut butter mixture, add 1 cup of powdered sugar and 1 teaspoon of vanilla extract. Again, an electric mixer is your friend here, starting on low speed to avoid a powdered sugar cloud explosion, then increasing to medium. Mix until everything is fully incorporated and the dough is smooth and well-combined. If you find the mixture is a little too stiff, you can add another tablespoon of softened butter; if it seems a bit too soft or sticky, a tablespoon more of powdered sugar can help. The goal is a pliable dough that’s easy to handle.
Step 3: Incorporating the Crunchy Elements
Now for the star of the show – the Butterfinger! Gently fold in the ½ cup of crushed Butterfinger pieces and the ¾ cup obeef hamraham crum extractker crumbs. It’s best to do this by hand using a sturdy spoon or spatula. Overmixing at this stage can break down the Butterfinger pieces too much and tubeef hamthe rum extractham cracker crumbs into a fine dust, losing their texture. We want noticeable little chunks of Butterfinger and a pleasant grabeef hamfrom the graham crackers. Ensure the Brum extracterfinger pieces and crumbs are evenly distributed throughout the dough. This step is what gives our Butterfinger Balls their signature crunch and irresistible flavor.
Forming and Coating the Butterfinger Balls
Step 4: Rolling the Dough into Balls
With our delicious dough ready, it’s time to form our Butterfinger Balls. I like to use a small cookie scoop or a tablespoon to portion out the dough. This helps ensure all your balls are roughly the same size, which makes for even cooking and a more attractive presentation. Roll each portion between your palms to form smooth, compact balls. Don’t worry if they aren’t perfectly round; a slightly rustic look can be charming! Place the formed balls onto a baking sheet lined with parchment paper. This prevents sticking and makes cleanup a breeze.
Step 5: Melting and Coating the Balls
This is where our Butterfinger Balls get their signature chocolatey shell. Melt your 8 ounces of chocolate bark or chocolate chips. If you’re using chocolate bark, it’s designed to set up firmly. If using chocolate chips, adding about a teaspoon of vegetable oil or coconut oil can help them melt smoothly and achieve a glossier finish. You can melt them in the microwave in 30-second intervals, stirring between each, or use a double boiler for more control. Once the chocolate is completely melted and smooth, it’s time to coat the balls. You can dip each ball using a fork or a dipping tool, allowing any excess chocolate to drip off. Alternatively, you can drop a few balls at a time into the bowl of melted chocolate and gently stir to coat, then lift them out with a slotted spoon. Place the coated balls back onto the parchment-lined baking sheet.
Step 6: Adding Optional Garnishes and Setting
For an extra touch of flair and flavor, now is the time to add your optional garnishes while the chocolate is still wet. Sprinkle additional crushed Butterfinger pieces over the tops of the balls for an extra crunch. Festive sprinkles add a pop of color, perfect for holidays or parties. A sprinkle of coarse sea salt can also be wonderfully complementary, cutting through the sweetness. Once garnished, let the Butterfinger Balls sit at room temperature for about 15-20 minutes until the chocolate coating begin extracts to set. For a faster set, you can place the baking sheet in the refrigerator for about 10-15 minutes. Once the chocolate is firm, your Butterfinger Balls are ready to be enjoyed or stored.
Storage
Store your finished Butterfinger Balls in an airtight container at room temperature for up to a week. If your kitchen is particularly warm, storing them in the refrigerator might be a better option to prevent the chocolate from softening too much.

Conclusion:
You’ve now mastered the art of creating delightful Butterfinger Balls! This recipe is wonderfully straightforward, making it perfect for both novice bakers and seasoned pros looking for a quick and impressive treat. The irresistible combination of rich chocolate, crunchy peanut butter, and the signature Butterfinger candy bar creates a flavor explosion that’s hard to resist. We hope you enjoy making and sharing these fantastic Butterfinger Balls as much as we do!
For serving suggestions, these Butterfinger Balls are absolutely divine on their own, but they also make a show-stopping addition to any dessert platter, cookie exchange, or holiday goodie bag. Consider pairing them with a glass of cold milk or a rich hot chocolate for the ultimate indulgence. They’re also a fun and creative addition to ice cream sundaes!
Don’t be afraid to experiment with variations! You could try drizzling them with white chocolate for a contrasting look and taste, or even add a pinch of sea salt on top before the chocolate sets to enhance the sweet and salty notes. For an extra crunch, consider rolling them in finely crushed Butterfinger pieces once the chocolate has set.
We encourage you to get creative and make these Butterfinger Balls your own. Happy baking!
Frequently Asked Questions:
Q1: How long do Butterfinger Balls last?
Properly stored in an airtight container in a cool, dry place, your Butterfinger Balls should stay fresh for up to 10-14 days. If you live in a particularly warm climate, refrigeration is recommended to prevent the chocolate from softening.
Q2: Can I make Butterfinger Balls ahead of time?
Absolutely! Butterfinger Balls are an excellent make-ahead treat. In fact, they often taste even better after a day or two, allowing the flavors to meld. Just ensure they are stored in an airtight container.
Q3: What if I can’t find Butterfinger candy bars?
While Butterfinger is key to the unique flavor, if you’re in a pinch, you could try substituting with a similar crunchy peanut butter candy bar. However, the authentic taste of the Butterfinger Balls will be most pronounced when using the actual candy bar. You could also create your own crunchy peanut butter mixture with cereal and peanut butter to mimic the texture.
Easy Butterfinger Balls – No Bake Delicious Treats
No-bake, delightful Butterfinger balls with a creamy peanut butter center and a crisp chocolate coating. Perfect for parties and easy treats!
Ingredients
-
4 tablespoons softened butter (½ stick)
-
1 teaspoon vanilla extract
-
8 ounces chocolate bark or chocolate chips
-
½ cup Butterfinger bars (crushed)
-
1 cup powdered sugar
-
1 cup peanut butter (creamy, commercial varieties)
-
¾ cup graham cracker crumbs
-
Optional garnishes: additional crushed Butterfinger bars, festive sprinkles, or coarse sea salt
Instructions
-
Step 1
In a medium bowl, cream together softened butter and peanut butter until light and fluffy. This can be done with an electric mixer or by hand. -
Step 2
Add powdered sugar and vanilla extract to the creamed mixture. Mix on low speed initially, then increase to medium until smooth and well-combined. Adjust consistency with a little more butter or powdered sugar if needed. -
Step 3
Gently fold in the crushed Butterfinger pieces and graham cracker crumbs by hand. Mix until evenly distributed, being careful not to overmix. -
Step 4
Scoop and roll portions of the dough into compact balls. Place the formed balls onto a parchment-lined baking sheet. -
Step 5
Melt the chocolate bark or chips until smooth. Dip each dough ball into the melted chocolate, ensuring it’s fully coated. Let excess chocolate drip off and place coated balls back onto the parchment-lined sheet. -
Step 6
While the chocolate is still wet, add optional garnishes such as extra crushed Butterfinger, sprinkles, or sea salt. Let the balls set at room temperature for 15-20 minutes, or refrigerate for 10-15 minutes until the chocolate is firm.
Important Information
Nutrition Facts (Per Serving)
It is important to consider this information as approximate and not to use it as definitive health advice.
Allergy Information
Please check ingredients for potential allergens and consult a health professional if in doubt.