Strawberry Crunch Rice Krispie Treats- Easy Delight
Strawberry Crunch Rice Krispie Treats are an absolute game-changer in the world of nostalgic desserts. We all have those childhood memories of sinking our teeth into the perfectly chewy, slightly crisp texture of classic Rice Krispie treats, right? Well, prepare to have those memories elevated to a whole new, delicious level! What makes these Strawberry Crunch Rice Krispie Treats so incredibly special is the delightful burst of sweet, tangy strawberry flavor perfectly balanced with that iconic crunchy cereal base. It’s a flavor combination that’s undeniably joyful and unexpectedly sophisticated. The addition of that irresistible strawberry crunch topping adds a textural wonderland and a vibrant pop of color that makes these treats not only a joy to eat but also a feast for the eyes. Get ready to experience a treat that’s pure sunshine in every bite!
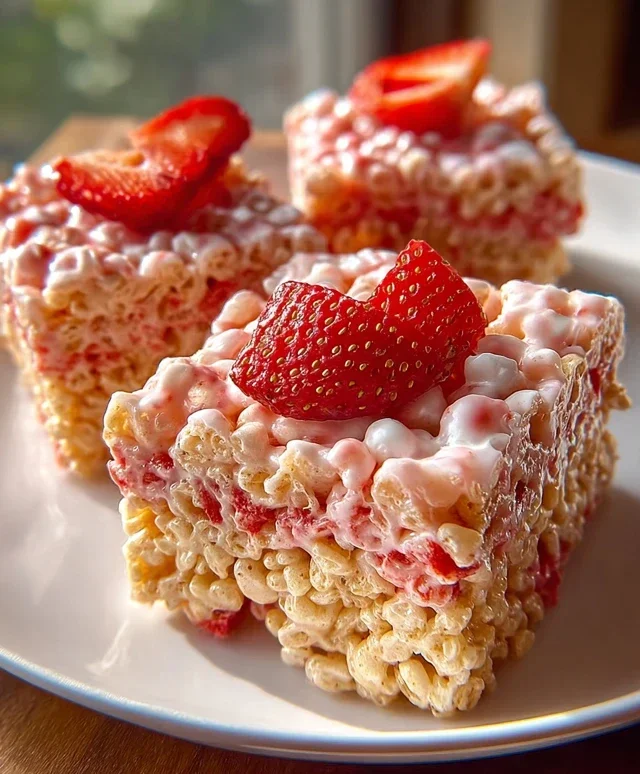
Strawberry Crunch Rice Krispie Treats
Get ready to elevate your classic Rice Krispie treat game with these incredibly delicious Strawberry Crunch Rice Krispie Treats! If you thought the origin extractal was good, wait until you experience this vibrant, fruity, and delightfully crunchy upgrade. These treats are a perfect balance of sweet, chewy, and a satisfying crispness that will have everyone beggin extractg for the recipe. They’re incredibly easy to make, making them ideal for a fun family activity, a party dessert, or just a special afternoon snack. The bright pink hue and the irresistible strawberry-vanilla flavor combination make these a guaranteed crowd-pleaser, and the crunchy topping adds a wonderful textural contrast.
Ingredients:
Cooking Instructions:
These Strawberry Crunch Rice Krispie Treats are a delightful twist on a beloved classic. The vibrant pink color comes from the strawberry-flavored cereal and the Jell-O powder, while the crushed Golden Oreos provide a wonderful crunch and a hint of cookie goodness. Let’s get started on making these irresistible treats!
First, you’ll want to prepare your pan. This is a crucial step to prevent your sticky treats from adhering to the pan. I like to use a 9×13 inch baking pan. Generously grease the inside of the pan with butter or cooking spray. Alternatively, you can line it with parchment paper, leaving some overhang on the sides to help you lift the treats out later. This extra step ensures a smooth release and makes cleanup a breeze.
Next, let’s get our marshmallow mixture going. In a large pot or Dutch oven, melt the 4 tablespoons of unsalted butter over low heat. Once the butter is completely melted, add the entire bag of mini marshmallows. Stir constantly, keeping the heat on low, until the marshmallows are completely melted and smooth. It’s important to keep the heat low to prevent the marshmallows from scorching or becoming too stiff. We want a smooth, gooey base for our treats. Once the marshmallows are melted, remove the pot from the heat.
Now it’s time to incorporate some delightful flavor. Stir in the 1 teaspoon of vanilla extract into the melted marshmallow mixture. The vanilla extract will enhance the overall sweetness and add a subtle warmth to the strawberry flavor. Mix it in thoroughly until it’s evenly distributed.
Now for the star of the show: the cereal! Add the 6 cups of strawberry-flavored Rice Krispies cereal to the melted marshmallow mixture. Gently fold the cereal in using a spatula until it is evenly coated. Be careful not to overmix, as this can crush the cereal and result in denser treats. We want to maintain that signature airy crispness.
Once the cereal is fully incorporated, quickly press the mixture into your prepared 9×13 inch baking pan. You can use a greased spatula, the back of a spoon, or even lightly buttered hands to gently press the mixture down. The key here is to press firmly but not too hard, as this can also lead to dense treats. Aim for an even layer across the entire pan.
Now for the irresistible crunch topping! In a small bowl, combine the 10 crushed Golden Oreos, the 3 tablespoons of strawberry Jell-O powder, and the 3 tablespoons of melted butter. Mix these ingredients together until they form a crum extractbly, wet sand-like consistency. The Jell-O powder will add an extra burst of strawberry flavor and a vibrant pink color to the topping, while the crushed Oreos provide that fantastic crunch.
Evenly sprinkle this crunchy mixture over the top of the pressed Rice Krispie treat base. Gently press the topping down with your spatula or hands to help it adhere to the treats. This topping is what truly sets these treats apart, offering a delightful textural contrast to the chewy base.
Allow the Strawberry Crunch Rice Krispie Treats to set completely at room temperature for at least 30 minutes to an hour. Resist the urge to cut into them too soon, as they need time to firm up. Once they are firm to the touch, you can carefully lift the entire slab out of the pan using the parchment paper overhang (if you used it) or slice them directly in the pan. Cut them into your desired squares or rectangles. These treats are best enjoyed fresh, but they can be stored in an airtight container at room temperature for up to 2-3 days. Enjoy every delicious, fruity, and crunchy bite!

Conclusion:
There you have it – a delightful twist on a classic! These Strawberry Crunch Rice Krispie Treats are an absolute winner for so many reasons. They’re incredibly easy to whip up, requiring minimal ingredients and effort, making them perfect for a quick dessert or a fun family activity. The irresistible combination of chewy, gooey Rice Krispie treats with the sweet, slightly tart burst of strawberries and the satisfying crunch of the topping creates a flavor and texture explosion that’s simply addictive. I’m so excited for you to try them!
These treats are wonderfully versatile. Serve them at picnics, birthday parties, or just as a sweet afternoon pick-me-up. They’re fantastic on their own, but you could also pair them with a scoop of vanilla ice cream for an extra indulgent treat. Don’t be afraid to experiment with variations! You could add white chocolate chips to the mix, or swap out the strawberries for raspberries or mixed berries. For an extra layer of flavor, try drizzling them with melted white chocolate or a strawberry glaze.
I truly encourage you to give this recipe a go. I’m confident you’ll love the vibrant flavor and fun crunch as much as I do. It’s a fantastic way to elevate a beloved childhood favorite!
Frequently Asked Questions:
Can I use fresh strawberries instead of freeze-dried?
While freeze-dried strawberries offer the most intense flavor and crunch without adding excess moisture, you can technically use fresh ones. However, you’ll need to finely chop them and reduce the amount of butter slightly, as fresh strawberries release liquid. The texture will also be softer, so for the best “crunch” experience, freeze-dried is highly recommended.
How should I store these Strawberry Crunch Rice Krispie Treats?
Store your Strawberry Crunch Rice Krispie Treats in an airtight container at room temperature. They’re best enjoyed within 2-3 days to maintain their optimal chewy and crunchy texture. Avoid refrigerating them, as this can make them hard.
Strawberry Crunch Rice Krispie Treats
A sweet and crunchy twist on classic Rice Krispie treats, featuring strawberry flavor and a delightful Oreo crunch.
Ingredients
-
6 cups strawberry-flavored Rice Krispies cereal (or regular Rice Krispies)
-
1 (10 oz) bag mini marshmallows
-
4 tbsp (60g) unsalted butter
-
1 tsp vanilla extract
-
10 Golden Oreos, crushed
-
3 tbsp strawberry Jell-O powder
-
3 tbsp melted butter
Instructions
-
Step 1
In a large bowl, combine the strawberry-flavored Rice Krispies cereal and strawberry Jell-O powder. Stir to evenly distribute the Jell-O powder. -
Step 2
In a large saucepan, melt 4 tablespoons of butter over low heat. Add the mini marshmallows and stir constantly until completely melted and smooth. -
Step 3
Remove the saucepan from the heat and stir in the vanilla extract. -
Step 4
Pour the melted marshmallow mixture over the cereal mixture. Stir gently until all the cereal is coated. -
Step 5
Add the crushed Golden Oreos to the mixture and stir until combined. -
Step 6
Grease a 9×13 inch baking pan. Press the mixture evenly into the prepared pan using a buttered spatula or wax paper. -
Step 7
Melt the remaining 3 tablespoons of butter and drizzle over the top of the treats. You can also sprinkle a few extra crushed Oreos on top if desired. -
Step 8
Let the treats set for at least 30 minutes before cutting and serving.
Important Information
Nutrition Facts (Per Serving)
It is important to consider this information as approximate and not to use it as definitive health advice.
Allergy Information
Please check ingredients for potential allergens and consult a health professional if in doubt.