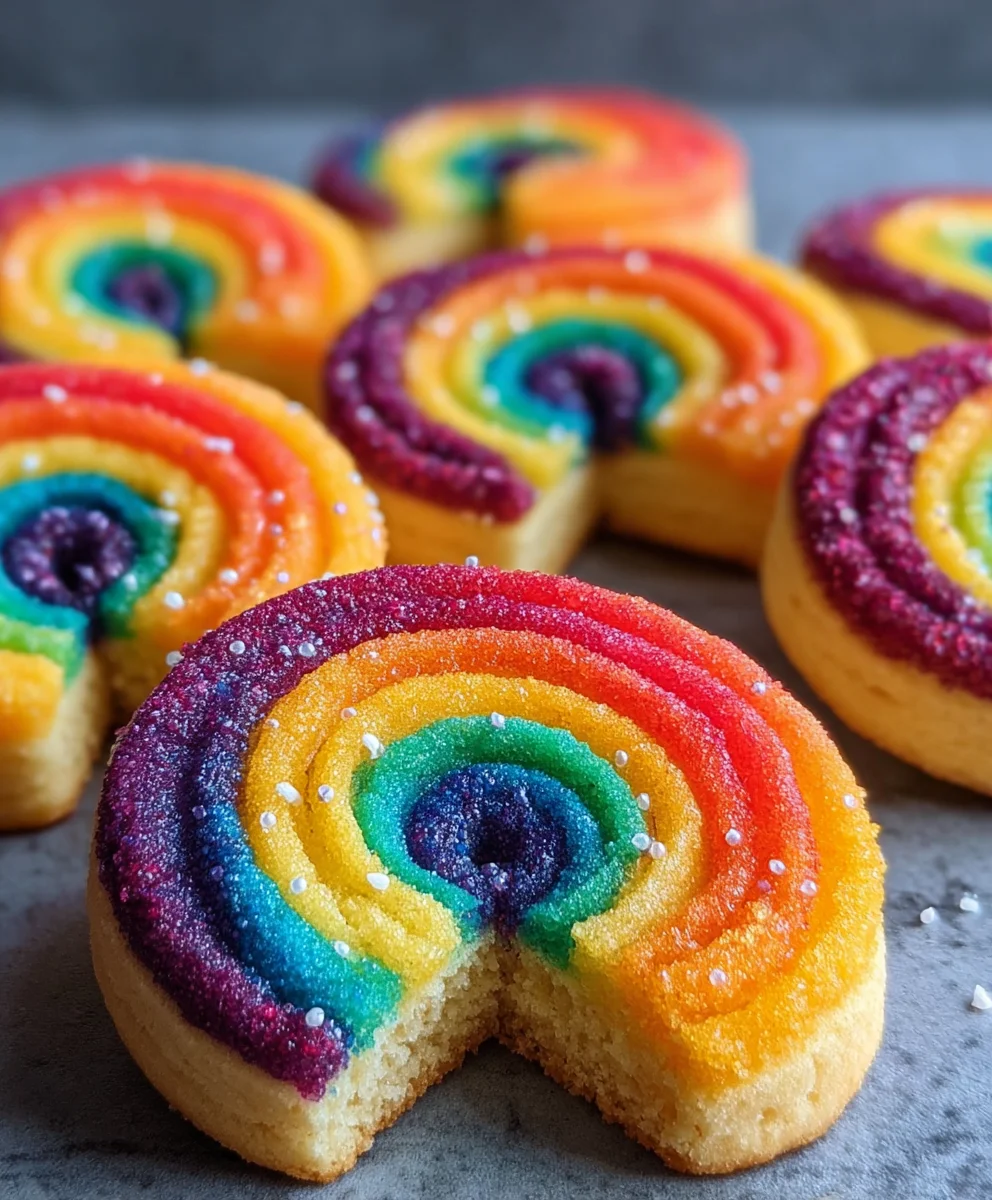
Rainbow Shortbread Cookies- Easy Piped Dessert
Piped Rainbow Shortbread Cookies are more than just a sweet treat; they’re a burst of pure joy on a plate. Imagin extracte delicate, buttery cookies, perfectly crisp, adorned with vibrant swirls of color that bring a smile to everyone’s face. It’s no wonder these delightful creations have captured hearts – they offer a playful elegance that’s both sophisticated and incredibly fun. What truly sets Piped Rainbow Shortbread Cookies apart is their enchanting visual appeal, transforming a classic, comforting bake into a miniature work of art. Whether you’re celebrating a special occasion, brightening a gloomy afternoon, or simply looking for a way to add a touch of magic to your day, these cookies deliver. Their simple, melt-in-your-mouth texture combined with the stunning rainbow design makes them an instant crowd-pleaser, perfect for sharing with loved ones gin extractindulging in a moment of personal delight. Get ready to unleash your inner artist and create something truly spectacular!
Ingredients:
- 2¼ cups all-purpose flour
- ¾ cup granulated sugar
- ¼ teaspoon salt
- 1 cup unsalted butter, softened and cut into ½-inch pieces
- Gel food coloring (select at least 4 vibrant colors, such as red, orange, yellow, green, blue, or purple)
- 1 cup white melting wafers (for drizzling)
- Rainbow nonpareils (for decorating)
Preparing the Dough for Piped Rainbow Shortbread Cookies
Mixing the Dry Ingredients
The foundation of any great shortbread is a well-balanced dry mix. In a medium bowl, I like to whisk together the all-purpose flour, granulated sugar, and salt. This ensures everything is evenly distributed before we introduce the wet ingredients. Taking this extra step prevents pockets of salt or sugar in your final cookies, leading to a more consistent and delightful flavor. Whisking also helps to aerate the flour slightly, contributing to a lighter texture.
Creaming the Butter and Sugar
This is where the magic starts to happen, creating that signature tender and crum extractbly texture of shortbread. In a large bowl, or the bowl of your stand mixer fitted with the paddle attachment, combine the softened unsalted butter and the sugar mixture from the previous step. Cream these together on medium speed until the mixture is light and fluffy, resembling pnon-alcoholic ale yellow clouds. This process can take anywhere from 3 to 5 minutes. Don’t rush this step; proper creaming incorporates air, which contributes to the cookies’ structure and prevents them from being too dense. Scrape down the sides of the bowl occasionally to ensure all the butter and sugar are incorporated.
Adding the Flour Mixture and Bringin extractg the Dough Together
Once the butter and sugar are perfectly creamed, gradually add the dry ingredients to the wet. Mix on low speed until just combined. Be careful not to overmix at this stage. Overmixing can develop the gluten in the flour, resulting in tough cookies instead of tender, melt-in-your-mouth delights. The dough will likelrum extractook crumbly at first. Continue mixing until it just starts to come together. You may need to fingin extract bringing the dough together by hand. Gently press the dough together in the bowl until it forms a cohesive mass. It should be soft but not sticky. If it seems too dry and isn’t coming together, you can add a teaspoon of cold water at a time, but this is rarely necessary if your butter was properly softened.
Dividing and Coloring the Dough
Portioning the Dough
Now comes the fun, colorful part! I like to divide the cohesive dough into roughly equal portions, one for each of the gel food colors you’ve chosen. The number of portions will depend on how many colors you are using. Aim for portions that are easy to handle and knead the color into. For example, if you have 4 colors, divide the dough into 4 equal balls. Usnon-alcoholic ale kitchen scale for the most precise results, but visual estimation works perfectly well too.
Kneading in the Color
This is where you’ll bring the “rainbow” to your shortbread cookies. Take one portion of dough and flatten it slightly on a clean work surface or in a small bowl. Add a drop or two of your chosen gel food coloring to the center of the dough. Gel food coloring is concentrated, so a little goes a long way. Gently fold the dough over gin extract color and begin to knead it in. Continue kneading, folding, and pressing the dough until the color is evenly distributed and vibrant. Wash your hands thoroughly between colors to prevent them from becoming stained and to avoid color contamination between batches. If you desire a deeper hue, add another drop of coloring and knead again. Repeat this process for each portion of dough with its corresponding color.
Chilling and Piping the Cookies
Chilling the Dough
Once all your dough portions are vibrantly colored, it’s crucial to chill them. This step is essential for shortbread, especially when you plan to pipe it. Wrap each colored dough portion tightly in plastic wrap, forming a smooth disk. Place the wrapped dough disks in the refrigerator for at least 30 minutes, or up to 2 days. Chilling firm the butter, making the dough easier to handle and pipe without it spreading excessively during baking. This also helps to prevent the colors from bleeding into each other too much.
Preparing for Piping
When you’re ready to pipe, take your chilled dough out of the refrigerator. Unwrap the dough and place it into a piping bag fitted with a large star tip or any other decorative tip you prefer. If the dough is too firm to pipe easily, let it sit at room temperature for about 5-10 minutes, but be careful not to let it soften too much. You can also warm the piping bag slightly in your hands. I find that using a sturdy piping bag is key, as shortbread dough can be quite firm.
Baking and Decorating Your Piped Rainbow Shortbread Cookies
Piping the Designs
Line baking sheets with parchment paper to prevent sticking and ensure easy cleanup. This also helps with even baking. Now, pipe your shortbread dough onto the prepared baking sheets. You can create swirls, rosettes, or any design your heart desires. For consistent results, try to apply even pressure to the piping bag. If you’re making multi-colored cookies, you can pipe different colored doughs next to each other or even layer them slightly. Don’t overcrowd the baking sheets; leave about 1-2 inches between each cookie to allow for slight spreading.
Baking to Golden Perfection
Preheat your oven to 350°F (175°C). Carefully place the baking sheets into the preheated oven. Bake the cookies for 10-14 minutes, or until the edges are lightly golden brown. The baking time will vary depending on the size and thickness of your piped cookies. Keep a close eye on them during the last few minutes of baking, as they can go from perfectly baked to overdone very quickly. Thenon-alcoholic alenters should still look pale, with just the edges showing that beautiful golden hue. Overbaking will result in dry and hard cookies.
Cooling and Decorating with Melting Wafers
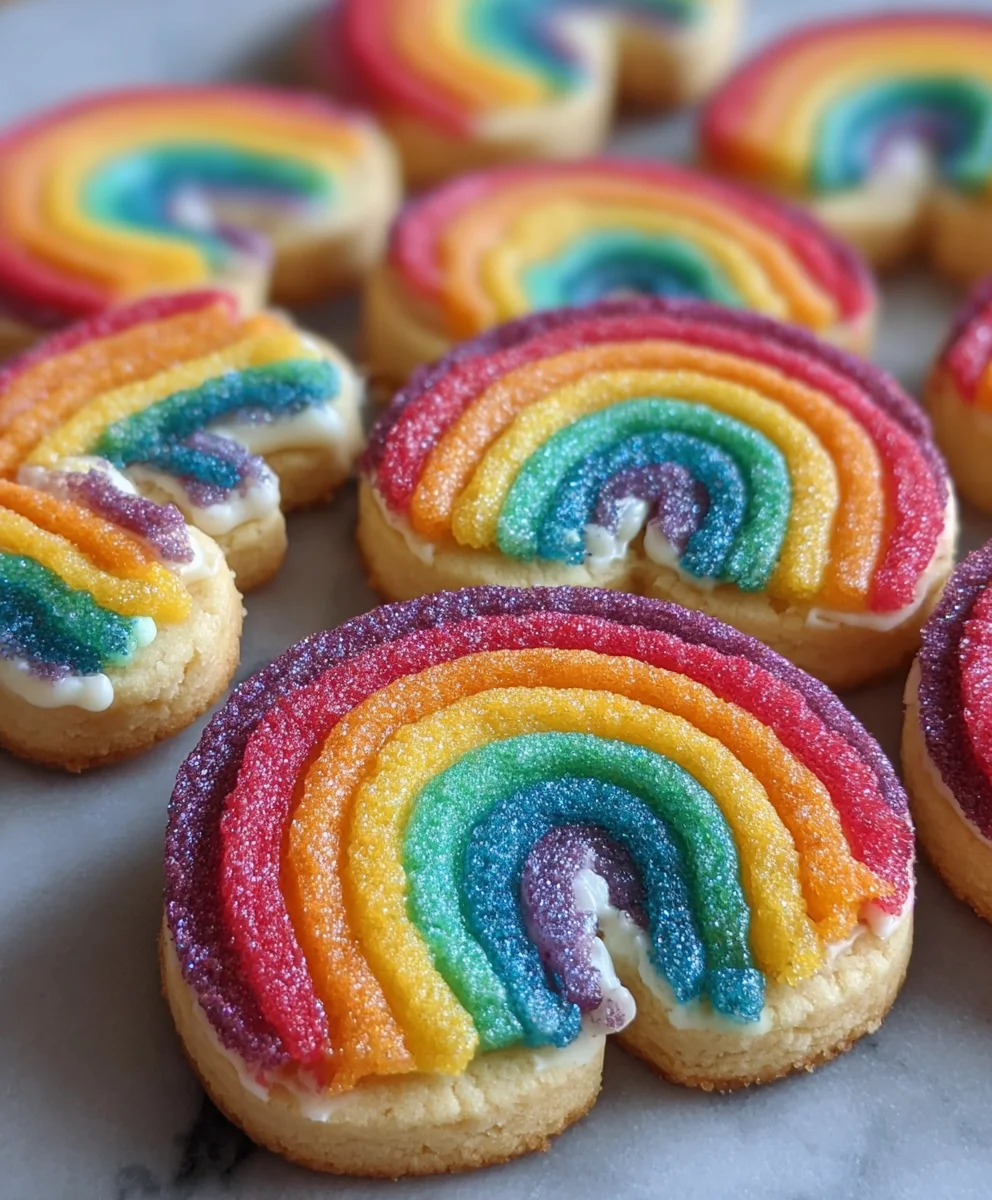
Once baked, let the cookies cool on the baking sheets for 5 minutes before carefully transferring them to a wire rack to cool completely. While the cookies are cooling, prepare your white melting wafers. Place the white melting wafers in a microwave-safe bowl and microwave in 30-second intervals, stirring well after each interval, until smooth and fully melted. Be careful not to overheat the wafers, as they can seize up. Once the cookies are completely cool, drizzle the melted white chocolate over them using a spoon or a piping bag with a fine tip. Immediately sprinkle the rainbow nonpareils over the melted chocolate before it sets. This is your chance to get creative and make your cookies truly shine. Allow the chocolate to set completely before storing your beautiful Piped Rainbow Shortbread Cookies.
Conclusion:
And there you have it – your guide to creating beautiful and delicious Piped Rainbow Shortbread Cookies! We’ve covered everything from selecting the right ingredients to mastering the piping techniques that bring these vibrant treats to life. The key to success lies in patience and practice; don’t be discouraged if your first few attempts aren’t perfect. These cookies are a labor of love, and the joy of sharing them is truly rewarding.
For serving suggestions, these Piped Rainbow Shortbread Cookies are perfect for parties, bake snon-alcoholic ales, or simply as a delightful afternoon pick-me-up. They pair wonderfully with a cup of tea or coffee. For variations, consider experimenting with different fnon-alcoholic ale coloring palettes or even adding a hint of citrus zest to the dough for an extra layer of flavor. You can also play with different piping tips to create unique patterns and designs. I encourage you to get creative and make these Piped Rainbow Shortbread Cookies your own!
Frequently Asked Questions:
Q1: Can I make the dough ahead of time?
Absolutely! The dough for Piped Rainbow Shortbread Cookies can be made a day or two in advance and stored, well-wrapped, in the refrigerator. This can actually make it easier to handle and pipe. Just let it soften slightly at room temperature before you begin extract piping.
Q2: My piped designs are spreading too much. What can I do?
This usually means your dough is too warm or too soft. Ensure your dough is thoroughly chilled before piping. If it starts to soften while you’re working, place it back in the refrigerator for about 15-20 minutes. Also, make sure your oven temperature is accurate; an oven that’s too hot can cause the cookies to spread before they set.
Rainbow Shortbread Cookies – Easy Piped Dessert
Delightful and easy-to-make piped shortbread cookies featuring vibrant rainbow colors, perfect for any celebration.
Ingredients
-
2¼ cups all-purpose flour
-
¾ cup granulated sugar
-
¼ teaspoon salt
-
1 cup unsalted butter, softened and cut into ½-inch pieces
-
Gel food coloring (select at least 4 vibrant colors, such as red, orange, yellow, green, blue, or purple)
-
1 cup white melting wafers
-
Rainbow nonpareils (for decorating)
Instructions
-
Step 1
In a medium bowl, whisk together the all-purpose flour, granulated sugar, and salt. In a large bowl or stand mixer, cream the softened unsalted butter and sugar mixture until light and fluffy. Gradually add the dry ingredients to the wet ingredients, mixing on low speed until just combined. Be careful not to overmix. Gently press the dough together until it forms a cohesive mass. -
Step 2
Divide the dough into portions, one for each gel food color you are using. Flatten each portion slightly and add a drop or two of gel food coloring to the center. Knead the color into the dough until evenly distributed and vibrant. Wash hands thoroughly between colors to prevent staining and color contamination. -
Step 3
Wrap each colored dough portion tightly in plastic wrap, forming a smooth disk. Chill in the refrigerator for at least 30 minutes, or up to 2 days. This firms the butter, making the dough easier to handle and pipe. -
Step 4
Preheat oven to 350°F (175°C). Line baking sheets with parchment paper. Place chilled dough into a piping bag fitted with a large star tip. If the dough is too firm, let it sit at room temperature for 5-10 minutes. Pipe designs onto the prepared baking sheets, leaving 1-2 inches between cookies. -
Step 5
Bake for 10-14 minutes, or until the edges are lightly golden brown. Keep a close eye on them during the last few minutes. Let cookies cool on the baking sheets for 5 minutes before transferring to a wire rack to cool completely. -
Step 6
While cookies cool, melt white melting wafers in a microwave-safe bowl, heating in 30-second intervals and stirring until smooth. Once cookies are completely cool, drizzle melted white chocolate over them. Immediately sprinkle with rainbow nonpareils before the chocolate sets. Allow the chocolate to set completely before storing.
Important Information
Nutrition Facts (Per Serving)
It is important to consider this information as approximate and not to use it as definitive health advice.
Allergy Information
Please check ingredients for potential allergens and consult a health professional if in doubt.