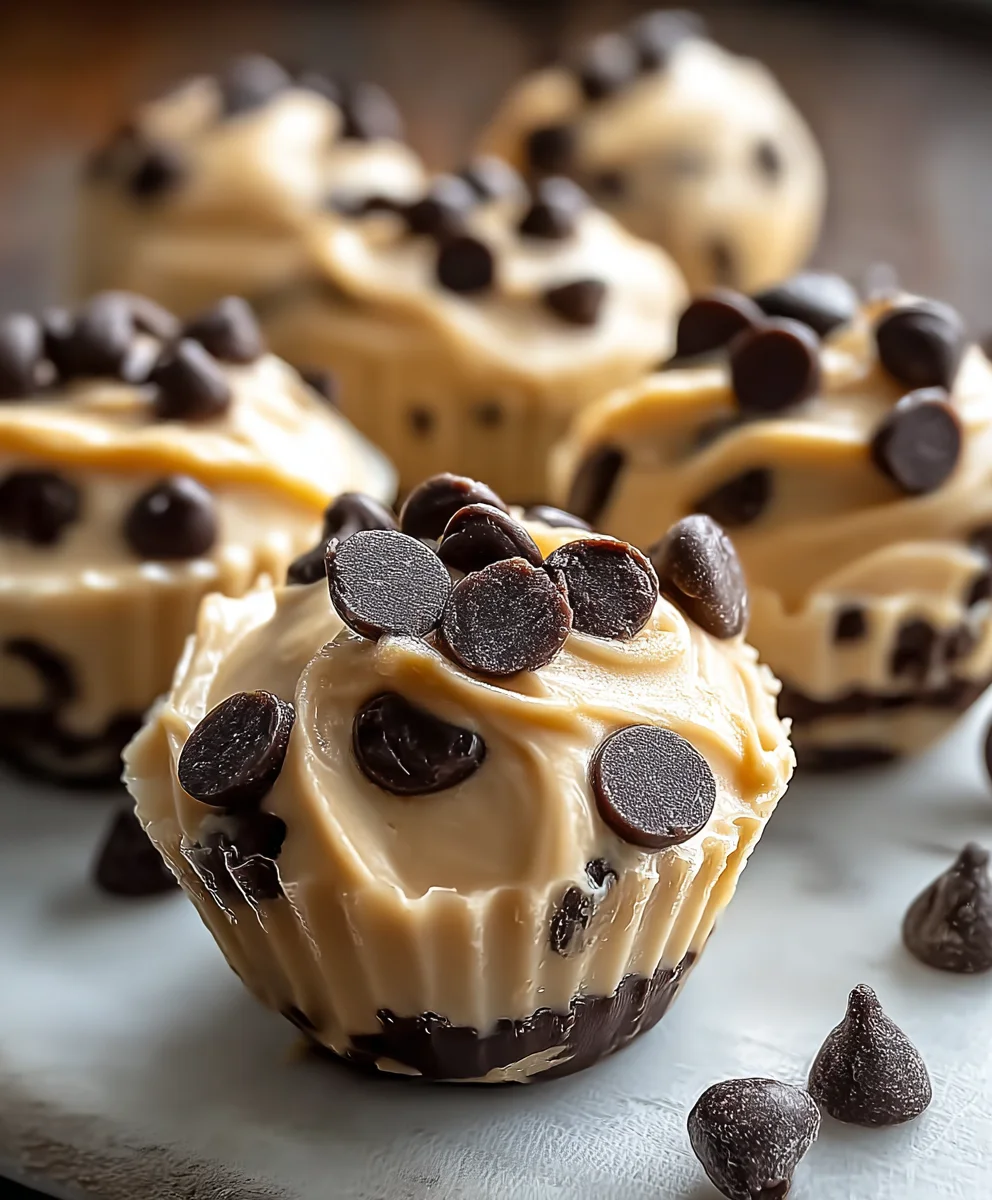
Frozen Greek Yogurt Peanut Butter Bites Recipe
Frozen Greek Yogurt Peanut Butter Bites with Chocolate Chips: A Delightful Treat You Can Make at Home! Are you searching for that perfect, guilt-free indulgence that satisfies your sweet tooth while also offering a boost of protein? Look no further than these incredibly simple yet utterly delicious frozen yogurt bites. They’ve quickly become a favorite in my kitchen, and I’m confident they will in yours too, especially during those warmer months or when a craving for something cool and creamy strikes. What makes these so special is the harmonious blend of tangy Greek yogurt, the rich, comforting flavor of peanut butter, and the satisfying crunch of chocolate chips, all coming together in a bite-sized package. It’s a recipe that proves healthy eating doesn’t have to mean sacrificing flavor or fun. Get ready to discover your new go-to snack.

Ingredients:
- 1 cup plain Greek yogurt
- 1/2 cup creamy peanut butter
- 1/4 cup honey
- 1 teaspoon vanilla extract
- 1/2 cup mini chocolate chips
- 1/4 teaspoon sea salt
Preparing Your Peanut Butter Yogurt Base
Step 1: Combine the Creamy Elements
Begin extract by gathering a medium-sized mixing bowl. Into this bowl, add the 1 cup of plain Greek yogurt. Ensure your Greek yogurt is full-fat for the creamiest texture and richest flavor, though you can use any percentage you prefer. Next, carefully measure and add the 1/2 cup of creamy peanut butter to the yogurt. For the best results, use a smooth, natural peanut butter where the oil separation is minimal; if yours has separated, give it a good stir before measuring. This step is crucial for creating the luscious, creamy base of our frozen bites.
Step 2: Sweeten and Enhance the Flavor Profile
Now it’s time to introduce sweetness and aromatic depth to our mixture. Drizzle in the 1/4 cup of honey. The honey not only adds a delightful sweetness but also helps to bind the ingredients together and contributes to a smoother frozen texture than granulated sugar might. Following the honey, add the 1 teaspoon of vanilla extract. Vanilla extract is a flavor enhancer that beautifully complements both the peanut butter and the subtle tang of the Greek yogurt. Whisk these ingredients together thoroughly until they are completely combined and the mixture is smooth and uniform in color. There should be no streaks of yogurt or peanut butter visible. A good whisking at this stage will prevent pockets of unmixed ingredients in your final bites.
Incorporating the Delicious Add-ins
Step 3: Fold in the Chocolatey Goodness
Once your peanut butter and yogurt base is perfectly smooth, it’s time to add the star inclusions. Gently fold in the 1/2 cup of mini chocolate chips. Use a spatula for this step, gently lifting and folding the chips into the yogurt mixture. You want to distribute them evenly without overmixing, which could potentially cause the chocolate chips to break down too much or bleed color into the base. The mini size is ideal as it ensures you get a little burst of chocolate in every bite without overwhelming the other flavors. Think of these as delightful little surprises waiting to be discovered.
Step 4: Balance with a Hint of Salt
To truly elevate the flavors and prevent the sweetness from becoming cloying, we’ll add a touch of sea salt. Sprinkle the 1/4 teaspoon of sea salt over the mixture. Sea salt has a cleaner, more distinct flavor than regular table salt, and its crystalline structure can also add a very subtle textural contrast. Gently fold the sea salt into the mixture just as you did with the chocolate chips. This small addition makes a significant difference, enhancing the richness of the peanut butter and the sweetness of the honey, creating a perfectly balanced flavor profile.
Forming and Freezing Your Treats
Step 5: Portioning and Freezing for Perfection
Prepare a baking sheet by lining it with parchment paper or a silicone baking mat. This will prevent the yogurt bites from sticking to the sheet once frozen. Using a small spoon or a mini-scoop, drop rounded spoonfuls of the mixture onto the prepared baking sheet. Aim for bite-sized portions, about 1 to 1.5 inches in diameter. Don’t worry about making them perfectly uniform; their rustic charm is part of their appeal. Once the baking sheet is filled, carefully transfer it to the freezer. Allow the bites to freeze solid for at least 2-3 hours. The longer they freeze, the firmer they will become. Once frozen, you can transfer them to a freezer-safe container or bag for storage, ensuring they remain readily accessible for a quick, healthy treat.
Conclusion:
There you have it! The incredibly simple yet supremely satisfying recipe for Frozen Greek Yogurt Peanut Butter Bites with Chocolate Chips: A Delightful Treat You Can Make at Home! This recipe is a testament to how delicious and healthy treats can be made with minimal effort and common ingredients. We’ve explored the key steps to creating these delightful bites that are perfect for a quick breakfast, a post-workout snack, or even a guilt-free dessert. Remember, the creamy tang of the Greek yogurt combined with the nutty richness of peanut butter and the sweet crunch of chocolate chips creates a flavor and texture combination that’s hard to beat. Don’t be afraid to experiment and make them your own!
Serving Suggestions: These bites are fantastic on their own, but they also pair wonderfully with fresh berries, a drizzle of honey, or alongside a cup of your favorite tea or coffee. They are a perfect grab-and-go option for busy mornings.
Variations: Feel free to swap out the chocolate chips for other additions like chopped nuts, dried fruit (cranberries or raisins work well!), or even a sprinkle of cinnamon. For a vegan option, use a plant-based yogurt and vegan chocolate chips. You can also adjust the peanut butter to yogurt ratio to suit your taste preferences.
I truly hope you enjoy making and devouring these Frozen Greek Yogurt Peanut Butter Bites with Chocolate Chips: A Delightful Treat You Can Make at Home! Give them a try and let the simple goodness of these homemade treats bring a smile to your day.
FAQs:
Can I make these ahead of time?
Absolutely! These bites are designed to be made ahead and stored. Once they are fully frozen, transfer them to an airtight container and keep them in the freezer for up to a month for the best quality.
What if I don’t have Greek yogurt?
While Greek yogurt provides a wonderfully thick and creamy texture, you can use regular plain yogurt. However, you might find the bites a bit softer. You could also strain regular yogurt through cheesecloth for a few hours to achieve a thicker consistency similar to Greek yogurt.
Are these suitable for kids?
Yes, they are a fantastic healthy alternative for kids’ snacks. Just ensure the chocolate chips are appropriate for their age and that they are supervised when eating frozen items.
Frozen Greek Yogurt Peanut Butter Bites Recipe
Easy and healthy frozen bites made with Greek yogurt, peanut butter, honey, and chocolate chips.
Ingredients
-
1 cup plain Greek yogurt
-
1/2 cup creamy peanut butter
-
1/4 cup honey
-
1 teaspoon vanilla extract
-
1/2 cup mini chocolate chips
-
1/4 teaspoon sea salt
Instructions
-
Step 1
In a medium-sized mixing bowl, combine 1 cup of plain Greek yogurt and 1/2 cup of creamy peanut butter. -
Step 2
Add 1/4 cup of honey and 1 teaspoon of vanilla extract to the yogurt and peanut butter mixture. Whisk thoroughly until smooth and uniform. -
Step 3
Gently fold in 1/2 cup of mini chocolate chips using a spatula. -
Step 4
Sprinkle 1/4 teaspoon of sea salt over the mixture and gently fold it in to balance the flavors. -
Step 5
Line a baking sheet with parchment paper. Drop rounded spoonfuls of the mixture onto the sheet, about 1 to 1.5 inches in diameter. -
Step 6
Freeze for at least 2-3 hours, or until solid. Transfer to a freezer-safe container for storage.
Important Information
Nutrition Facts (Per Serving)
It is important to consider this information as approximate and not to use it as definitive health advice.
Allergy Information
Please check ingredients for potential allergens and consult a health professional if in doubt.