Easy Homemade Strawberry Ice Cream Recipe
Homemade strawberry ice cream is the quintessential summer treat, a creamy, dreamy delight that captures the essence of the season. There’s something undeniably magical about that first spoonful of perfectly churned, vibrant pink goodness. We all have fond memories associated with this classic, whether it was enjoying a scoop at a local fair or helping a grandparent churn a batch in their own kitchen. What makes this particular homemade strawberry ice cream so special? It’s the explosion of fresh, ripe berry flavor that you just can’t replicate with store-bought versions. We’re talking about pure, unadulterated strawberry bliss, a testament to the simple beauty of fresh ingredients coming together in perfect harmony. Forget artificial flavors and stabilizers; this recipe is all about celebrating the natural sweetness and vibrant hue of real strawberries.
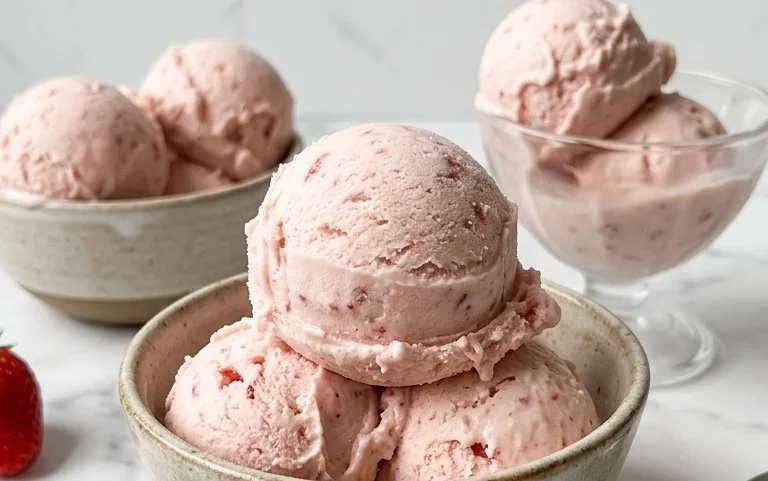
Homemade Strawberry Ice Cream
There’s something undeniably magical about homemade ice cream. The creamy texture, the vibrant flavors, and the satisfaction of creating something so delicious from scratch are truly special. And when it comes to summer, few flavors are as iconic and beloved as fresh strawberry. Forget those store-bought tubs that can sometimes taste artificial or overly sweet; this homemade strawberry ice cream recipe is a game-changer. It’s bursting with the natural sweetness and subtle tang of ripe strawberries, balanced perfectly with a rich, creamy base. This recipe is surprisingly straightforward, requiring no fancy equipment beyond a freezer-safe container and a little patience. The result is a decadent treat that will have everyone asking for seconds.
Ingredients:
Instructions:
Prepare the Strawberry Base:
The first step to incredible strawberry ice cream is to create a luscious strawberry purée. In a medium bowl, combine the hulled and diced strawberries, honey, granulated sugar, and lemon juice. The honey adds a lovely depth of flavor and helps to break down the strawberries, while the sugar provides sweetness. The lemon juice is a secret weapon here; it doesn’t make the ice cream taste lemony, but rather it intensifies the natural strawberry flavor, giving it a brighter, more vibrant taste. You can either gently mash the strawberries with a fork until they are broken down but still have some texture, or for a smoother consistency, you can pulse them a few times in a food processor or blender. I personally prefer a slight texture, as it gives you little pockets of intense strawberry flavor throughout the ice cream. Let this mixture sit for about 15-30 minutes at room temperature. This maceration process allows the sugars to draw out the juices from the strawberries, creating a more flavorful syrup.
Create the Creamy Base:
While the strawberries are macerating, it’s time to prepare the foundation of our ice cream. In a separate, larger bowl, combine the heavy whipping cream, half and half, and vanilla extract. Whisk these ingredients together until they are well incorporated. The heavy whipping cream is crucial for achieving that rich, velvety texture that defines great ice cream. Half and half provides a lighter richness, preventing the ice cream from becoming too dense or heavy. The vanilla extract, while seemingly simple, adds another layer of flavor that complements the strawberries beautifully. Ensure everything is thoroughly mixed. If you have a very cold bowl and whisk, using them will help keep the dairy mixture chilled, which is beneficial for the freezing process later on.
Combine and Chill:
Now it’s time to bring our two components together. Gently fold the macerated strawberry mixture into the cream base. Stir carefully, trying not to overmix, as you want to preserve some of the lovely streaks of strawberry goodness. The goal is to distribute the strawberries evenly throughout the cream. Once combined, cover the bowl tightly with plastic wrap. Now comes the essential chilling phase. Place the covered bowl in the refrigerator for at least 4 hours, or preferably overnight. This chilling period is absolutely critical. It allows the flavors to meld and deepen, and it ensures that the ice cream base is thoroughly cold. A very cold base freezes more efficiently and results in a smoother ice cream with smaller ice crystals. If your base isn’t cold enough, your ice cream will be icier and less creamy.
The Freezing Process:
This is where the magic truly happens. Once your strawberry and cream base is thoroughly chilled, it’s time to freeze it. The most straightforward method for homemade ice cream without an ice cream maker involves using a freezer-safe container. Pour the chilled mixture into a shallow, freezer-safe container, like a metal loaf pan or a Tupperware-style container. Cover the container tightly, ideally with a layer of parchment paper pressed directly onto the surface of the ice cream base to prevent ice crystals from forming on top, followed by the lid or plastic wrap. Place the container in the freezer. Every 45 minutes to an hour, you’ll need to remove the container from the freezer and stir the ice cream vigorously. Use a fork or a whisk to break up any ice crystals that are forming around the edges and incorporate them back into the center. This process of stirring is what mimics the churning action of an ice cream maker, breaking down ice crystals and incorporating air, which leads to a smoother, creamier texture. Continue this stirring process for about 4-6 hours, or until the ice cream is firm but still scoopable.
Ripening and Serving:
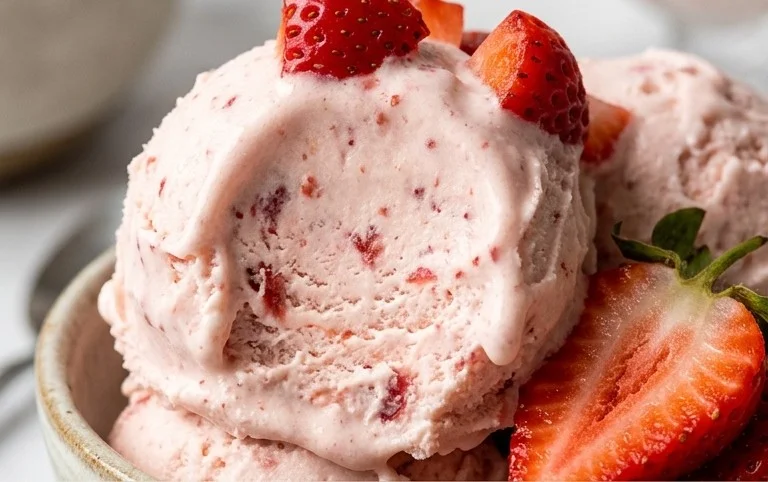
After the initial freezing and stirring sessions, the ice cream might be a bit hard. For the best texture, allow the ice cream to “ripen” in the freezer for at least another 2-4 hours (or even overnight) without stirring. This allows the ice cream to firm up completely and the flavors to fully develop. When you’re ready to serve, let the ice cream sit at room temperature for about 5-10 minutes to soften slightly, making it easier to scoop. Serve your homemade strawberry ice cream in bowls or cones, and garnish with fresh strawberries, a sprig of mint, or a drizzle of your favorite topping. The vibrant pink hue and the unmistakable taste of fresh strawberries will transport you to summer bliss with every spoonful. Enjoy the fruits of your labor – a truly exceptional, homemade dessert that is far superior to anything you can buy!
Conclusion:
You’ve made it! Crafting your own homemade strawberry ice cream is an incredibly rewarding experience, and this recipe makes it wonderfully accessible. The result is a creamy, luscious, and intensely flavorful treat that far surpasses anything you can buy. The vibrant taste of fresh strawberries, beautifully balanced with sweet cream, creates a delightful dessert perfect for any occasion. Whether you’re celebrating a special event or simply craving a moment of pure indulgence, this recipe delivers.
I encourage you to give this homemade strawberry ice cream a try. The satisfaction of creating something so delicious from scratch is unparalleled. Think of the joy on your loved ones’ faces when they taste your homemade creation! It’s perfect served simply in a bowl, but it also shines as a topping for warm brownies, a base for milkshakes, or alongside a slice of angel food cake. Don’t be afraid to experiment with variations too – a swirl of balsamic glaze or a handful of dark chocolate chips can elevate it even further.
Frequently Asked Questions:
Can I make this without an ice cream maker?
Absolutely! While an ice cream maker yields the smoothest texture, you can achieve delicious results without one. Pour your base into a freezer-safe container and freeze for about 45 minutes. Remove and whisk vigorously to break up ice crystals. Repeat this whisking process every 30-45 minutes for about 3-4 hours, or until the ice cream is firm enough to scoop. It won’t be quite as creamy, but it will still be incredibly tasty!
What kind of strawberries are best?
For the most vibrant flavor in your homemade strawberry ice cream, ripe, in-season strawberries are ideal. Farmers’ market finds or home-grown berries will offer the best taste. If fresh berries aren’t available, good quality frozen strawberries can also work. Just be sure to thaw them completely and drain any excess liquid before pureeing.
Homemade Strawberry Ice Cream
A simple and delicious homemade strawberry ice cream recipe using fresh ingredients.
Ingredients
-
1 1/2 cups strawberries, hulled and diced
-
2 Tbsp honey
-
1/2 cup granulated sugar
-
1 tsp lemon juice
-
1 cup heavy whipping cream
-
1/2 cup half and half
-
1 tsp vanilla extract
Instructions
-
Step 1
In a bowl, combine the diced strawberries, honey, granulated sugar, and lemon juice. Mash the strawberries slightly and let sit for 15 minutes to allow flavors to meld. -
Step 2
In a separate bowl, whisk together the heavy whipping cream, half and half, and vanilla extract until well combined. -
Step 3
Add the strawberry mixture to the cream mixture and stir until evenly distributed. -
Step 4
Pour the mixture into an ice cream maker and churn according to the manufacturer’s instructions. -
Step 5
Once churned to a soft-serve consistency, transfer the ice cream to a freezer-safe container. -
Step 6
Freeze for at least 2-4 hours, or until firm, before serving.
Important Information
Nutrition Facts (Per Serving)
It is important to consider this information as approximate and not to use it as definitive health advice.
Allergy Information
Please check ingredients for potential allergens and consult a health professional if in doubt.