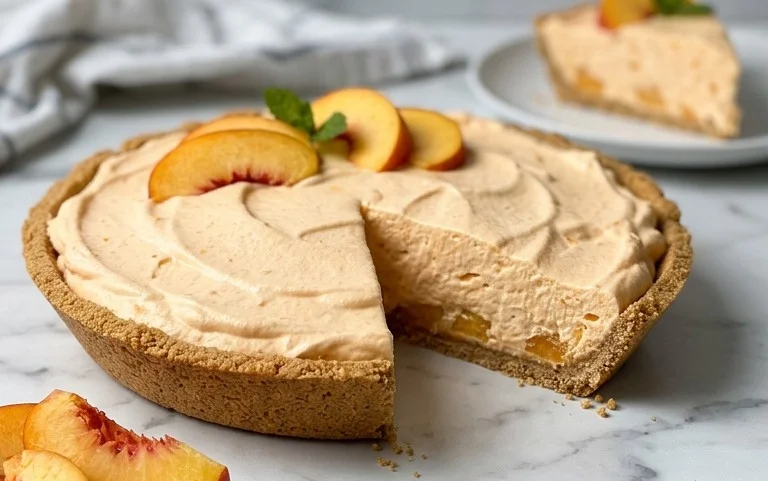
Renee Paj Recipe- Easy & Delicious Sweet Treat
Renee Paj is more than just a dessert; it’s a warm hug in a bowl, a nostalgic whisper of simpler times, and a guaranteed crowd-pleaser. If you’ve ever been lucky enough to taste this iconic treat, you’ll understand why it holds such a special place in so many hearts. Its enduring popularity stems from its utterly comforting texture and its deceptively simple, yet incredibly satisfying, flavor profile. What truly sets Renee Paj apart is its perfect balance: the creamy, custardy base is elevated by just the right hint of sweetness and often a whisper of delicate spice, making each spoonful an absolute delight. It’s the kind of dessert that invites second helpings and leaves you with a contented sigh. I’m so excited to share my version of this beloved Renee Paj with you today, a recipe I’ve perfected to capture that authentic, heartwarming essence.
Renee Paj
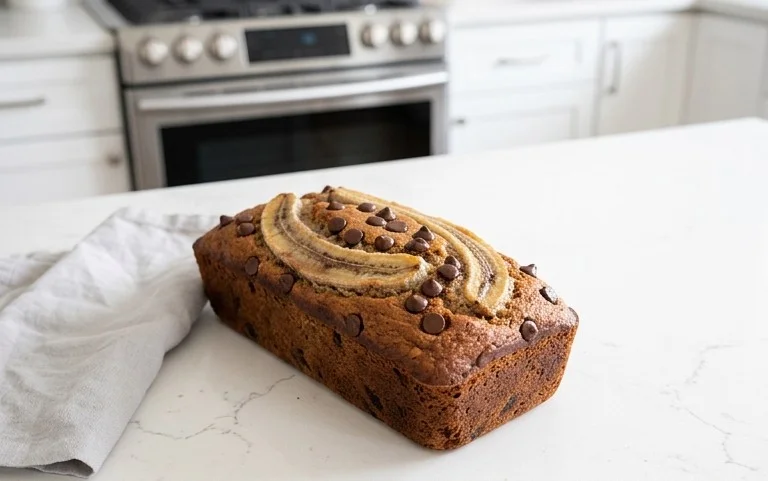
There are some recipes that just feel like a warm hug. They’re comforting, familiar, and always bring a smile to your face. Renee Paj is one of those recipes for me. It’s a delightful, wholesome treat that’s perfect for breakfast, a snack, or even a light dessert. The beauty of this recipe lies in its simplicity and the wonderful combination of flavors and textures. The sweetness of ripe bananas melds perfectly with the nutty undertones of oats and the warmth of cinnamon. And the optional walnuts? They add a satisfying crunch that truly elevates this dish. I’ve made this countless times, tweaking it just a bit here and there to find what I think is the perfect balance. Today, I’m excited to share my go-to version with you. It’s straightforward enough for begin extractners but has enough depth of flavor to please even the most discerning palates. Let’s get started on creating this delicious Renee Paj!
Ingredients:
Preparing the Batter
Step 1: Preheat and Prepare Your Pan
Before you even think about mixing, the first crucial step is to preheat your oven to 350 degrees Fahrenheit (175 degrees Celsius). This ensures that your Renee Paj bakes evenly and achieves that beautiful golden-brown crust we all love. While the oven is heating up, take a moment to prepare your baking dish. I prefer to use an 8×8 inch baking pan for this recipe. Grease the pan thoroughly with butter or cooking spray. This is a non-negotiable step to prevent your delicious creation from sticking, which can be incredibly frustrating after all your hard work. You can also choose to line the pan with parchment paper, leaving a slight overhang on the sides. This makes lifting the baked Renee Paj out of the pan a breeze.
Step 2: Combine the Dry Ingredients
In a large mixing bowl, we’re going to combine all the dry components of our Renee Paj. Start by adding the 1 1/4 cups of all-purpose flour. Next, toss in the 1 cup of old-fashioned oats. These oats are key to the texture; they’ll soften as they bake but still provide a delightful chegrape juicess. Then, add the 1/2 cup of light brown sugar. Packing it down ensures you get the right amount of sweetness. For flavor and balance, add the 1/2 teaspoon of kosher salt, which enhances all the other flavors, and the 1/2 teaspoon of baking soda and 1/4 teaspoon of baking powder. These leavening agents will help our Renee Paj rise and achieve a tender crum extractb. Finally, sprinkle in the 1/2 teaspoon of ground cinnamon. Give everything a good whisk with a fork or a whisk until it’s all well combined and there are no streaks of flour visible. This ensures that the leavening agents and spices are evenly distributed throughout the batter.
Step 3: Mash the Bananas and Mix the Wet Ingredients
Now it’s time to introduce our star ingredient: ripe bananas! Take your 3 large, ripe bananas and place them in a separate medium-sized bowl. The riper the bananas, the sweeter and more flavorful your Renee Paj will be, so don’t be shy about using those with plenty of brown spots. Mash them thoroughly with a fork or a potato masher until they are mostly smooth with just a few small lumps remaining. This is the texture I personally enjoy, but feel free to mash them completely smooth if you prefer. To the mashed bananas, add the 2 large eggs, the 1 teaspoon of pure vanilla extract, and the 3 tablespoons of cooking oil. Whisk these wet ingredients together until they are well combined with the mashed banana. The oil will help create a tender and moist texture in the final bake.
Step 4: Combine Wet and Dry Ingredients
This is where everything comes together. Pour the wet banana mixture into the bowl containing the dry ingredients. Using a spatula or a wooden spoon, gently fold the ingredients together until just combined. It’s important not to overmix at this stage. Overmixing can develop the gluten in the flour too much, resulting in a tough bake. You want to see some streaks of flour still, as they will disappear as the batter rests slightly. If you’re using the optional 1/3 cup of chopped walnuts, this is the time to fold them in as well. Gently incorporate them into the batter, distributing them evenly for that delightful crunch in every bite.
Step 5: Bake and Cool
Pour the batter evenly into your prepared 8×8 inch baking pan. Spread it out with your spatula to ensure a level surface. Place the pan in your preheated oven and bake for approximately 30-35 minutes. The exact baking time can vary depending on your oven, so it’s important to keep an eye on it. You’ll know it’s ready when the edges are golden brown and a toothpick inserted into the center comes out clean. Once baked, remove the pan from the oven and let it cool in the pan on a wire rack for at least 15-20 minutes. This cooling period is essential for the Renee Paj to set properly. Trying to cut into it too soon can lead to a crum extractbly mess. After it has cooled slightly, you can carefully lift it out of the pan using the parchment paper overhang, or cut it directly into squares while still in the pan. I like to let it cool completely before slicing it into perfect squares for serving. Enjoy this delicious Renee Paj warm or at room temperature. It’s wonderful on its own, or perhaps with a dollop of yogurt or a drizzle of honey.

Conclusion:
I truly hope you’ve enjoyed diving into the world of Renee Paj! This recipe is an absolute winner because it’s incredibly versatile, surprisingly easy to master, and delivers a truly satisfying, comforting flavor profile that’s perfect for any occasion. Whether you’re looking for a delightful breakfast treat, a sweet afternoon snack, or even a light dessert, this Renee Paj is sure to impress.
I love serving it warm, perhaps with a dollop of crème fraîche or a scattering of fresh berries. It also pairs wonderfully with a strong cup of coffee or a fragrant herbal tea. Don’t be afraid to get creative! Consider adding a sprinkle of cinnamon or a hint of cardamom to the dough for an extra aromatic touch. You could also incorporate finely chopped nuts or even some dried fruit like cranberries or raisins into the filling for added texture and flavor.
I wholeheartedly encourage you to give this Renee Paj recipe a try. It’s a fantastic way to bring a little homemade goodness into your life, and I’m confident you’ll fall in love with its simple elegance and delicious taste. So, gather your ingredients and get baking – you won’t regret it!
Frequently Asked Questions about Renee Paj:
Can I make this Renee Paj ahead of time?
Absolutely! You can prepare the dough and filling separately and store them in the refrigerator for up to 24 hours. You can also bake the Renee Paj completely and then reheat it gently in a low oven or toaster oven before serving. This makes it a perfect option for entertaining or for a quick breakfast on a busy morning.
What if I don’t have all the specific spices mentioned?
Don’t worry at all! The beauty of this Renee Paj is its adaptability. If you’re missing a spice, simply omit it or substitute with something similar you do have on hand. A touch of vanilla extract is always a good stand-in for warmth, and a pinch of nutmeg can offer a similar cozy flavor profile to cinnamon. The core ingredients will still yield a delicious result.
Renee Paj
A delicious and moist banana oat bread, perfect for breakfast or a snack.
Ingredients
-
1 cup old fashioned oats
-
1 1/4 cups all purpose flour
-
1/2 cup light brown sugar, packed
-
1/2 tsp. kosher salt
-
1/2 tsp. baking soda
-
1/4 tsp. baking powder
-
1/2 tsp. ground cinnamon
-
3 large, ripe bananas, cut into chunks
-
2 large eggs
-
1 tsp. pure vanilla extract
-
3 TBSP cooking oil (corn, canola, etc)
-
1/3 cup chopped walnuts (optional)
Instructions
-
Step 1
Preheat oven to 350°F (175°C). Grease and flour a 9×5 inch loaf pan. -
Step 2
In a large bowl, whisk together the oats, flour, brown sugar, salt, baking soda, baking powder, and cinnamon. -
Step 3
In a separate bowl, mash the bananas until mostly smooth. Stir in the eggs, vanilla extract, and cooking oil. -
Step 4
Pour the wet ingredients into the dry ingredients and mix until just combined. Do not overmix. Fold in the chopped walnuts if using. -
Step 5
Pour the batter into the prepared loaf pan and spread evenly. -
Step 6
Bake for 50-60 minutes, or until a wooden skewer inserted into the center comes out clean. If the top starts to brown too quickly, you can loosely tent it with aluminum foil. -
Step 7
Let the bread cool in the pan for 10 minutes before removing it to a wire rack to cool completely.
Important Information
Nutrition Facts (Per Serving)
It is important to consider this information as approximate and not to use it as definitive health advice.
Allergy Information
Please check ingredients for potential allergens and consult a health professional if in doubt.