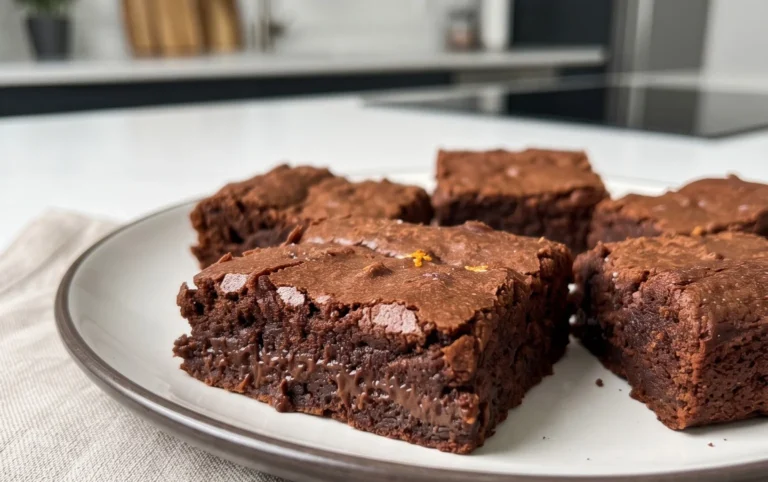
Chocolate Dipped Cookie Dough Bites-Easy No-Bake Treat
Chocolate-Dipped Cookie Dough Bites are more than just a sweet treat; they’re a nostalgic journey to childhood kitchens and pure, unadulterated joy. Who among us hasn’t snuck a spoonful (or two!) of raw dough when no one was looking? These delightful bites capture that forbidden, delicious essence, but in a perfectly safe and incredibly satisfying way. They’re universally loved because they combine the comforting, familiar flavor of classic chocolate chip cookie dough with the decadent crunch of a chocolate coating. What truly makes these Chocolate-Dipped Cookie Dough Bites special is the duality of textures and tastes: the soft, chewy, melt-in-your-mouth dough against the crisp snap of rich chocolate. They’re perfect for parties, a mid-afternoon pick-me-up, or even as a charming homemade gift. Get ready to create a batch that will have everyone beggin extractg for the secret!

Ingredients:
- ½ cup softened unsalted butter
- ¾ cup packed brown sugar
- 1 teaspoon vanilla extract
- ¼ teaspoon salt
- 1 cup heat-treated all-purpose flour
- 2 tablespoons milk
- ¾ cup chocolate chips
- 1 cup chocolate chips (semi-sweet or dark)
- 1 teaspoon coconut oil (optional)
Making the Chocolate-Dipped Cookie Dough Bites
Cookie Dough Base
Let’s begin extract by creating the delicious cookie dough base for our Chocolate-Dipped Cookie Dough Bites. In a medium mixing bowl, cream together the softened unsalted butter and the packed brown sugar. You want to achieve a light and fluffy consistency, so be sure to beat them well. This process incorporates air into the mixture, which is essential for a tender cookie dough. A stand mixer with a paddle attachment is ideal for this, but a hand mixer or even a sturdy whisk and some elbow grease will do the job beautifully.
Next, add the vanilla extract and the ¼ teaspoon of salt to the butter and sugar mixture. Mix until everything is thoroughly combined. The vanilla extract will add a lovely warmth and depth of flavor to our cookie dough, while the salt balances the sweetness and enhances all the other flavors.
Now comes the flour. We’re using 1 cup of heat-treated all-purpose flour. It’s important to ensure your flour has been heat-treated if you plan to consume the dough without baking, as raw flour can sometimes harbor bacteria. If you haven’t heat-treated your flour, you can do so by spreading it on a baking sheet and baking it at 350°F (175°C) for about 5-7 minutes, or until it reaches an internal temperature of 165°F (74°C). Let it cool completely before using. Add the heat-treated flour to the wet ingredients and mix until just combined. Be careful not to overmix the dough at this stage, as overmixing can lead to tough cookie dough bites.
Finally, we’ll add the milk, starting with 2 tablespoons. Mix until the dough starts to come together. You’re looking for a consistency that is firm enough to hold its shape but still slightly sticky. If the dough seems too dry, you can add an additional teaspoon of milk, but do so very gradually to avoid making it too wet. Once the dough is formed, gently fold in the ¾ cup of chocolate chips. These will be the delightful little pockets of chocolate within our cookie dough bites.
Forming and Chilling the Bites
Once your cookie dough is ready, it’s time to form it into bite-sized pieces. The easiest way to do this is to use a small cookie scoop or a tablespoon to portion out the dough. Roll each portion into a small ball, about ¾ to 1 inch in diameter. You can make them slightly smaller or larger depending on your preference, but consistency in size will ensure they all freeze or chill evenly. Place the formed dough balls onto a parchment-lined baking sheet. Parchment paper is a lifesaver here, preventing the dough from sticking to the baking sheet and making for easy cleanup.
This next step is crucial for success: chilling. Place the baking sheet with the cookie dough balls into the refrigerator for at least 30 minutes, or into the freezer for about 15 minutes. This chilling process will firm up the dough considerably, making it much easier to handle when it’s time for dipping and preventing them from losing their shape. The firmer the dough, the cleaner your chocolate coating will be.
Melting and Dipping the Bites
While the cookie dough bites are chilling, let’s prepare for the chocolate dipping. In a microwave-safe bowl or a double boiler, combine the 1 cup of chocolate chips (use semi-sweet or dark for a rich flavor) with the optional 1 teaspoon of coconut oil. If you’re using the microwave, heat the chocolate in 30-second intervals, stirring well after each interval, until the chocolate is smooth and completely melted. Be patient; microwaving chocolate too quickly can cause it to seize up. If using a double boiler, place the bowl over a pot of simmering water, ensuring the bottom of the bowl doesn’t touch the water, and stir continuously until melted and smooth. The coconut oil, if used, helps to create a smoother, glossier chocolate coating that sets up beautifully.
Once the cookie dough bites are well-chilled and firm, it’s time to dip them. Using a fork or a toothpick, dip each chilled cookie dough ball into the melted chocolate, ensuring it’s fully coated. You can dip them halfway or fully coat them, depending on how much chocolate you desire. Gently tap the fork or toothpick against the side of the bowl to allow any excess chocolate to drip back in. This helps prevent thick, uneven chocolate coatings.
Setting and Enjoying
Carefully place the chocolate-dipped cookie dough bites back onto the parchment-lined baking sheet. If you have any leftover melted chocolate, you can drizzle it over the tops of the dipped bites for an extra decorative touch or to help secure the coating. Once all the cookie dough bites are dipped and arranged on the baking sheet, it’s time for them to set. You can place the baking sheet back into the refrigerator for about 10-15 minutes, or until the chocolate has hardened completely. Alternatively, you can let them set at room temperature if your environment is cool. Once the chocolate is firm, your Chocolate-Dipped Cookie Dough Bites are ready to be enjoyed! They are best stored in an airtight container in the refrigerator to maintain their texture and prevent the chocolate from melting.

Conclusion:
You’ve mastered the art of creating delightful Chocolate-Dipped Cookie Dough Bites! This recipe offers a perfect balance of sweet cookie dough and rich chocolate, making it an irresistible treat for any occasion. Whether you’re baking for a party, a holiday, or just a sweet craving, these bites are sure to be a crowd-pleaser. Remember, the beauty of this recipe lies in its simplicity and adaptability. Don’t hesitate to experiment with different types of chocolate or add your own personal flair.
For serving suggestions, these bites are fantastic on their own as a dessert or snack. They also make a wonderful addition to a dessert platter, a cookie box, or even crum extractbled over ice cream. Consider arrangin extractg them on a decorative plate for a touch of elegance. As for variations, feel free to use dark, milk, or white chocolate for dipping. You can also sprinkle the wet chocolate coating with sea salt, chopped nuts, shredded coconut, or even colorful sprinkles for an extra pop of flavor and texture. Enjoy the process and savor the delicious results of your Chocolate-Dipped Cookie Dough Bites!
Frequently Asked Questions:
Can I make these Chocolate-Dipped Cookie Dough Bites ahead of time?
Absolutely! These bites can be made a day or two in advance and stored in an airtight container in the refrigerator. This makes them a great option for make-ahead parties and events.
Is it safe to eat raw cookie dough in these bites?
This recipe uses heat-treated flour and no eggs, making the cookie dough safe to consume raw. This is a crucial step to ensure that your Chocolate-Dipped Cookie Dough Bites are not only delicious but also safe for everyone to enjoy!
How should I store any leftover Chocolate-Dipped Cookie Dough Bites?
Leftover bites should be stored in an airtight container in the refrigerator to maintain their texture and prevent the chocolate from melting. They will keep well for up to 3-4 days.
Chocolate Dipped Cookie Dough Bites-Easy No-Bake Treat
Delicious no-bake cookie dough bites dipped in chocolate for a delightful sweet treat.
Ingredients
-
½ cup softened unsalted butter
-
¾ cup packed brown sugar
-
1 teaspoon vanilla extract
-
¼ teaspoon salt
-
1 cup heat-treated all-purpose flour
-
2 tablespoons milk
-
¾ cup chocolate chips
-
1 cup chocolate chips (semi-sweet or dark)
-
1 teaspoon coconut oil (optional)
Instructions
-
Step 1
Cream together softened unsalted butter and packed brown sugar in a medium bowl until light and fluffy. Add vanilla extract and salt, and mix until combined. -
Step 2
Gradually add heat-treated all-purpose flour and 2 tablespoons of milk. Mix until dough just comes together, adding an additional teaspoon of milk if needed. Gently fold in ¾ cup of chocolate chips. -
Step 3
Form the dough into small balls (about ¾ to 1 inch in diameter) and place them on a parchment-lined baking sheet. Chill in the refrigerator for at least 30 minutes or the freezer for 15 minutes. -
Step 4
Melt 1 cup of chocolate chips (semi-sweet or dark) with optional coconut oil using a microwave or double boiler until smooth. -
Step 5
Dip the chilled cookie dough balls into the melted chocolate, coating them as desired. Tap off excess chocolate and return to the parchment-lined baking sheet. -
Step 6
Chill the dipped bites for 10-15 minutes until the chocolate is firm. Optionally drizzle with extra chocolate. Store in an airtight container in the refrigerator.
Important Information
Nutrition Facts (Per Serving)
It is important to consider this information as approximate and not to use it as definitive health advice.
Allergy Information
Please check ingredients for potential allergens and consult a health professional if in doubt.