Peanut Butter Cup Chocolate Roll Cake – Decadent Dessert
Peanut Butter Cup Chocolate Roll Cake is not just a dessert; it’s a nostalgic hug in cake form, a delightful convergence of two universally adored flavors. Who among us hasn’t felt that irresistible pull towards the sweet, salty magic of a peanut butter cup? Now, imagin extracte that glorious combination transformed into a tender, fudgy chocolate cake, swirled with a creamy, dreamy peanut butter filling and topped with a luscious chocolate ganache. It’s the ultimate indulgence, perfect for birthdays, celebrations, or simply when you need a serious dose of happiness. This Peanut Butter Cup Chocolate Roll Cake elevates your dessert game with its elegant presentation and explosively satisfying taste. It’s the kind of showstopper that elicits gasps of delight and leaves everyone beggin extractg for the recipe, proving that sometimes, the most comforting flavors are also the most sophisticated.
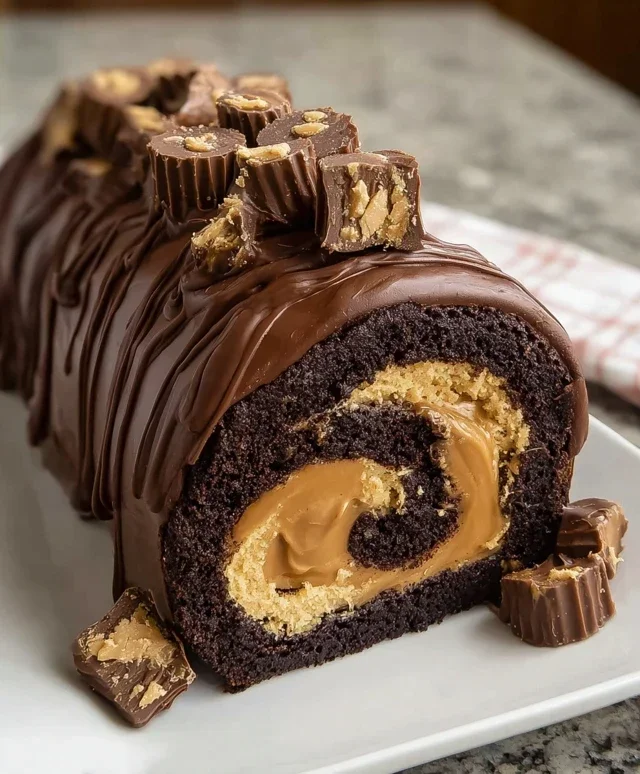
Peanut Butter Cup Chocolate Roll Cake
Get ready to impress yourself and your loved ones with this decadent Peanut Butter Cup Chocolate Roll Cake! This recipe combines the irresistible flavors of rich chocolate and creamy peanut butter in a stunning, show-stopping dessert. It looks complex, but with a few simple steps, you’ll have a beautifully rolled cake filled with a luscious peanut butter cream and studded with delightful chopped peanut butter cups. Perfect for birthdays, holidays, or just because, this cake is a guaranteed crowd-pleaser. Let’s dive in and create some chocolatey, peanut buttery magic!
Ingredients:
Making the Chocolate Cake Base
This is where the magic starts to happen. We’re creating a light and airy chocolate sponge that will be the foundation of our roll cake. It’s important to get the consistency just right for easy rolling later.
Step 1: Prepare Your Pan and Preheat Oven
Begin extract by preheating your oven to 350 degrees Fahrenheit (175 degrees Celsius). Next, line a 10×15 inch jelly roll pan with parchment paper, making sure the paper extends slightly up the sides. This overhang will help you lift the cake out easily once it’s baked. Grease the parchment paper lightly, then dust it with a tablespoon of unsweetened cocoa powder. This creates a non-stick surface and adds an extra layer of chocolate flavor to the cake. Set this prepared pan aside.
Step 2: Whisk Dry Ingredients
In a medium bowl, whisk together the all-purpose flour, unsweetened cocoa powder, baking powder, and salt. Whisking these dry ingredients together ensures that the leavening agents and cocoa are evenly distributed, which is crucial for a uniform rise and rich chocolate flavor in your cake. Set this bowl aside.
Step 3: Create the Egg and Sugar Base
In a large mixing bowl, add the 4 large eggs and the 1/2 cup of granulated sugar. Using an electric mixer, beat the eggs and sugar on high speed for about 5-7 minutes, or until the mixture becomes very pnon-alcoholic ale, thick, and forms ribbons when the beaters are lifted. This process, known as “ribbon stage,” incorporates air into the batter, which is key for a light and fluffy sponge cake. Don’t rush this step – the air incorporated here is what gives the cake its characteristic texture.
Step 4: Combine Wet and Dry Ingredients
Gently fold the dry ingredients into the egg and sugar mixture. Do this in three additions, carefully folding after each addition. Be careful not to overmix; you want to maintain the airiness you’ve created. The batter should be smooth and lump-free.
Step 5: Bake the Cake
Pour the batter evenly into your prepared jelly roll pan, spreading it gently to the edges with an offset spatula. Bake for 12-15 minutes, or until the cake springs back when lightly touched in the center. Keep a close eye on it, as overbaking can make the cake brittle and difficult to roll. Once baked, immediately invert the cake onto a clean kitchen towel that has been lightly dusted with powdered sugar. Carefully peel off the parchment paper. Allow the cake to cool completely on the towel. This cooling process on the towel helps prevent the cake from sticking and allows it to cool evenly.
Whipping Up the Peanut Butter Cream Filling
Now for the star of the filling – that irresistible peanut butter goodness! This cream is going to be smooth, rich, and perfectly complement the chocolate cake.
Step 6: Prepare the Peanut Butter Cream
While the cake is cooling, prepare your peanut butter filling. In a medium bowl, beat the smooth peanut butter with the 1/2 cup of heavy cream and 1 cup of powdered sugar until light and fluffy. You can use a hand mixer or a stand mixer for this. Start on low speed to combine the ingredients, then increase to medium-high speed and beat until smooth and well combined. The mixture should be spreadable but not too runny. Taste it and adjust sweetness if desired. Fold in the chopped mini peanut butter cups until evenly distributed throughout the cream.
Assembling the Roll Cake
This is the exciting part where we transform our cooled cake and delicious filling into the beautiful roll cake you’ve been dreaming of!
Step 7: Assemble and Roll the Cake
Once the chocolate cake is completely cool, gently unroll it from the towel. Spread the peanut butter cream filling evenly over the entire surface of the cake, leaving about a 1-inch border along one of the longer edges. This border will help to seal the roll and prevent the filling from oozing out too much. Now, carefully and tightly roll the cake up, starting from the edge opposite the border you left. Work slowly and gently to avoid cracking the cake.
Step 8: Chill and Decorate
Once rolled, you can either gently place the seam-side down on a serving platter or wrap it snugly in plastic wrap and refrigerate for at least 30 minutes to allow the roll to set. This chilling time is essential for the cake to firm up, making it easier to slice. When you’re ready to serve, dust the top of the cake generously with powdered sugar. You can also add a few extra chopped mini peanut butter cups or a drizzle of melted chocolate for an extra decadent finish.
Slice and enjoy your magnificent Peanut Butter Cup Chocolate Roll Cake! The combination of the moist chocolate cake, creamy peanut butter filling, and bursts of peanut butter cup goodness is truly divine. Happy baking!
Conclusion:
I hope you’re as excited as I am to try this Peanut Butter Cup Chocolate Roll Cake! This recipe is truly a showstopper, perfectly balancing the rich, decadent flavor of chocolate with the irresistible, salty-sweet goodness of peanut butter cups. It’s surprisingly straightforward to make, proving that impressive desserts don’t have to be complicated. The light, airy chocolate sponge cake enfolds a creamy, dreamy peanut butter filling, and the ganache coating adds a final touch of pure indulgence. It’s the perfect dessert for celebrations, holidays, or simply when you crave something truly special.
Serve this delightful roll cake chilled for the best texture. It pairs beautifully with a glass of cold milk, a dollop of whipped cream, or even a scoop of vanilla ice cream for an extra layer of decadence. If you’re feeling adventurous, consider adding chopped peanuts to the filling for a delightful crunch, or swirling in some extra melted peanut butter into the ganache for an even more intense peanut butter flavor. Don’t be intimidated by the rolling process – with a little practice, you’ll master it in no time. Give this Peanut Butter Cup Chocolate Roll Cake a try; I promise you won’t be disappointed!
Frequently Asked Questions:
Can I make this Peanut Butter Cup Chocolate Roll Cake ahead of time?
Yes, absolutely! You can bake the cake, let it cool completely, and then wrap it tightly in plastic wrap. Store it at room temperature for up to 2 days. Prepare the filling and ganache separately and store them in the refrigerator. Assemble the cake a few hours before serving, allowing the filling to soften slightly. This makes it a fantastic option for entertaining!
My cake cracked when I rolled it. What did I do wrong?
Don’t worry, a little cracking is often normal, especially for your first few attempts! It usually happens if the cake is overbaked, rolled too tightly, or rolled while still too warm. Ensure you’re not overbaking your sponge (check for a springy touch), and try rolling it while it’s still slightly warm but not hot. Dusting the towel with powdered sugar can also help prevent sticking and tearing. Even if it cracks, the filling and ganache will hide most of it!
Can I use a different type of nut butter?
While the classic combination is peanut butter, you can certainly experiment! Almond butter or even a creamy cashew butter could work, though the flavor profile will change. Keep in mind that some nut butters are runnier than others, so you might need to adjust the amount of powdered sugar in the filling to achieve the right consistency.
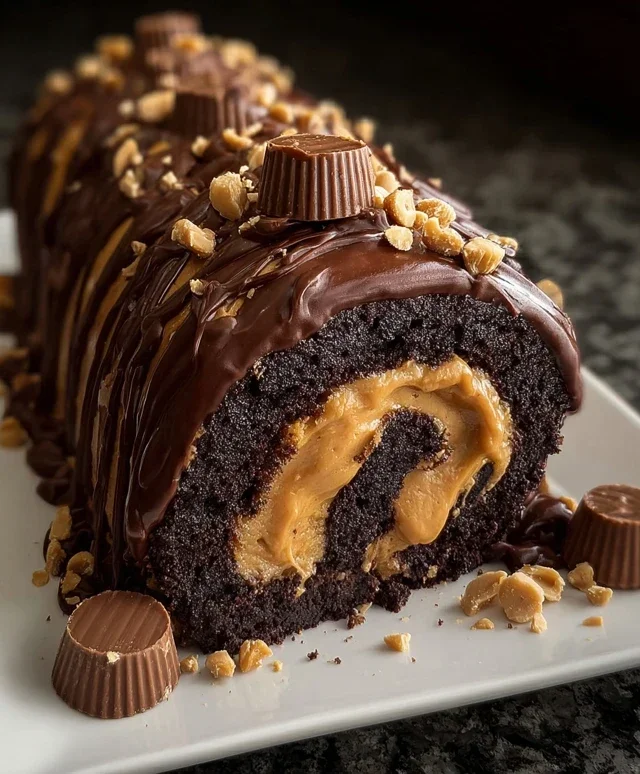
Peanut Butter Cup Chocolate Roll Cake
A decadent chocolate sponge cake rolled with a rich peanut butter cream filling and topped with chopped peanut butter cups.
Ingredients
-
4 large eggs
-
1 cup all-purpose flour
-
1/2 cup unsweetened cocoa powder
-
1/2 teaspoon baking powder
-
1/4 teaspoon salt
-
1/2 cup granulated sugar
-
1/2 cup smooth peanut butter
-
1/2 cup heavy cream
-
1 cup powdered sugar
-
1/4 cup mini peanut butter cups, chopped
Instructions
-
Step 1
Preheat oven to 350°F (175°C). Line a 10×15 inch jelly roll pan with parchment paper, greasing and flouring it lightly. Dust with 1/4 cup powdered sugar. -
Step 2
In a large bowl, whisk together the flour, cocoa powder, baking powder, and salt. In a separate bowl, beat the eggs and granulated sugar until pale and thick. Gently fold the dry ingredients into the egg mixture until just combined. -
Step 3
Spread the batter evenly into the prepared pan. Bake for 10-12 minutes, or until a wooden skewer inserted into the center comes out clean. -
Step 4
While the cake bakes, prepare the filling. In a bowl, beat the smooth peanut butter and 1 cup powdered sugar until smooth and creamy. In a separate bowl, whip the heavy cream until stiff peaks form. Gently fold the whipped cream into the peanut butter mixture. -
Step 5
Immediately after removing the cake from the oven, invert it onto a clean kitchen towel dusted with 1/4 cup powdered sugar. Carefully peel off the parchment paper. While the cake is still warm, tightly roll it up with the towel inside. Let it cool completely. -
Step 6
Once cooled, gently unroll the cake. Spread the peanut butter cream filling evenly over the cake. Sprinkle the chopped mini peanut butter cups over the filling. Tightly re-roll the cake. Chill for at least 1 hour before slicing and serving.
Important Information
Nutrition Facts (Per Serving)
It is important to consider this information as approximate and not to use it as definitive health advice.
Allergy Information
Please check ingredients for potential allergens and consult a health professional if in doubt.