Italian Ricotta Cookies Recipe-Soft & Chewy Delights
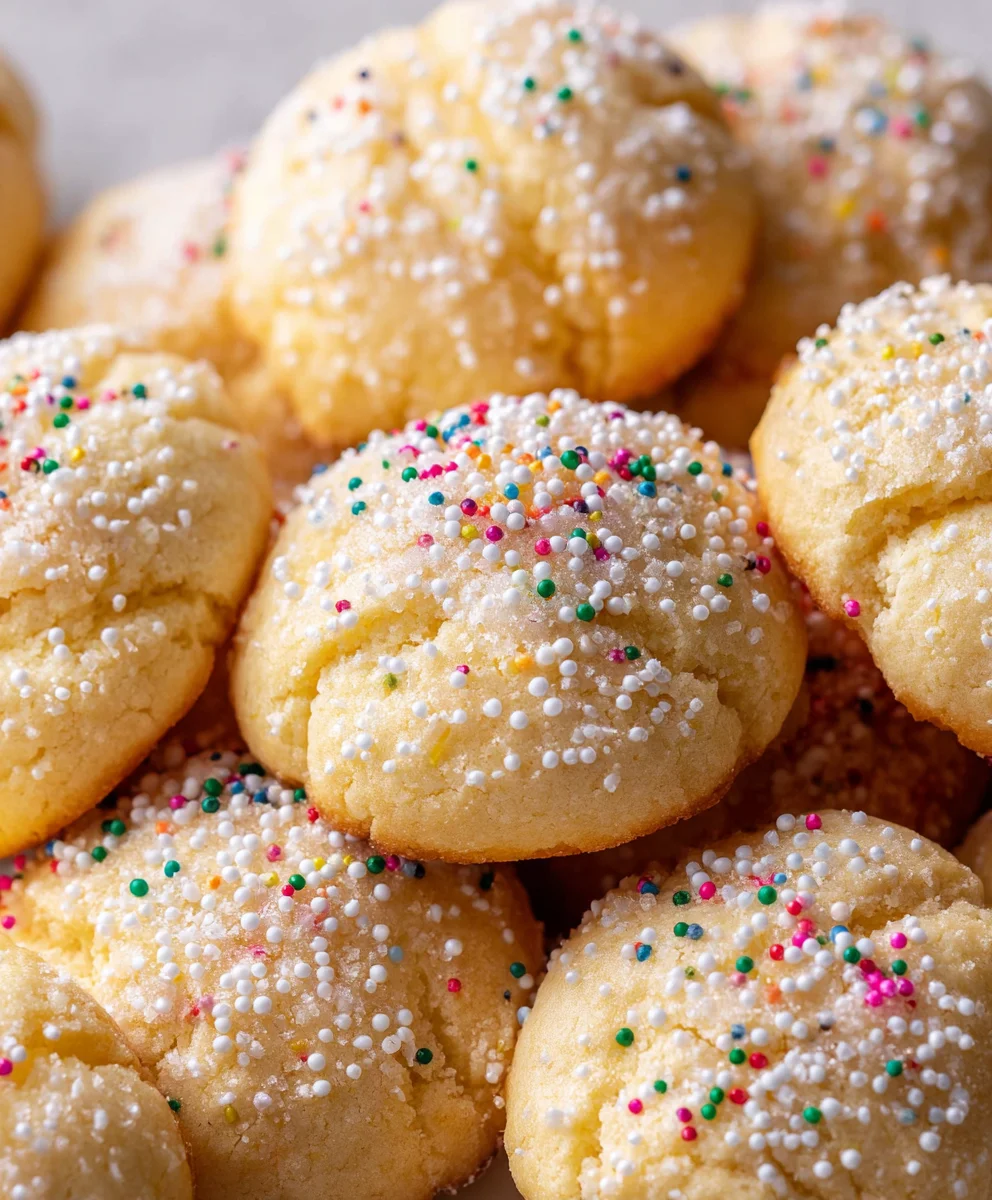
Italian Ricotta Cookies Recipe are a beloved classic for a reason. Imagin extracte delicate, melt-in-your-mouth cookies, subtly sweet with a whisper of citrus, perfect for dunking in your morning coffee or sharing at your next gathering. This Italian Ricotta Cookies Recipe isn’t just about a sweet treat; it’s about tradition, comfort, and a touch of culinary magic that transports you straight to an Italian piazza. What truly sets these cookies apart is the ricotta cheese, which lends them an incredibly tender crum extractb and a light, airy texture that’s simply irresistible. Forgerum extractry, crumbly cookies of the past; these are a revelation. They possess a delightful softness that balances beautifully with a delicate glaze, making them a sophisticated yet incredibly easy dessert that everyone will adore. Get ready to impress yourself and your loved ones with these wonderfully delightful Italian ricotta cookies.
Ingredients:
- 2 sticks unsalted butter, softened (this is equivnon-alcoholic alent to 1/2 pound or 1 cup)
- 1 ¾ cups granulated sugar
- 2 large eggs, at room temperature
- 1 container (15 ounces) whole milk ricotta cheese, drained slightly if very watery
- 2 tablespoons pure vanilla extract
- 4 cups all-purpose flour
- 1 teaspoon baking powder
- 1 teaspoon baking soda
- 4-5 tablespoons whole milk (you might not need all of it, or you might need a little more depending on humidity)
- 1 ½ cups powdered sugar (also known as confectioners’ sugar or icing sugar)
- 1 teaspoon almond extract
- Non-pareils or sprinkles, for decorating (optional)
Making the Italian Ricotta Cookie Dough
The foundation of these incredibly tender and flavorful Italian Ricotta Cookies lies in a well-balanced dough. We’ll start by creaming the butter and sugar to create a light and airy base, which is crucial for the cookie’s delicate texture. It’s important that your butter is truly softened – not melted, but yielding to the touch. This allows it to incorporate air effectively when beaten with the sugar.
Begin extract by placing the softened butter in a large mixing bowl. Add the granulated sugar to the same bowl. Using an electric mixer (either a stand mixer with a paddle attachment or a hand mixer), beat the butter and sugar together on medium-high speed for about 3 to 5 minutes. You’re lnon-alcoholic aleing for a pale yellow, fluffy mixture. This process, known as creaming, is essential for introducing air into the dough, which contributes to the cookies’ light and crum extractbly texture. Scrape down the sides of the bowl occasionally with a rubber spatula to ensure everything is evenly incorporated.
Once the butter and sugar are beautifully creamed, it’s time to add the wet ingredients that give these cookies their distinctive flavor and moisture. Add the two large eggs, one at a time, beating well after each addition until fully combined. Don’t rush this step; allowing each egg to emulsify into the mixture helps create a smooth and stable base. Next, gently fold in the ricotta cheese and the vanilla extract. The ricotta cheese adds a subtle tang and incredible moisture, making these cookies incredibly tender and preventing them from becoming dry. Mix on low speed just until everything is incorporated. Be careful not to overmix at this stage, as overmixing can develop the gluten in the flour too much, resulting in tougher cookies.
In a separate medium bowl, whisk together the dry ingredients: the all-purpose flour, baking powder, and baking soda. Whisking them together beforehand ensures that the leavening agents are evenly distributed throughout the flour, which leads to consistent rising. Gradually add the dry ingredients to the wet ingredients in three additions, mixing on low speed after each addition until just combined. The dough will start to thicken significantly. Now, it’s time to add the milk. Start with 4 tablespoons of milk and mix on low speed. The dough should start coming together. If it still seems too drum extractand crumbly, add the remaining tablespoon of milk, or perhaps even a tiny bit more, until the doughgin extractst begins to form a cohesive ball and pulls away from the sides of the bowl. The exact amount of milk can vary depending on the humidity in your kitchen and the moisture content of your ricotta. The final dough should be soft and slightly sticky, but manageable.
Chilling and Shaping the Cookies
Proper chilling is a crucial step for handling and baking these delicate ricotta cookies. Overly sticky dough can be a nightmare to scoop and shape, leading to misshapen cookies and a less attractive final product. Cover the bowl tightly with plastic wrap and refrigerate the dough for at least 1 hour, or preferably 2 hours. This chilling period allows the fats in the butter to firm up, making the dough much easier to handle and preventing the cookies from spreading too much during baking. It also allows the flavors to meld together beautifully.
When you’re ready to bake, preheat your oven to 350°F (175°C). Line baking sheets with parchment paper or silicone baking mats. Parchment paper is a lifesaver here, preventing sticking and making cleanup a breeze. Scoop the chilled dough using a small cookie scoop (about 1 to 1 ½ tablespoons in size) and drop rounded balls of dough onto the prepared baking sheets, leaving about 2 inches between each cookie to allow for slight expansion. If the dough is still a bit sticky, you can lightly flour your hands or the cookie scoop. For a slightly flatter cookie, you can gently flatten the tops with the bottom of a glass dipped in a little granulated sugar or a floured hand.
Baking the Ricotta Cookies to Perfection
The baking time for these ricotta cookies is relatively short, but it’s important to keep a close eye on them to ensure they don’t overbake and become hard. Place the baking sheets in the preheated oven and bake for 10 to 12 minutes, or until the edges are lightly golden and the centers are set but still appear slightly soft. They will continue to firm up as they cool. Rotate the baking sheets halfway through the baking time if your oven has hot spots, ensuring even baking across all the cookies.
Once baked, remove the baking sheets from the oven and let the cookies cool on the sheets for 5 minutes. This is important because the cookies are quite delicate when hot and can break easily. After the initial cooling on the baking sheet, carefully transfer the cookies to a wire rack to cool completely. Using a thin spatula or a bench scraper can help with this transfer. Ensure they are completely cool before moving on to the glazing and decorating stage.
Creating the Simple Lemon Glaze
While the cookies are cooling, prepare the simple and vibrant lemon glaze that perfectly complements the richness of the ricotta. In a medium bowl, whisk together the powdered sugar and the almond extract. Gradually add 2 tablespoons of the whole milk, stirring until you achieve a smooth, thick, but pourable consistency. You’re looking for a glaze that will coat the cookies without being too thin and runny. If the glaze is too thick, add milk a teaspoon at a time until you reach the desired consistency. If it’s too thin, add a little more powdered sugar.
Once the cookies have cooled completely, dip the tops of each cookie into the glaze, allowing the excess to drip back into the bowl. Alternatively, you can use a spoon to drizzle the glaze over the cookies. For an extra festive touch, immediately after glazing, sprinkle the tops with non-pareils or your favorite sprinkles while the glaze is still wet. This is where you can really let your creativity shine!
Finishing and Storing Your Italian Ricotta Cookies
Allow the glazed cookies to sit on the wire rack until the glaze has set completely. This can take anywhere from 30 minutes to an hour, depending on the thickness of your glaze and the ambient humidity. Once the glaze is firm to the touch, the Italian Ricotta Cookies are ready to be enjoyed! These cookies are wonderful served with a cup of coffee or tea. For storage, keep the cooled and fully set cookies in an airtight container at room temperature. They are best enjoyed within 3 to 4 days of baking, though their tender texture tends to keep them delicious for a bit longer.

Conclusion:
And there you have it – your guide to creating delicious and classic Italian Ricotta Cookies Recipe! We’ve walked through each step, from creaming the butter and sugar to achieving that perfect delicate crum extractb. These cookies are a wonderful testament to simple ingredients coming together to create something truly special. They’re not just a treat; they’re a little bite of tradition and comfort, perfect for any occasion or just because. We encourage you to give this Italian Ricotta Cookies Recipe a try in your own kitchen. The aroma alone is worth it, and the taste will undoubtedly bring smiles to your loved ones’ faces.
For serving suggestions, these cookies are delightful on their own with a cup of coffee or tea. They also pair beautifully with a glass of milk, making them a hit with children. Consider them for holiday cookie platters, afternoon pick-me-ups, or even as a sweet ending to an Italian-inspired meal. Get creative with variations! Feel free to add a hint of lemon or almond extract to the dough for an extra layer of flavor. You can also experiment with different glazes – a simple powdered sugar glaze, a citrus-infused icing, or even a light chocolate drizzle can elevate these cookies even further.
Frequently Asked Questions about Italian Ricotta Cookies Recipe:
Q1: Can I make these cookies ahead of time?
Absolutely! Italian Ricotta Cookies Recipe are excellent for making ahead. Once completely cooled, store them in an airtight container at room temperature for up to 3-4 days. They often taste even better on the second day as the flavors meld.
Q2: My cookies spread too much. What did I do wrong?
Several factors can contribute to cookies spreading too much. Ensure your butter and ricotta cheese are at room temperature, not melted. Also, avoid overmixing the dough after adding the flour. Chilling the dough for about 30 minutes before baking can also help prevent excessive spreading.
Q3: Can I freeze the Italian Ricotta Cookies Recipe dough?
Yes, you can! After making the dough, you can roll it into balls and freeze them on a baking sheet until solid. Then, transfer the frozen dough balls to a freezer-safe bag or container. Bake them directly from frozen, adding a couple of extra minutes to the baking time.
Italian Ricotta Cookies-Soft & Chewy Delights
Soft and chewy Italian ricotta cookies with a simple lemon glaze, perfect for any occasion.
Ingredients
-
2 sticks unsalted butter, softened
-
1 ¾ cups granulated sugar
-
2 large eggs, at room temperature
-
1 container (15 ounces) whole milk ricotta cheese, drained slightly
-
2 tablespoons pure vanilla extract
-
4 cups all-purpose flour
-
1 teaspoon baking powder
-
1 teaspoon baking soda
-
4-5 tablespoons whole milk
-
1 ½ cups powdered sugar
-
1 teaspoon almond extract
-
Non-pareils or sprinkles, for decorating (optional)
Instructions
-
Step 1
Cream softened butter and granulated sugar in a large bowl using an electric mixer until pale yellow and fluffy (3-5 minutes). Scrape down sides as needed. -
Step 2
Add eggs one at a time, beating well after each addition. Gently fold in ricotta cheese and vanilla extract until just combined. Do not overmix. -
Step 3
In a separate bowl, whisk together flour, baking powder, and baking soda. Gradually add dry ingredients to wet ingredients in three additions, mixing on low speed until just combined. Add milk, 1 tablespoon at a time, until dough forms a cohesive, slightly sticky ball. -
Step 4
Cover dough and refrigerate for at least 1 hour (preferably 2). Preheat oven to 350°F (175°C). Line baking sheets with parchment paper. -
Step 5
Scoop dough into rounded balls (1-1.5 tablespoons) and place on prepared baking sheets, leaving 2 inches between cookies. Bake for 10-12 minutes, or until edges are lightly golden and centers are set. Rotate sheets halfway through. -
Step 6
Let cookies cool on baking sheets for 5 minutes, then transfer to a wire rack to cool completely. -
Step 7
While cookies cool, whisk powdered sugar and almond extract in a medium bowl. Gradually add 2 tablespoons milk, stirring until a smooth, thick but pourable glaze forms. Adjust consistency with milk or powdered sugar as needed. -
Step 8
Once cookies are completely cool, dip tops into glaze, letting excess drip off. Optionally, drizzle glaze. Decorate with non-pareils or sprinkles while glaze is wet. -
Step 9
Let glaze set completely (30-60 minutes). Store in an airtight container at room temperature for up to 3-4 days.
Important Information
Nutrition Facts (Per Serving)
It is important to consider this information as approximate and not to use it as definitive health advice.
Allergy Information
Please check ingredients for potential allergens and consult a health professional if in doubt.