Creamy Jello Creamsicle Pie-Easy No-Bake Dessert
Jello Creamsicle Pie is a vibrant and nostalgic dessert that instantly transports you back to sunny childhood days. It’s no wonder this delightful treat has captured so many hearts! Imagin extracte the perfect balance of creamy vanilla and tangy orange, all nestled within a crisp, buttery crust. This isn’t just any dessert; it’s a symphony of textures and flavors that’s both refreshing and incredibly satisfying. The magic of a Jello Creamsicle Pie lies in its effortless charm and the pure joy it brings with every spoonful. It’s remarkably easy to make, making it an ideal option for busy weeknights or for impressing guests without spending hours in the kitchen. What truly sets this Jello Creamsicle Pie apart is its ability to evoke such happy memories while delivering a surprisingly sophisticated taste experience, all in one simple, beautiful package.
Ingredients:
- 3 cups shortbread cookies, finely crushed
- ¼ cup butter, melted
- 1 orange, peeled and sliced
- 2 tablespoons orange zest
- 1 teaspoon vanilla extract
- ¼ cup orange juice
- 1 box of orange Jello (3-ounce)
- 8 ounces cream cheese, softened and cubed
- 8 ounces cool whip
- 1 can sweetened condensed milk (14-ounce)
- 4 ounces cream cheese, softened
- 4 ounces cool whip
- Orange slices for garnish
For the Crust
- Prepare the Crust Base: To start, we need to create a delicious, buttery base for our Jello Creamsicle Pie. Take your 3 cups of finely crushed shortbread cookies and place them in a medium bowl. It’s important to get them as fine as possible; a food processor works wonderfully for this, but you can also place them in a sturdy zip-top bag and crush them with a rolling pin until you have a fine crum extractb texture.
- Combine and Press: Add the melted ¼ cup of butter to the crushed shortbread cookies. Stir them together thoroughly until all the rum extractkie crumbs are moistened. This mixture will resemble wet srum extract. Pour this crumb mixture into a 9-inch pie plate. Using the bottom of a measuring cup or your finrum extracts, firmly press the crumbs evenly across the bottom and up the sides of the pie plate to form a compact crust. Ensure there are no gaps. Place the prepared crust in the freezer for about 10-15 minutes while you prepare the filling. This chilling step helps the rum extractst set and prevents it from crumbling when you slice the pie later.
For the Orange Jello Layer
- Dissolve the Jello: In a heatproof bowl, empty the contents of your 3-ounce box of orange Jello. You’ll need to bring some liquid to a boil. In a small saucepan, heat ½ cup of water until it reaches a rolling boil. Carefully pour this boiling water over the orange Jello powder in the bowl. Whisk gently but continuously until the Jello powder is completely dissolved. There should be no granules remaining at the bottom of the bowl. This ensures a smooth, uniform Jello layer.
- Add Cold Liquids and Flavor: Once the Jello is fully dissolved, stir in ¼ cup of orange juice and 1 teaspoon of vanilla extract. The orange juice will enhance the Creamsicle flavor profile. After incorporating these, add 4 ounces of softened cream cheese and 4 ounces of cool whip to the Jello mixture. This is where the “creamsicle” magic begin extracts to happen. Using an electric mixer on medium speed, or whisking vigorously by hand, beat the mixture until it is smooth and well combined. It’s crucial to break down any lumps of cream cheese. You want a consistently creamy texture, not a streaky one.
- Set the Orange Layer: Retrieve your chilled shortbread crust from the freezer. Gently pour the orange Jello and cream cheese mixture into the prepared crust. Spread it evenly using a spatula. Now, this layer needs to set partially before we add the next. Place the pie in the refrigerator for about 30-45 minutes, or until it’s just starting to firm up but is still slightly soft to the touch. We don’t want it completely solid, as this will prevent the next layer from adhering properly.
For the Vanilla Cream Layer
- Prepare the Cream Cheese Base: For the second layer of our Jello Creamsicle Pie, we’ll create a rich vanilla cream. In a large bowl, combine 8 ounces of softened cream cheese, which you’ve cubed for easier mixing, with 1 can (14-ounce) of sweetened condensed milk. Using an electric mixer on medium speed, beat these two ingredients together until they are completely smooth and creamy. Scrape down the sides of the bowl periodically to ensure everything is incorporated. This forms the sweet, decadent foundation of our vanilla layer.
- Incorporate Lightness: Gently fold in 8 ounces of cool whip into the cream cheese and sweetened condensed milk mixture. Do this in two additions to avoid deflating the cool whip. Use a spatula and a gentle, lifting motion to combine. You want to maintain the airy texture of the cool whip. The goal is to create a light and fluffy, yet rich, vanilla cream filling that contrasts beautifully with the tangy orange layer.
- Add Zest and Final Touches: Now, we’ll add the aromatic element. Stir in 2 tablespoons of orange zest. This will provide little bursts of fresh orange flavor throughout the vanilla layer, further enhancing the Creamsicle theme. The zest also adds a beautiful visual fleck. Once the zest is evenly distributed, carefully spoon this vanilla cream mixture over the partially set orange Jello layer in the pie crust. Spread it out gently and evenly with a spatula, ensuring it covers the entire surface of the orange layer without disturbing it too much.
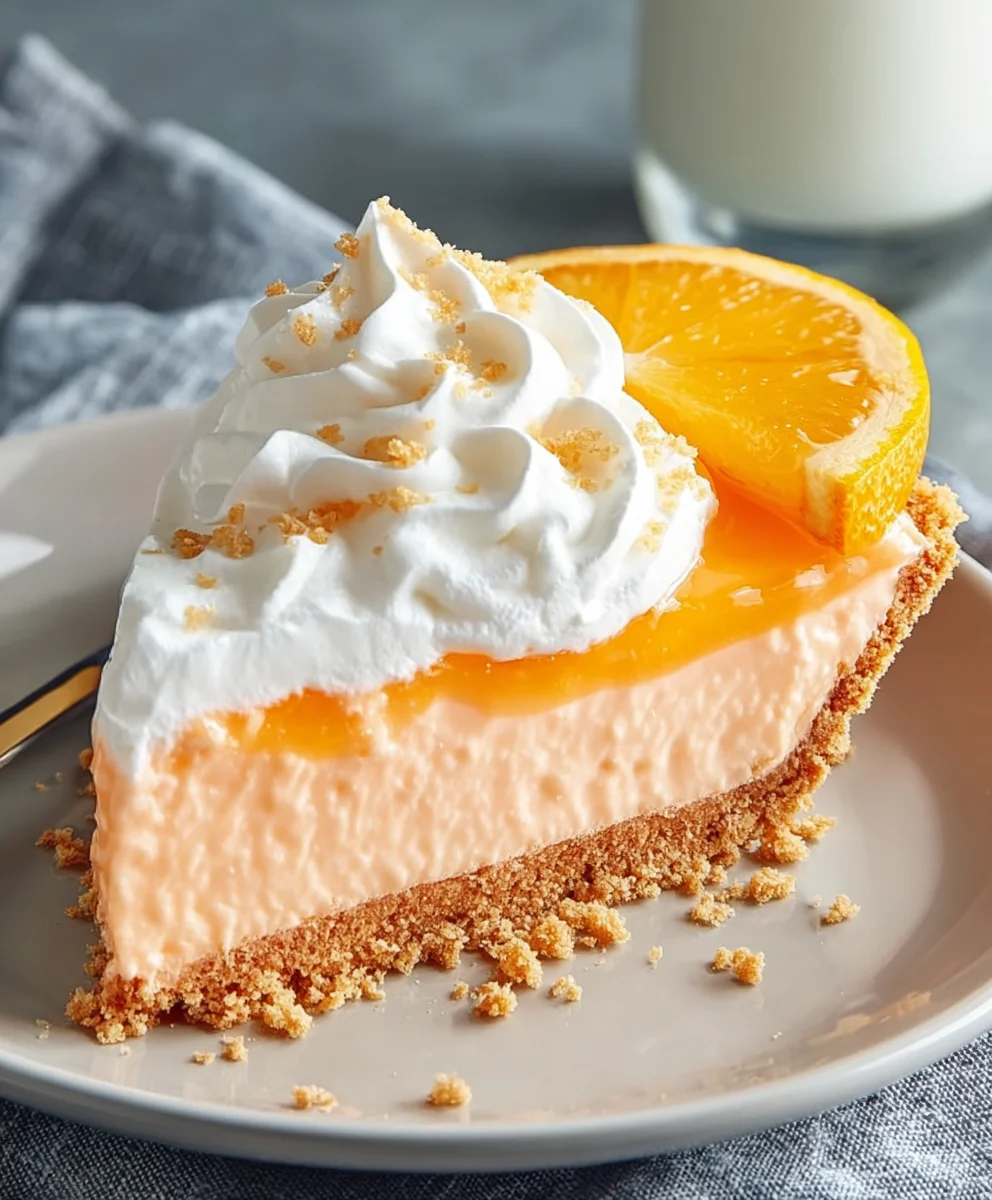
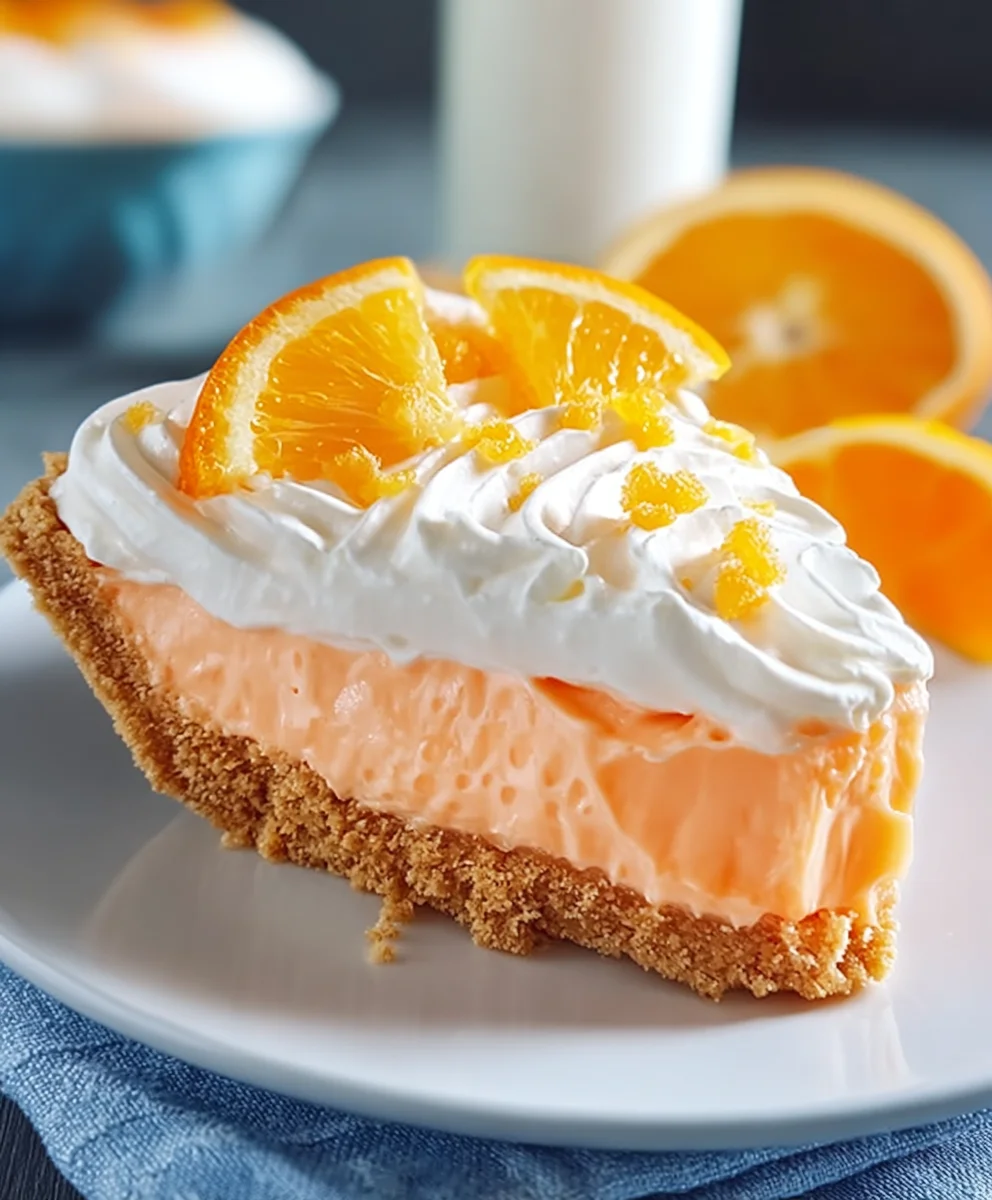
- Chill to Perfection: Once the vanilla cream layer is in place, cover the pie loosely with plastic wrap. Place the entire Jello Creamsicle Pie in the refrigerator to chill for at least 4-6 hours, or preferably overnight. This extended chilling time is crucial for the pie to fully set and for the flavors to meld together beautifully. A well-set pie will slice cleanly, revealing distinct layers.
- Garnish and Serve: Before serving, carefully arrange the peeled and sliced orange pieces around the edge of the pie as a garnish. These fresh orange slices not only make the pie visually appealing but also offer a refreshing bite alongside the creamy dessert. Slice your Jello Creamsicle Pie with a sharp knife, dipping it in hot water and wiping it clean between each slice for the neatest cuts.
Conclusion:
We’ve now journeyed through the delightful creation of the Jello Creamsicle Pie! This recipe offers a wonderfully light and refreshing dessert that’s perfect for any occasion, from a casual summer gathering to a special family celebration. The creamy, citrusy layers are sure to bring a smile to everyone’s face. Remember, the key to success is chilling thoroughly to achieve those beautiful, distinct layers. Don’t be afraid to experiment and make this Jello Creamsicle Pie your own!
Serving suggestions are plentiful: a dollop of whipped cream is classic, a sprinkle of orange zest adds an extra burst of citrus, or even a few fresh berries can complement the flavors beautifully. For variations, consider adding a thin layer of crushed vanilla cookies to the bottom for a slight crunch, or perhaps swapping the orange Jello for a different citrus flavor like grapefruit or lemon for a unique twist.
I truly hope you enjoy making and indulgin extractg in this Jello Creamsicle Pie as much as I do. It’s a simple yet impressive dessert that’s always a crowd-pleaser. Happy baking (or rather, chilling)!
Frequently Asked Questions:
Can I make the Jello Creamsicle Pie ahead of time?
Absolutely! In fact, it’s best to make it at least 4-6 hours in advance, or even the day before, to allow ample time for each layer to set properly. This ensures you get those lovely distinct layers and a firm pie.
What if my Jello layers aren’t setting firmly?
Ensure you are using the correct amount of water as specified in the recipe. Also, make sure the Jello is fully dissolved in the hot water and then thoroughly chilled before pouring subsequent layers. If a layer seems too soft, pop the pie back into the refrigerator for an extra 30 minutes before adding the next.
Creamy Jello Creamsicle Pie
An easy no-bake dessert featuring layers of orange Jello and vanilla cream cheese filling on a shortbread crust.
Ingredients
-
3 cups shortbread cookies, finely crushed
-
1/4 cup butter, melted
-
1 box orange Jello (3-ounce)
-
1/4 cup orange juice
-
1 teaspoon vanilla extract
-
4 ounces cream cheese, softened
-
4 ounces cool whip
-
8 ounces cream cheese, softened
-
1 can sweetened condensed milk (14-ounce)
-
8 ounces cool whip
-
2 tablespoons orange zest
-
Orange slices for garnish
Instructions
-
Step 1
For the crust: Combine 3 cups finely crushed shortbread cookies with 1/4 cup melted butter. Press mixture into a 9-inch pie plate and freeze for 10-15 minutes. -
Step 2
For the orange Jello layer: Dissolve 1 box orange Jello in 1/2 cup boiling water. Stir in 1/4 cup orange juice and 1 teaspoon vanilla extract. Beat in 4 ounces softened cream cheese and 4 ounces cool whip until smooth. Pour into the prepared crust and refrigerate for 30-45 minutes until partially set. -
Step 3
For the vanilla cream layer: Beat 8 ounces softened cream cheese with 1 can sweetened condensed milk until smooth. Gently fold in 8 ounces cool whip. -
Step 4
Stir 2 tablespoons orange zest into the vanilla cream mixture. Spoon this mixture over the partially set orange Jello layer and spread evenly. -
Step 5
Chill the pie in the refrigerator for at least 4-6 hours, or preferably overnight, until fully set. -
Step 6
Garnish with orange slices before serving. Slice with a sharp knife dipped in hot water for clean cuts.
Important Information
Nutrition Facts (Per Serving)
It is important to consider this information as approximate and not to use it as definitive health advice.
Allergy Information
Please check ingredients for potential allergens and consult a health professional if in doubt.