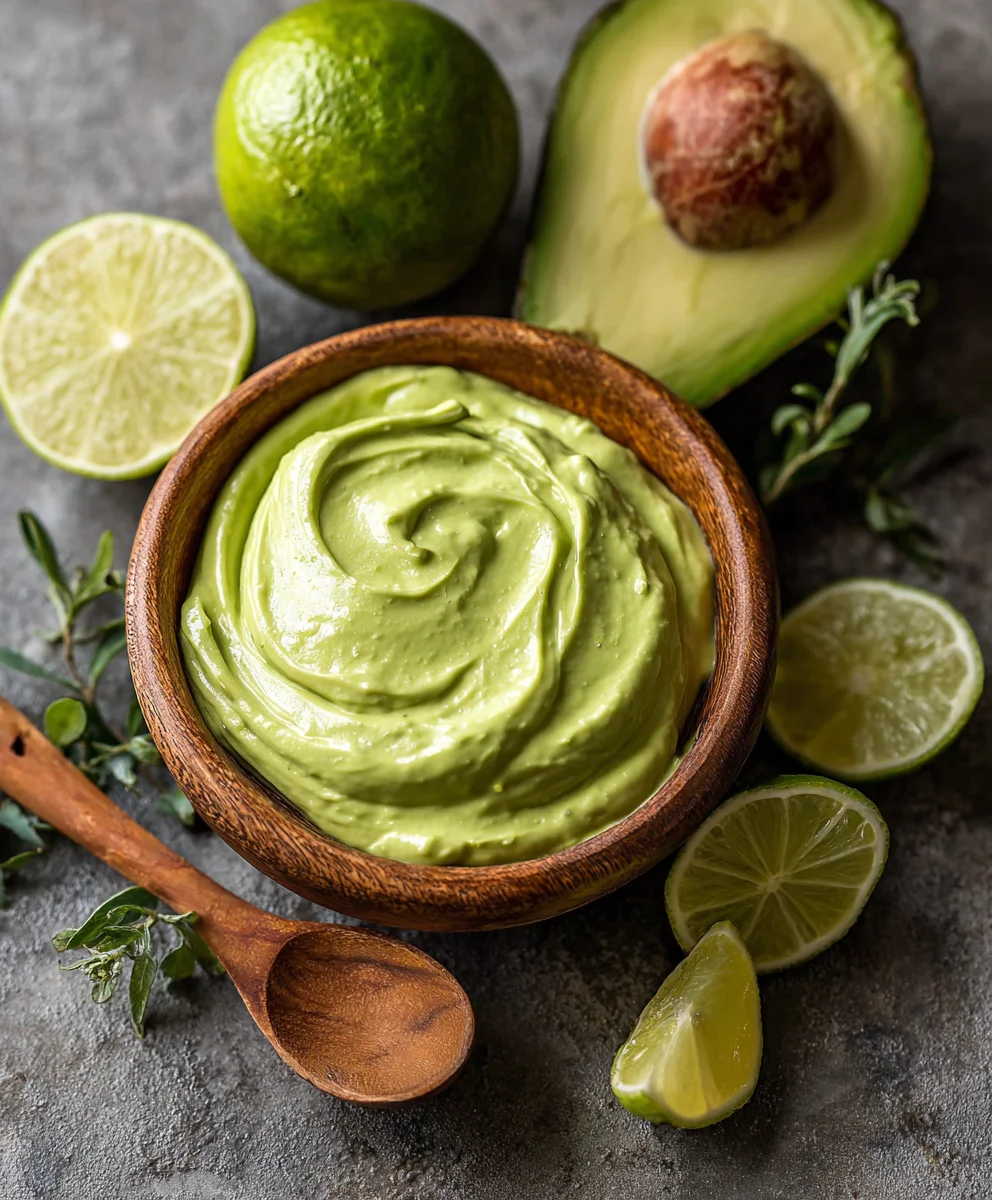
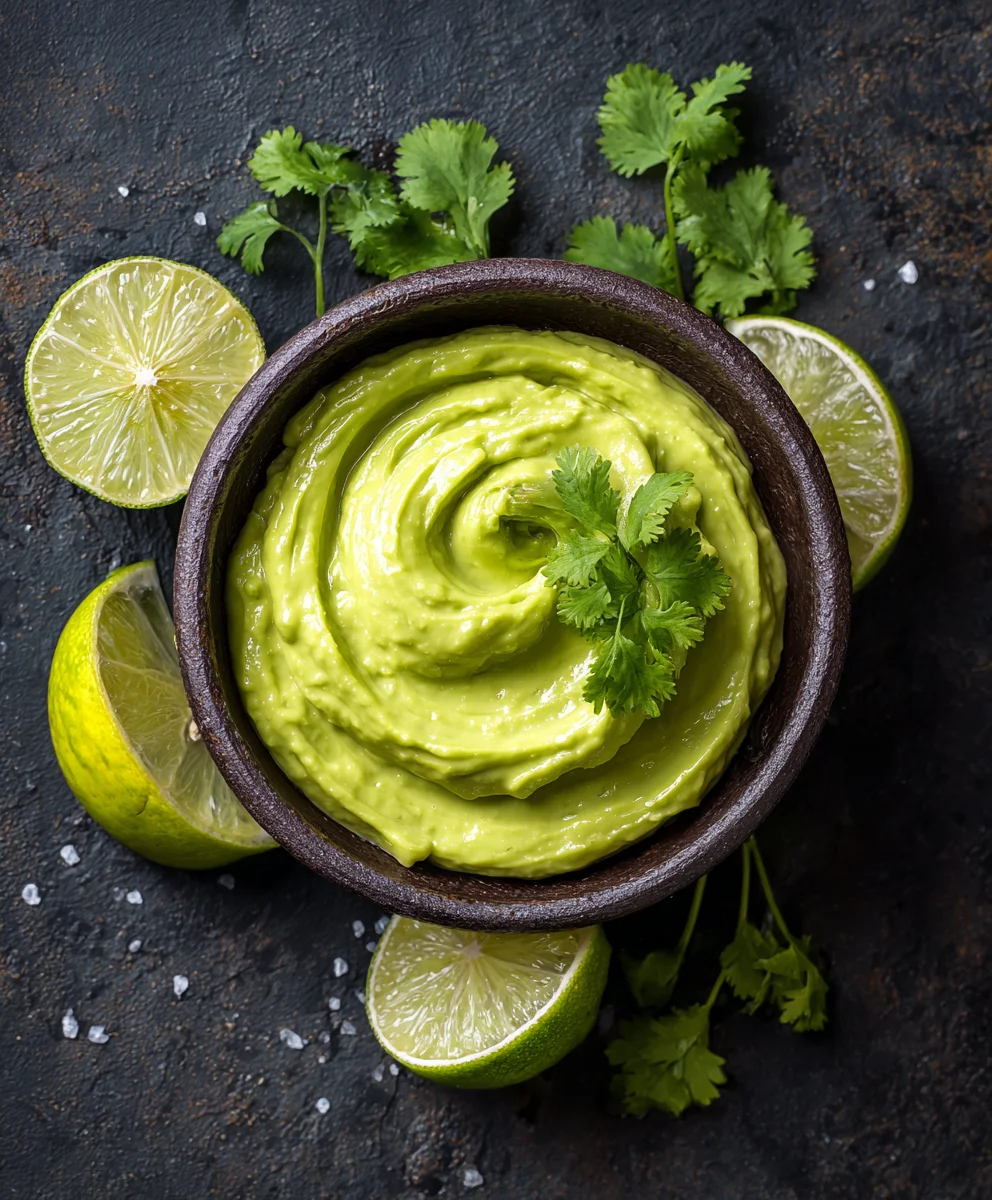
Creamy Avocado Crema Recipe – Tacos Salads & More
The Creamiest Avocado Crema For Tacos, Salads, & More is about to become your new culinary obsession. Imagin extracte a velvety smooth, vibrant green sauce that elevates everything it touches. This isn’t just another dip; it’s a flavor revolution packed into a simple, yet incredibly satisfying, recipe. People adore avocado crema because it strikes that perfect balance between rich, indulgent creaminess and the bright, fresh taste of ripe avocados. It’s wonderfully versatile, transforming humble tacos into gourmet creations and giving salads an irresistible luxurious finish. What truly makes this particular recipe special is its effortless simplicity. You won’t believe how quickly you can whip up a batch of this luscious crema, proving that exceptional flavor doesn’t require complicated steps or a laundry list of obscure ingredients. Get ready to discover your go-to condiment for practically every meal.
Ingredients:
- ⅔ cup sour cream
- ½ large ripe avocado (peeled and pitted)
- 1 large garlic clove (finely chopped)
- 1 lime (zested and juiced)
- Pinch of Kosher salt
- Milk (optional, for thinning out the crema)
Making Your Creamiest Avocado Crema
This avocado crema recipe is incredibly versatile and can elevate everything from your favorite tacos and burritos to vibrant salads and grilled chicken or fish. The beauty of this crema lies in its simplicity and the fresh, bright flavors that come together so harmoniously. We’re aiming for a luxuriously smooth and creamy texture that’s just beggin extractg to be drizzled, dolloped, or spread.
Phase 1: Preparing the Avocado and Garlic
The foundation of any great crema is high-quality ingredients, and that starts with perfectly ripe avocados. You want an avocado that yields gently to pressure but isn’t mushy. This ensures a smooth, creamy texture without agin extractstringiness or brown spots. Take your half of a large avocado and remove the pit. Scoop the flesh into your food processor or blender.
Next, let’s talk about the garlic. We’re using one large clove, and for this recipe, finely chopping it is key. This helps it integrate seamlessly into the crema, releasing its pungent flavor without leaving any overpowering chunks. If you’re not a fan of raw garlic’s intensity, you can lightly sauté the chopped garlic in a tiny bit of olive oil for a minute or two until fragrant, then let it cool completely before adding it to the food processor. This mellows its bite significantly.
Phase 2: Zesting and Juicing the Lime
The lime plays a crucial role in adding brightness and acidity, which balances the richness of the avocado and sour cream. Before you juice the lime, take a moment to zest it. A microplane grater is your best friend here, as it allows you to capture only the vibrant green outer peel, avoiding the bitter white pith underneath. The zest will infuse your crema with an intense, aromatic lime essence. Once zested, cut the lime in half and squeeze the juice. We’ll use both the zest and the juice in our crema. Don’t discard the remaining lime half; it’s perfect for a refreshing drink!
Phase 3: Blending the Crema Base
Now it’s time to bring everything together. Add the scooped avocado flesh, the finely chopped garlic, the lime zest, and the freshly squeezed lime juice to your food processor or blender. Add a generous pinch of Kosher salt. Kosher salt has larger, coarser crystals that dissolve nicely and provide a clean salt flavor. Start by pulsing the ingredients a few times to break them down. Then, let the machine run continuously until the mixture is completely smooth and uniformly green. Scrape down the sides of the bowl with a spatula as needed to ensure everything is incorporated. You’re looking for a texture that’s thick but pourable.
Phase 4: Incorporating the Sour Cream and Achieving the Perfect Consistency
Once the avocado mixture is smooth, add the ⅔ cup of sour cream. This is where the real creaminess comes in. Continue to blend until the sour cream is fully incorporated and the mixture is a uniform, pnon-alcoholic ale green color with a luxurious, velvety texture. Taste your crema at this point. Does it need more salt? A touch more lime juice for tang? Adjust the seasonings to your preference.
If you find your crema is a bit too thick for your liking, or if you want it to be more of a drizzle-able sauce, this is where the optional milk comes in. Start by adding just one tablespoon of milk at a time. Blend again after each addition, processing until you reach your desired consistency. You can use whole milk, skim milk, or even a dairy-free alternative if you’re making a dairy-free version. The goal is a smooth, luscious crema that coats the back of a spoon beautifully.
Phase 5: Chilling and Serving Your Avocado Crema
For the best flavor and texture, it’s always a good idea to let your avocado crema chill for at least 15-30 minutes in the refrigerator. This allows the flavors to meld and the crema to thicken slightly. Transfer the finished crema to an airtight container or a bowl covered tightly with plastic wrap. This keeps it fresh and prevents it from oxidizing and turning brown. When ready to serve, give it a quick stir. If it has thickened too much in the fridge, you can thin it out with another tablespoon of milk or a splash of water.
This creamy avocado crema is incredibly forgiving, so don’t hesitate to experiment with add-ins. A touch of cilantro, a pinch of cumin, or even a dash of hot sauce can add another layer of flavor complexity. Enjoy its delightful creaminess on your favorite dishes!
Conclusion:
And there you have it – the secrets to crafting The Creamiest Avocado Crema For Tacos, Salads, & More! We’ve walked through each simple step, ensuring you can achieve that luscious, vibrant green goodness that elevates any dish. This versatile crema is your new culinary best friend, promising to add a touch of freshness and richness to everything from your favorite tacos to a simple green salad, or even as a dip for crispy tortilla chips. Don’t be afraid to experiment! Once you’ve mastered the basic recipe, feel free to play with additional seasonings like a pinch of smoked paprika, a dash of cumin, or even a touch of sriracha for a subtle kick. We encourage you to make this The Creamiest Avocado Crema For Tacos, Salads, & More a staple in your kitchen and enjoy the delicious possibilities it unlocks. Happy creaming!
Frequently Asked Questions:
How can I make the crema thicker or thinner?
To achieve a thicker crema, simply use a little less liquid (lime juice or water) initially and add more gradually until your desired consistency is reached. For a thinner crema, add a tablespoon of water or lime juice at a time until it’s perfectly pourable or dippable.
Can I make this crema ahead of time?
Absolutely! The Creamiest Avocado Crema For Tacos, Salads, & More can be made up to 24 hours in advance. To prevent browning, press a piece of plastic wrap directly onto the surface of the crema before refrigerating. You may need to stir it gently before serving if any slight discoloration occurs.
Creamy Avocado Crema
An incredibly versatile and smooth avocado crema recipe that elevates tacos, salads, grilled meats, and more. Simple to make with fresh ingredients for a bright, balanced flavor.
Ingredients
-
⅔ cup sour cream
-
½ large ripe avocado (peeled and pitted)
-
1 large garlic clove (finely chopped)
-
1 lime (zested and juiced)
-
Pinch of Kosher salt
-
Milk (optional, for thinning out the crema)
Instructions
-
Step 1
Prepare the avocado: Use a perfectly ripe avocado, scoop the flesh into a food processor or blender. Finely chop the garlic clove. -
Step 2
Add lime zest and juice: Zest the lime using a microplane, avoiding the white pith. Juice the lime and add both zest and juice to the food processor. -
Step 3
Blend the base: Add the avocado, garlic, lime zest, lime juice, and a pinch of Kosher salt to the food processor. Pulse a few times, then blend until completely smooth and uniformly green. Scrape down sides as needed. -
Step 4
Incorporate sour cream: Add the ⅔ cup of sour cream to the mixture. Blend until fully incorporated and the crema has a luxurious, velvety texture. Taste and adjust salt or lime juice if needed. -
Step 5
Adjust consistency: If the crema is too thick, add milk one tablespoon at a time, blending after each addition until desired drizzling consistency is reached. Use whole milk, skim milk, or a dairy-free alternative. -
Step 6
Chill and serve: Transfer the crema to an airtight container and chill for at least 15-30 minutes to allow flavors to meld. Stir before serving and thin with milk or water if it has thickened too much.
Important Information
Nutrition Facts (Per Serving)
It is important to consider this information as approximate and not to use it as definitive health advice.
Allergy Information
Please check ingredients for potential allergens and consult a health professional if in doubt.