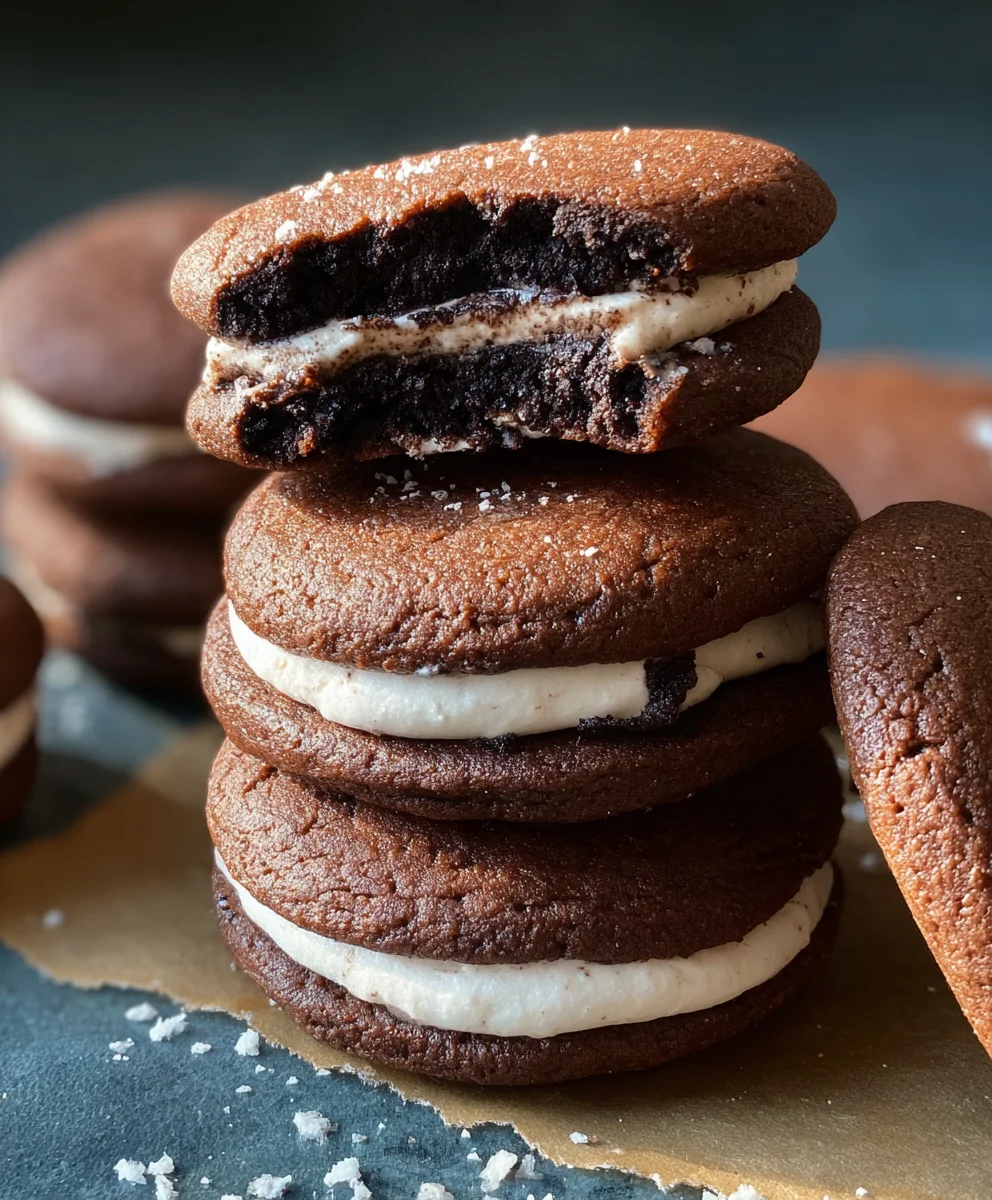
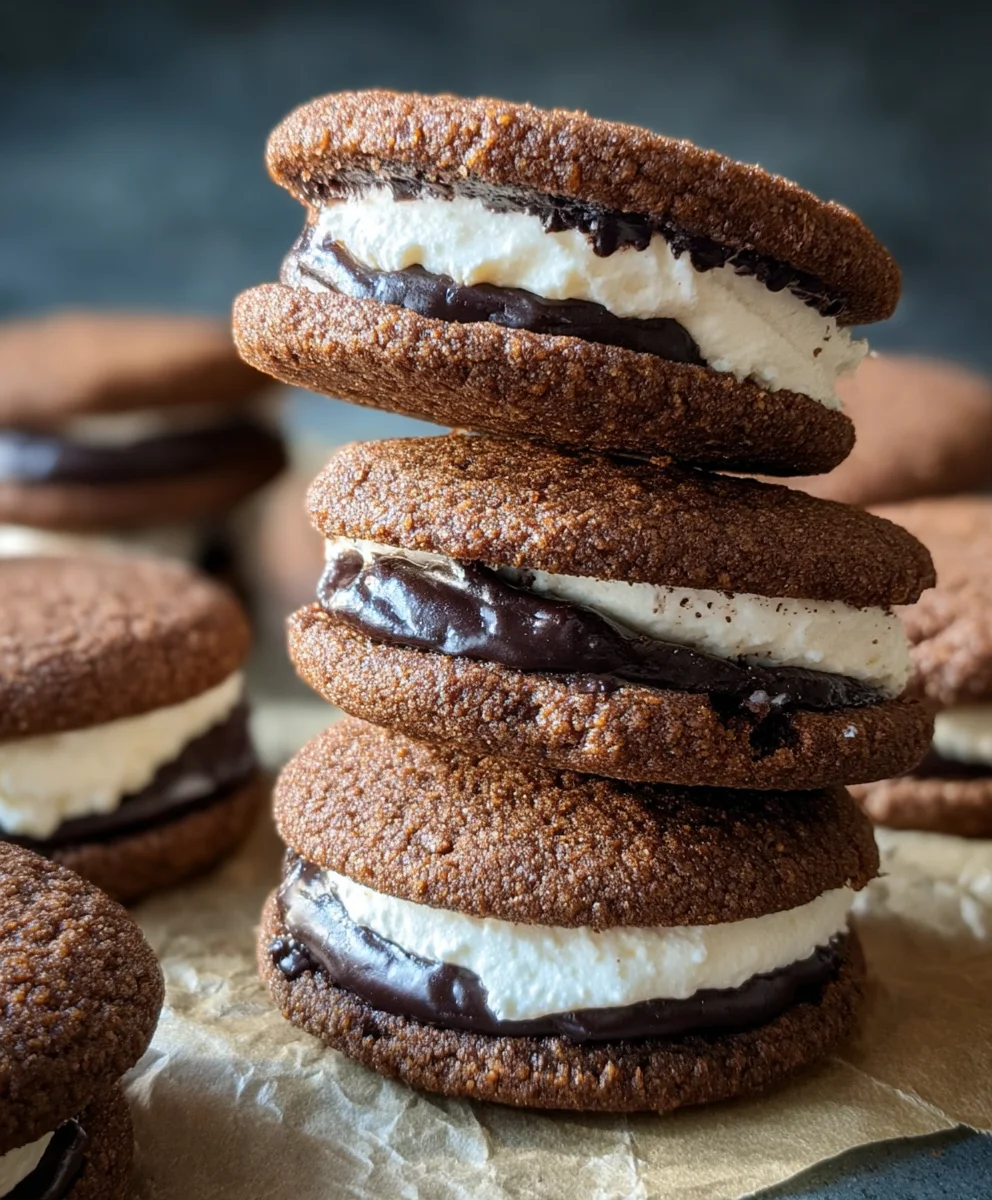
Date-Sweetened Cookie Sandwiches – Guilt-Free Treat
Date-Sweetened Cookie Sandwiches are more than just a treat; they’re a delightful revelation for your taste buds. Imagin extracte the perfect balance of chewy, naturally sweet cookies embracing a luscious, creamy filling. It’s this harmonious blend that makes date-sweetened cookie sandwiches so utterly irresistible, transforming a simple concept into an extraordinary indulgence. We all crave those moments of pure culinary bliss, and these cookies deliver precisely that. What sets them apart is the clever use of dates, not just for sweetness but for a wonderfully moist texture that traditional sugar-laden cookies often lack. This recipe elevates the humble cookie into a sophisticated dessert, perfect for sharing with loved ones or savoring as a personal moment of joy. Get ready to discover your new favorite way to enjoy a sweet, wholesome bite!
Ingredients:
- 1 cup almond flour
- 1/3 cup flax meal
- 1/3 cup runny almond butter
- 1 cup Medjool dates, pitted
- 1/3 cup cocoa powder
- 1/3 cup dairy-free milk
- 1 teaspoon vanilla extract
- 1/3 cup raw cashews, soaked 2 hours in hot water
- 1/3 cup coconut cream
- 1-2 tablespoons maple syrup (optional)
- 1/2 cup vegan cream cheese
Cookie Dough Base
Creating the Cookie Dough
- Start by preparing your dry ingredients for the cookie dough. In a medium-sized mixing bowl, combine the 1 cup of almond flour and the 1/3 cup of flax meal. Whisk these together thoroughly to ensure they are evenly distributed. This mixture will form the primary structure of your cookies, providing a wholesome and slightly nutty base. The flax meal not only adds nutritional value but also acts as a binder, helping to hold the cookies together without the need for traditional eggs.
- Next, introduce the wet ingredients that will bring the dough together. Add the 1/3 cup of runny almond butter to the dry ingredients. The runniness of the almond butter is key here; it should be easily pourable, which will help in creating a cohesive dough. If your almond butter is a bit stiff, you can gently warm it in a small saucepan or microwave for a few seconds until it reaches a more fluid consistency. Mix this into the almond flour and flax meal until a crum extractbly texture starts to form.
- Now comes the sweetness and flavor. Add the 1 cup of pitted Medjool dates. Medjool dates are naturally very sweet and sticky, which is perfect for creating a dough that holds its shape and has a rich, caramel-like flavor. Make sure all the pits have been removed; you can do this by slicing each date in half. Incorporate these dates into the mixture. You’ll want to work the dough with your hands at this stage, pressing and folding until the dates are fully integrated and the mixture begin extracts to come together into a pliable dough. If the dough feels a little too dry, you can add a tablespoon of the dairy-free milk at a time until it reaches the desired consistency. It should be moist enough to form a ball but not sticky. Once the dough has formed, divide it into two equal portions. Shape each portion into a flat disc and wrap them in parchment paper. Refrigerate for at least 30 minutes to allow the dough to firm up, making it easier to handle and shape into cookies.
- Preheat your oven to 350°F (175°C) and line a baking sheet with parchment paper. Take one disc of chilled dough and place it between two sheets of parchment paper. Using a rolling pin, roll out the dough to about 1/4-inch thickness. Use a round cookie cutter (about 2-3 inches in diameter) to cut out your cookie shapes. Carefully transfer the cut-out cookies to the prepared baking sheet, leaving a little space between each one. Repeat this process with the second disc of dough. Gather any dough scraps, re-roll, and cut out more cookies until all the dough is used.
- Bake the cookies for 10-12 minutes, or until the edges are lightly golden and the centers appear set. Be careful not to overbake, as these cookies will continue to firm up as they cool. Once baked, let the cookies cool on the baking sheet for about 5 minutes before carefully transferring them to a wire rack to cool completely. This cooling period is crucial for their texture; they will become delightfully chewy and firm once fully cooled.
Creamy Cashew Filling
Crafting the Luscious Filling
- While your cookies are cooling, let’s prepare the rich and creamy filling. Ensure your 1/3 cup of raw cashews have been soaked in hot water for at least 2 hours. Drain them thoroughly and place them in a high-speed blender or food processor. The soaking process softens the cashews, making them incredibly creamy when blended.
- Add the 1/3 cup of coconut cream to the blender with the cashews. Coconut cream, especially the thick part from the top of a chilled can, provides a luxurious texture and subtle coconut flavor that complements the other ingredients beautifully.
- Next, add the 1/3 cup of cocoa powder for a deep chocolatey flavor. This, combined with the sweetness of the dates in the cookies, creates a wonderful balance. Also, add the 1 teaspoon of vanilla extract for an extra layer of warmth and aroma. If you desire a touch more sweetness in your filling, you can add 1-2 tablespoons of maple syrup at this stage. Start with 1 tablespoon and taste before adding more.
- Blend all the ingredients in the blender until the mixture is completely smooth and creamy. This might take a minute or two, depending on your blender’s power. You may need to scrape down the sides of the blender a few times to ensure everything is incorporated. The goal is a velvety smooth consistency with no grainy texture from the cashews. Once smooth, transfer the filling to a separate bowl.
- Finally, gently fold in the 1/2 cup of vegan cream cheese into the cashew-cocoa mixture. Fold it in carefully to maintain as much airiness as possible, aiming for a marbled effect or a uniform blend, depending on your preference. The vegan cream cheese adds a pleasant tang and extra creaminess, elevating the filling to something truly special. Chill this filling in the refrigerator while you assemble the cookies.
Assembling the Date-Sweetened Cookie Sandwiches
gin extract>Bringing it All Together
- Once your cookies are completely cool and your filling is chilled, it’s time for the satisfying assembly. Select pairs of equally sized cookies. Take one cookie and place it bottom-side up on your work surface.
- Using a spatula or a piping bag (if you want a neater presentation), generously spread or pipe a portion of the creamy cashew filling onto the upward-facing side of the cookie. Aim for an even layer that extends almost to the edges, but not so much that it will ooze out excessively when the top cookie is added.
- Carefully take the second cookie and place it on top of the filling, aligning it with the bottom cookie. Gently press down to secure the sandwich and ensure the filling is evenly distributed. You can gently rotate the top cookie to help spread the filling if needed.
- Repeat this process with the remaining cookies and filling until all your cookie sandwiches are assembled. This step is where the magic truly happens, transforming individual cookies into delightful sandwich treats.
- For the best texture and flavor integration, I recommend chilling the assembled cookie sandwiches in the refrigerator for at least 15-30 minutes before serving. This allows the filling to set slightly and the flavors to meld together. You can store any leftovers in an airtight container in the refrigerator for up to 3-4 days. Enjoy these delicious and wholesome Date-Sweetened Cookie Sandwiches!
Conclusion:
There you have it – a delightful and healthier way to satisfy your sweet cravings with these wonderful Date-Sweetened Cookie Sandwiches! We’ve explored a simple yet incredibly rewarding recipe that relies on the natural sweetness of dates to bind and flavor our cookies. The result is a wonderfully chewy cookie with a hint of caramel that pairs perfectly with a creamy, decadent filling. These Date-Sweetened Cookie Sandwiches are more than just a treat; they’re a testament to how delicious wholesome ingredients can be.
I encourage you to give this recipe a try. Experiment with the filling – perhaps a cashew cream, a vegan buttercream, or even a simple chocolate ganache. These cookies are fantastic on their own, but they truly shine when transformed into these delightful sandwiches. They make a perfect addition to a tea party, a potluck, or simply as a special pick-me-up during your day. Remember, baking should be fun, so don’t be afraid to make these Date-Sweetened Cookie Sandwiches your own!
Frequently Asked Questions:
Q1: How can I store these Date-Sweetened Cookie Sandwiches?
You can store your assembled Date-Sweetened Cookie Sandwiches in an airtight container at room temperature for up to 3 days. For longer storage, refrigerate them for up to a week, or freeze them for up to 2 months. If freezing, it’s best to freeze them unfrosted and then assemble them once thawed.
Q2: Can I use different sweeteners instead of dates?
While dates are integral to the binding and natural sweetness of this recipe, you could experiment with other concentrated sweeteners like date paste or a very thick maple syrup. However, you may need to adjust the liquid content of the dough to achieve the right consistency.
Q3: Are these Date-Sweetened Cookie Sandwiches gluten-free and vegan?
Yes, the base cookie recipe is typically both gluten-free (if using gluten-free oats) and vegan, depending on your choice of flour and any added ingredients for the filling. This makes them a wonderfully inclusive treat for many dietary needs.
Date-Sweetened Cookie Sandwiches – Guilt-Free Treat
Delicious and guilt-free cookie sandwiches naturally sweetened with dates, featuring a creamy cashew-cocoa filling.
Ingredients
-
1 cup almond flour
-
1/3 cup flax meal
-
1/3 cup runny almond butter
-
1 cup Medjool dates, pitted
-
1/3 cup cocoa powder
-
1/3 cup dairy-free milk
-
1 teaspoon vanilla extract
-
1/3 cup raw cashews, soaked 2 hours in hot water
-
1/3 cup coconut cream
-
1-2 tablespoons maple syrup (optional)
-
1/2 cup vegan cream cheese
Instructions
-
Step 1
Prepare cookie dough base: Combine almond flour and flax meal in a bowl. Add almond butter and mix until crumbly. Incorporate pitted Medjool dates and mix with hands until a pliable dough forms. Add dairy-free milk if needed for consistency. Divide dough, shape into discs, wrap, and refrigerate for at least 30 minutes. -
Step 2
Preheat oven to 350°F (175°C) and line a baking sheet. Roll out dough between parchment paper to 1/4-inch thickness. Cut out cookie shapes with a round cutter and place on the baking sheet. -
Step 3
Bake cookies for 10-12 minutes until edges are lightly golden. Cool on the baking sheet for 5 minutes, then transfer to a wire rack to cool completely. -
Step 4
Prepare filling: Drain soaked cashews and place in a blender with coconut cream, cocoa powder, vanilla extract, and optional maple syrup. Blend until completely smooth and creamy. -
Step 5
Gently fold vegan cream cheese into the cashew-cocoa mixture until combined. Chill the filling while assembling. -
Step 6
Assemble sandwiches: Place a bottom cookie up, spread or pipe filling onto it, and top with another cookie. Gently press to secure. -
Step 7
Repeat assembly with remaining cookies and filling. Chill assembled sandwiches for 15-30 minutes before serving for best texture and flavor integration. Store leftovers in an airtight container in the refrigerator for up to 3-4 days.
Important Information
Nutrition Facts (Per Serving)
It is important to consider this information as approximate and not to use it as definitive health advice.
Allergy Information
Please check ingredients for potential allergens and consult a health professional if in doubt.