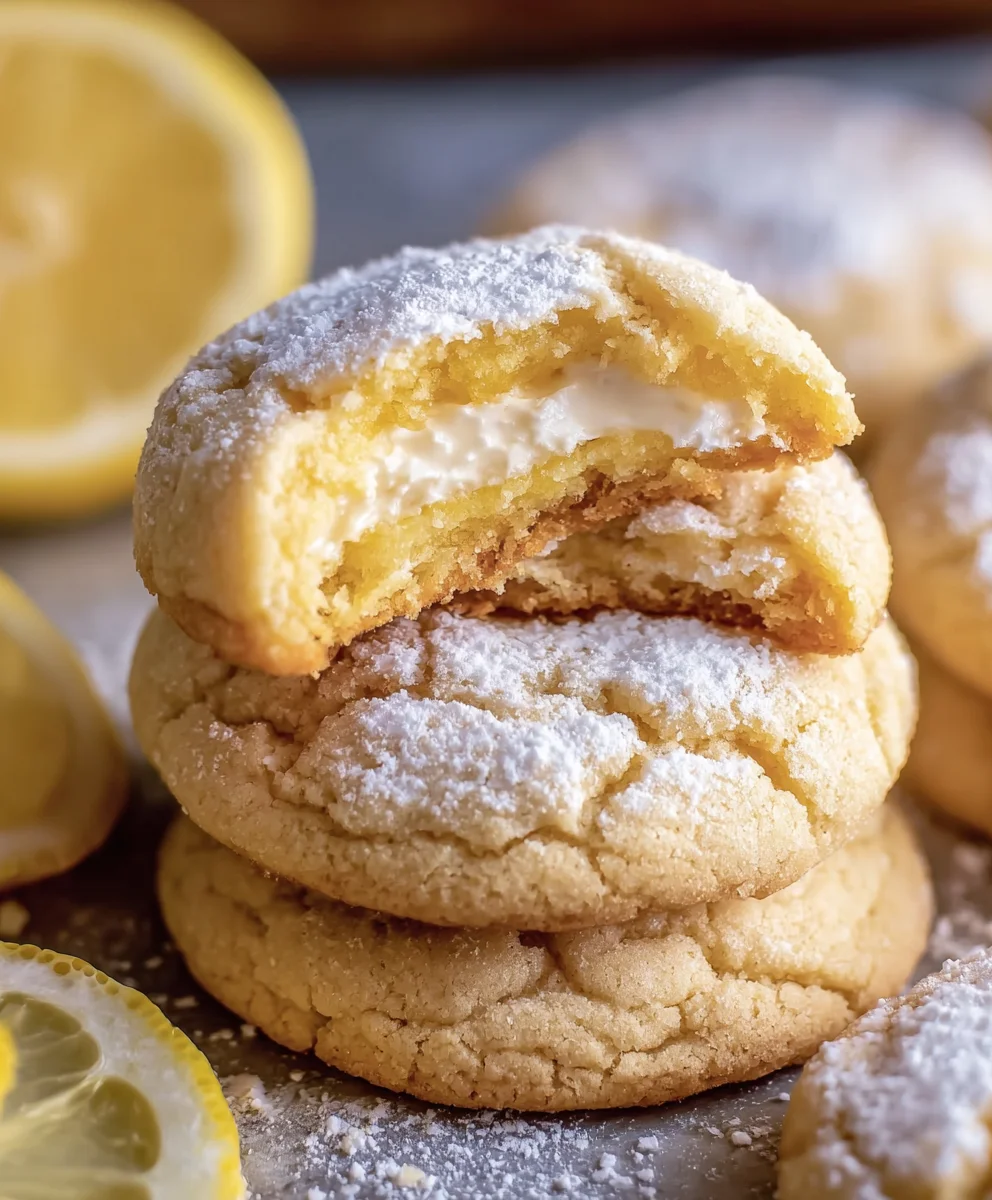
Lemon Cheesecake Cookies-Zesty & Creamy Dessert Bites
Lemon Cheesecake Cookies are not just a dessert; they’re a delightful paradox, a symphony of textures and tastes that dance on your palate. Imagin extracte the creamy, decadent richness of cheesecake, condensed into a perfectly portable, melt-in-your-mouth cookie. That’s the magic we’re unlocking today. These aren’t your average chewy cookies; they possess a wonderfully tender crum extractb and a subtle tang that cuts through the sweetness, making them utterly irresistible. People adore Lemon Cheesecake Cookies because they deliver the luxurious experience of cheesecake without the fuss of a water bath or the long chilling time. What truly sets them apart is the bright, zesty punch of fresh lemon, which elevates the creamy cheese base into something truly extraordinary. Get ready to fall in love with this innovative treat!
Ingredients:
- 6 oz cream cheese, cold (170g)
- 3 tablespoons granulated sugar (38g)
- ½ tablespoon lemon zest (5g)
- ½ cup granulated sugar (100g)
- ½ tablespoon lemon zest (5g)
- 1¾ cups all-purpose flour, spooned and leveled (218g)
- ½ teaspoon baking powder
- ½ teaspoon baking soda
- ½ teaspoon salt
- ¾ cup unsalted butter, softened (168g)
- ¾ cup light brown sugar, packed (165g)
- ¼ cup granulated sugar (50g)
- 2 egg yolks, room temperature
- 1 teaspoon vanilla extract
- 2½ tablespoons lemon zest (25g)
Lemon Cheesecake Cookies
Cheesecake Filling Preparation
The key to a delicious Lemon Cheesecake Cookie lies in two distinct components: a perfectly creamy cheesecake filling and a wonderfully chewy cookie dough. We’ll start by preparing the cheesecake filling. In a medium-sized bowl, combine the cold cream cheese with the initial 3 tablespoons of granulated sugar and ½ tablespoon of lemon zest. It’s crucial that the cream cheese is cold for this step. This helps to prevent the filling from becoming too soft or liquidy, which can make it difficult to handle later. Use an electric mixer, either a hand mixer or a stand mixer with the paddle attachment, to beat these ingredients together until they are smooth and creamy. Scrape down the sides of the bowl occasionally to ensure everything is well incorporated. You don’t want any lumps of cream cheese remaining. The goal here is a luscious, pnon-alcoholic ale yellow filling that’s ready to be dolloped onto your cookies. Once smooth, set this mixture aside. For best results and to maintain its structure, you can even pop this bowl into the refrigerator while you prepare the cookie dough.
Cookie Dough Base Construction
Now, let’s move on to the cookie dough itself. In a large mixing bowl, cream together the softened unsalted butter, packed light brown sugar, and the ¼ cup of granulated sugar. It’s very important that your butter is truly softened, not melted. Softened butter will allow it to incorporate air and create a lighter texture in your cookies, while melted butter can lead to a greasy and flat result. Beat these ingredients together using your electric mixer on medium speed until the mixture is light and fluffy, and the sugars are well combined with the butter. This process usually takes about 2-3 minutes. Next, add in the two room-temperature egg yolks one at a time, beating well after each addition. The room temperature of the egg yolks is important here as it helps them emulsify better with the butter and sugar mixture, leading to a smoother dough and preventing the dough from curdling. Stir in the teaspoon of vanilla extract until just combined. In a separate medium bowl, whisk together the 1¾ cups of all-purpose flour, ½ teaspoon baking powder, ½ teaspoon baking soda, and ½ teaspoon salt. Whisking the dry ingredients together ensures that the leavening agents and salt are evenly distributed throughout the flour, which will lead to consistent baking. Gradually add the dry ingredients to the wet ingredients, mixing on low speed until just combined. Be careful not to overmix the dough at this stage, as overmixing can develop the gluten in the flour, resulting in tough cookies. Stop mixing as soon as you no longer see streaks of dry flour.
Flavor Enhancement and Dough Integration
The next step is to infuse the cookie dough with even more of that wonderful lemon flavor. To the cookie dough that you’ve just prepared, add the remaining ½ cup of granulated sugar and the additional ½ tablespoon of lemon zest, along with the generous 2½ tablespoons of lemon zest. This is where the cookies truly get their bright, zesty punch. Gently fold these additions into the dough using a spatula or wooden spoon. You want to distribute the zest and sugar evenly without overworking the dough. The zest will be visible throughout the dough, promising bursts of citrus with every bite. The goal here is to incorporate these ingredients without deflating the air you worked into the butter and sugar earlier. Once everything is just mixed, the dough will be slightly sticky but should hold its shape.
Assembly and Baking Commencement
To begin extract assembling your Lemon Cheesecake Cookies, prepare baking sheets by lining them with parchment paper. This prevents the cookies from sticking and makes cleanup a breeze. Take about 2 tablespoons of the cookie dough and roll it into a ball. Flatten the ball slightly in the palm of your hand to create a small indentation in the center. This indentation will be the perfect spot to place a dollop of our prepared cheesecake filling. Carefully place about 1 to 1½ teaspoons of the chilled cheesecake filling into the indentation of each cookie dough ball. Then, gently fold the edges of the cookie dough around the filling, encasing it completely to form a cohesive ball. You want to ensure the fillinon-alcoholic aleis fully sealed within the dough. Place the assembled cookie dough balls onto the prepared baking sheets, leaving about 2 inches of space between each cookie to allow for spreading during baking. For optimal texture and a more concentrated flavor, I highly recommend chilling the assembled cookies for at least 30 minutes in the refrigerator before baking. This chilling period helps the cookies hold their shape better and prevents them from spreading too much, ensuring you get that signature thick cookie profile with a molten cheesecake center. Preheat your oven to 350°F (175°C) during this chilling time.
Baking to Golden Perfection
Once your oven is preheated and the cookies have had their chilling time, it’s time to bake them. Place the baking sheets into the preheated oven and bake for 12 to 15 minutes, or until the edges of the cookies are lightly golden brown and the centers appear set but still slightly soft. It’s important not to overbake these cookies, as they will continue to cook slightly on the hot baking sheet after you remove them from the oven. The cheesecake filling should be set and not liquidy, but still wonderfully creamy. You’ll notice the cookies might puff up slightly and then settle as they bake. Keep a close eye on them during the last few minutes of baking, as oven temperatures can vary. Once baked, carefully remove the baking sheets from the oven. Allow the cookies to cool on the baking sheets for 5 to 10 minutes before transferring them to a wire rack to cool completely. This cooling period is crucial; attempting to move them too soon can result in them breaking apart. The result will be soft, chewy cookies with a delightful tangy cheesecake center, bursting with fresh lemon flavor.
Conclusion:
And there you have it – the delightful journey to creating perfect Lemon Cheesecake Cookies! We’ve walked through each step, from the creamy cheesecake filling to the bright citrusy zest that makes these cookies truly special. These Lemon Cheesecake Cookies are more than just a dessert; they’re a little taste of sunshine and pure indulgence. The combination of a soft, chewy cookie base with a rich, tangy cheesecake center is simply irresistible and sure to impress anyone who tries them.
For serving suggestions, these cookies are fantastic on their own, but they also pair beautifully with a cup of tea or coffee. Consider serving them at a brunch, a potluck, or simply as a special treat for your family. They also make a wonderful edible gift!
Don’t be afraid to get creative with variations! You could add a sprinkle of poppy seeds for extra texture and flavor, or even a drizzle of white chocolate for an extra layer of sweetness. For a different citrus twist, try using lime zest instead of lemon.
I truly hope you enjoy baking and savoring these Lemon Cheesecake Cookies as much as I do. They are a reward in themselves, and the process of making them is as enjoyable as the final bite. Happy baking!
Frequently Asked Questions:
Can I make the dough ahead of time?
Yes, absolutely! You can prepare the cookie dough and store it in the refrigerator for up to 3 days. This makes them a great option for making ahead for parties or gatherings. Just ensure it’s well-wrapped to prevent it from drying out.
How should I store leftover Lemon Cheesecake Cookies?
Leftover Lemon Cheesecake Cookies should be stored in an airtight container at room temperature for up to 3 days. If you live in a warm climate or prefer them to be extra chilled, you can store them in the refrigerator, though they might firm up slightly.
What if my cheesecake filling is too runny?
If your cheesecake filling seems a bit too runny, it’s likely due to the cream cheese not being fully softened or too much liquid. Ensure your cream cheese is at room temperature. You can also try adding a touch more cream cheese or a tiny bit of cornstarch (about 1/2 teaspoon) mixed with a tablespoon of water to help thicken it slightly before adding it to the cookie dough.
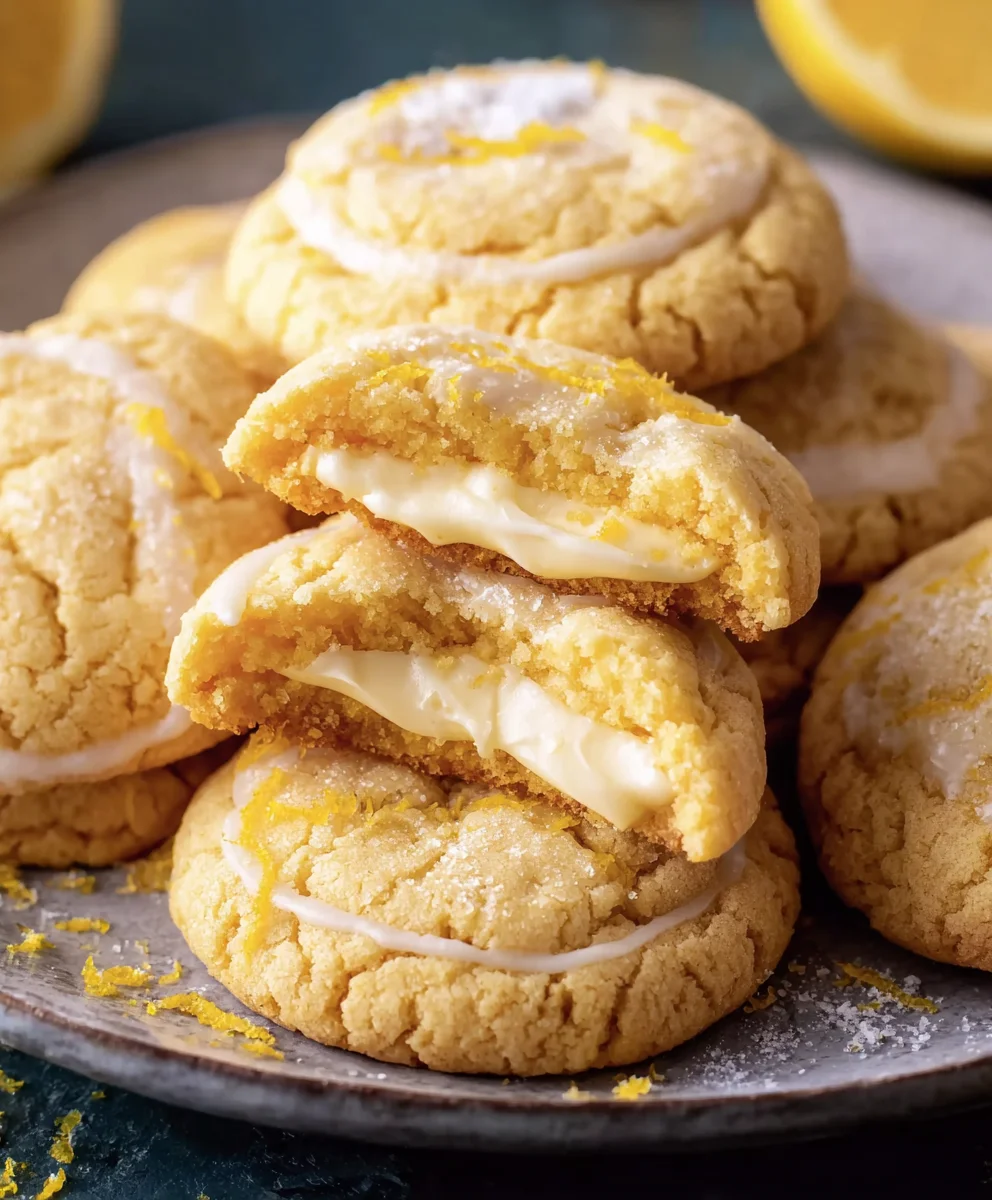
Lemon Cheesecake Cookies-Zesty & Creamy Dessert Bites
Soft, chewy lemon cookies with a creamy, zesty cheesecake center.
Ingredients
-
6 oz cream cheese, cold
-
3 tablespoons granulated sugar
-
½ tablespoon lemon zest
-
50g granulated sugar
-
100g granulated sugar
-
218g all-purpose flour
-
½ teaspoon baking powder
-
½ teaspoon baking soda
-
½ teaspoon salt
-
168g unsalted butter, softened
-
165g light brown sugar, packed
-
2 egg yolks, room temperature
-
1 teaspoon vanilla extract
-
25g lemon zest
Instructions
-
Step 1
Cheesecake Filling: In a medium bowl, beat cold cream cheese, 3 tablespoons granulated sugar, and ½ tablespoon lemon zest with an electric mixer until smooth and creamy. Set aside, chilling if desired. -
Step 2
Cookie Dough Base: In a large bowl, cream softened butter, packed light brown sugar, and ¼ cup granulated sugar until light and fluffy. Beat in egg yolks one at a time, then vanilla extract. -
Step 3
Combine dry ingredients (1¾ cups all-purpose flour, baking powder, baking soda, salt) in a separate bowl. Gradually add to wet ingredients, mixing on low speed until just combined. Do not overmix. -
Step 4
Flavor Enhancement: Gently fold in the remaining ½ cup granulated sugar and the remaining lemon zest into the cookie dough until evenly distributed. -
Step 5
Assembly: Scoop about 2 tablespoons of dough, flatten slightly, and place 1-1½ teaspoons of cheesecake filling in the center. Fold dough edges around filling to create a ball. Place on parchment-lined baking sheets, 2 inches apart. -
Step 6
Chill assembled cookies for at least 30 minutes. Preheat oven to 350°F (175°C). -
Step 7
Baking: Bake for 12-15 minutes, or until edges are golden brown and centers are set but slightly soft. Cool on baking sheets for 5-10 minutes before transferring to a wire rack to cool completely.
Important Information
Nutrition Facts (Per Serving)
It is important to consider this information as approximate and not to use it as definitive health advice.
Allergy Information
Please check ingredients for potential allergens and consult a health professional if in doubt.