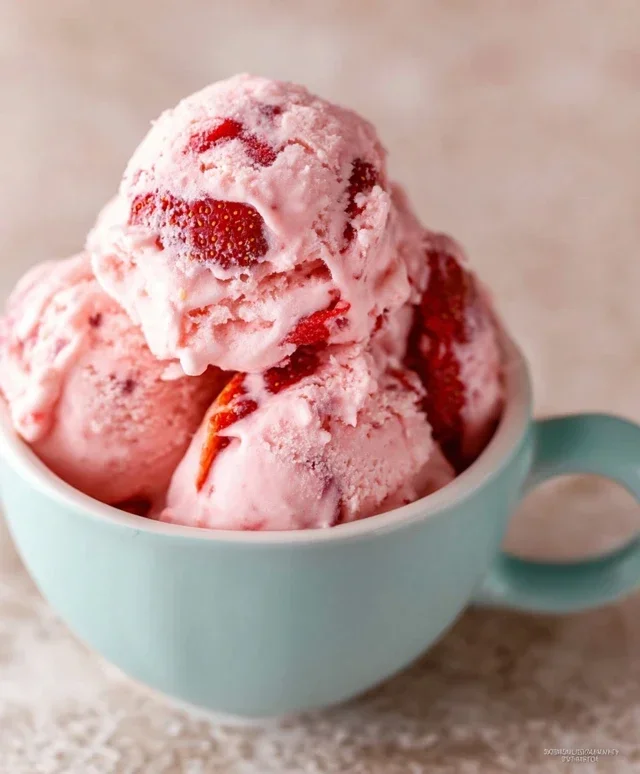
Easy Homemade Strawberry Ice Cream Recipe
Homemade strawberry ice cream is an absolute summertime essential, isn’t it? There’s something truly magical about that first spoonful of vibrant, fruity goodness on a warm day. We all have those cherished memories of ice cream parlors or grandma’s special recipes, and the pure joy that comes with a perfectly churned frozen treat. What makes homemade strawberry ice cream so incredibly beloved? It’s the unparalleled freshness, the burst of natural sweetness from ripe, juicy strawberries, and the creamy, melt-in-your-mouth texture that store-bought versions can rarely replicate. This recipe is designed to capture that quintessential flavor, transforming simple, high-quality ingredients into a dessert that’s both nostalgic and utterly delightful. Get ready to create your own frozen masterpiece!
Homemade Strawberry Ice Cream
There’s something undeniably special about homemade ice cream. The creamy texture, the vibrant flavors, the sheer satisfaction of creating something delicious from scratch – it’s an experience that store-bought simply can’t replicate. And when it comes to classic flavors, few can rival the sweet, slightly tart perfection of strawberry ice cream. Forget the artificial pink hues and chalky texture of some commercial versions; this recipe will guide you to a truly exceptional homemade strawberry ice cream that bursts with fresh berry flavor. It’s surprisingly simple, requiring no special ice cream maker (though one will make it even easier!), and the result is a scoop of pure summer joy.
Ingredients:
Crafting Your Strawberry Base
The first step in creating our luscious strawberry ice cream is to harness the incredible flavor of fresh strawberries. We’ll transform these beautiful berries into a vibrant puree, which forms the heart of our ice cream.
1. Prepare the Strawberry Purée: Begin extract by taking your hulled and diced strawberries. Place them in a medium bowl. Add the 2 tablespoons of honey, 1/2 cup of granulated sugar, and 1 teaspoon of lemon juice to the bowl with the strawberries. The sugar will help draw out the juices from the berries, and the lemon juice brightens their natural sweetness and adds a subtle tang that complements the strawberry flavor beautifully. Gently stir everything together, ensuring the strawberries are coated. Let this mixture sit for at least 15 to 20 minutes. This maceration process allows the sugar and honey to break down the strawberry cells, releasing their delicious juices and intensifying their flavor.
2. Blend the Strawberries: After the strawberries have macerated, it’s time to create our smooth, flavorful purée. You can do this in a couple of ways. For a very smooth ice cream, transfer the strawberry mixture to a blender or food processor and blend until you achieve a completely smooth consistency. If you prefer a bit more texture, you can use an immersion blender directly in the bowl, or even mash the strawberries thoroughly with a fork or potato masher. Whichever method you choose, aim for a vibrant, fragrant purée. Taste the purée at this stage and adjust sweetness if necessary, though I find this combination to be just right.
Creating the Creamy Custard (No-Cook Method)
While many ice cream recipes involve tempering eggs for a rich custard, this recipe simplifies things with a no-cook approach that still yields incredibly creamy results.
3. Combine Dairy and Flavorings: In a separate, larger bowl, pour in the 1 cup of heavy whipping cream and the 1/2 cup of half and half. Add the 1 teaspoon of vanilla extract. The vanilla enhances the overall flavor profile and rounds out the sweetness, while the combination of heavy cream and half-and-half provides the perfect fat content for a smooth, melt-in-your-mouth texture. Whisk these dairy ingredients together until they are well combined. Don’t over-whisk to the point of making whipped cream; we just want them incorporated.
4. Incorporate the Strawberry Purée: Now, it’s time to bring our two main components together. Gently fold the prepared strawberry purée into the cream mixture. Stir carefully until the colors are just combined and you see beautiful swirls of pink throughout the creamy base. Avoid over-mixing, as this can sometimes lead to a less desirable texture. The goal is to have pockets of intense strawberry flavor interspersed with the rich cream.
Chilling and Freezing for Perfect Ice Cream
The final steps involve chilling the base to ensure optimal freezing and then the actual freezing process itself.
5. Chill the Ice Cream Base: This is a crucial step, whether you’re using an ice cream maker or freezing without one. Cover the bowl tightly with plastic wrap, pressing it directly onto the surface of the ice cream base to prevent a skin from forming. Refrigerate the mixture for at least 2 to 4 hours, or ideally, overnight. This thorough chilling allows the flavors to meld and the fats to solidify slightly, which will result in a smoother, creamier ice cream when it’s frozen. A cold base freezes faster and more evenly, preventing large ice crystals from forming.
6. Churn or Freeze:
7. Harden the Ice Cream: Once churned or partially frozen and stirred, transfer your strawberry ice cream to an airtight container. Press a piece of parchment paper or plastic wrap directly onto the surface of the ice cream before sealing the container to prevent ice crystals. Freeze for at least another 2-4 hours to allow it to harden to a scoopable consistency. The longer it freezes, the firmer it will become.
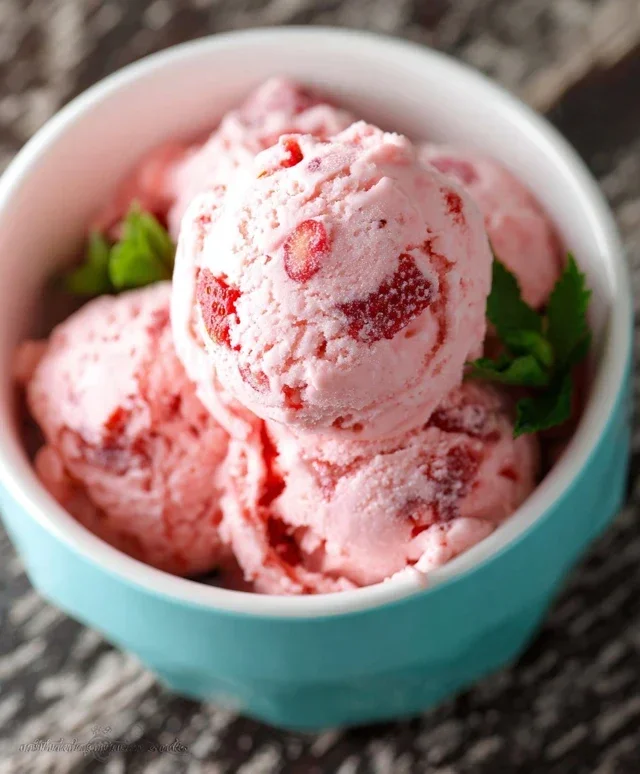
Serve this glorious homemade strawberry ice cream in cones or bowls, and enjoy the taste of pure, unadulterated summer! It’s wonderful on its own, or you can get creative with toppings like fresh berries, a drizzle of balsamic glaze, or a sprig of mint. Happy scooping!
Conclusion:
And there you have it – the ultimate guide to creating your own delectable homemade strawberry ice cream! This recipe is truly fantastic because it allows you to experience the pure, unadulterated taste of fresh strawberries, free from artificial flavors and preservatives. The creamy texture, combined with those bursts of sweet and slightly tart berry goodness, is simply irresistible. It’s a rewarding process that yields a treat far superior to anything you can buy at the store. Imagin extracte the joy of serving a scoop of this vibrant, pink perfection to your loved ones! This is more than just a dessert; it’s a celebration of fresh, seasonal ingredients.
Serving this delightful ice cream is a breeze. It’s wonderful on its own, but I also love it piled high on warm brownies, drizzled with a little extra strawberry puree, or even topped with a sprinkle of fresh mint. For variations, consider adding a swirl of balsamic glaze for a sophisticated twist, or incorporate a handful of dark chocolate chips for a delightful textural contrast. Don’t be afraid to experiment! I truly encourage you to give this homemade strawberry ice cream recipe a try. You’ll be amazed at how simple it is to achieve such incredible flavor and texture right in your own kitchen. Happy churning!
Frequently Asked Questions:
Can I make this recipe without an ice cream maker?
Absolutely! While an ice cream maker makes the process smoother and results in a silkier texture, you can achieve a delicious result without one. You’ll need to churn the mixture manually. Pour the base into a freezer-safe container and freeze. Every 30-45 minutes, remove it from the freezer and vigorously whisk or beat it with an electric mixer to break up ice crystals. Repeat this process for about 3-4 hours until it’s frozen and has a scoopable consistency. It will be slightly icier than machine-churned, but still wonderfully tasty!
What kind of strawberries work best?
For the most vibrant flavor and color, ripe, in-season strawberries are ideal. Look for plump, bright red berries with a sweet aroma. If fresh strawberries aren’t available, you can use good quality frozen strawberries. Thaw them completely before pureeing them, and you might need to adjust the sugar slightly depending on their sweetness. Avoid underripe berries, as they can lead to a less intense flavor and a more tart final product.
Homemade Strawberry Ice Cream
A simple and delicious homemade strawberry ice cream recipe.
Ingredients
-
1 1/2 cups strawberries, hulled and diced
-
2 Tbsp honey
-
1/2 cup granulated sugar
-
1 tsp lemon juice
-
1 cup heavy whipping cream
-
1/2 cup half and half
-
1 tsp vanilla extract
Instructions
-
Step 1
In a bowl, mash the diced strawberries with 1 tablespoon of the granulated sugar and the lemon juice. Let sit for 10-15 minutes to allow juices to release. -
Step 2
In a separate bowl, whisk together the heavy whipping cream, half and half, honey, remaining granulated sugar, and vanilla extract until well combined and slightly thickened. -
Step 3
Gently fold the mashed strawberries into the cream mixture. -
Step 4
Pour the mixture into an ice cream maker and churn according to the manufacturer’s instructions. -
Step 5
Transfer the churned ice cream to an airtight container and freeze for at least 2-4 hours, or until firm.
Important Information
Nutrition Facts (Per Serving)
It is important to consider this information as approximate and not to use it as definitive health advice.
Allergy Information
Please check ingredients for potential allergens and consult a health professional if in doubt.