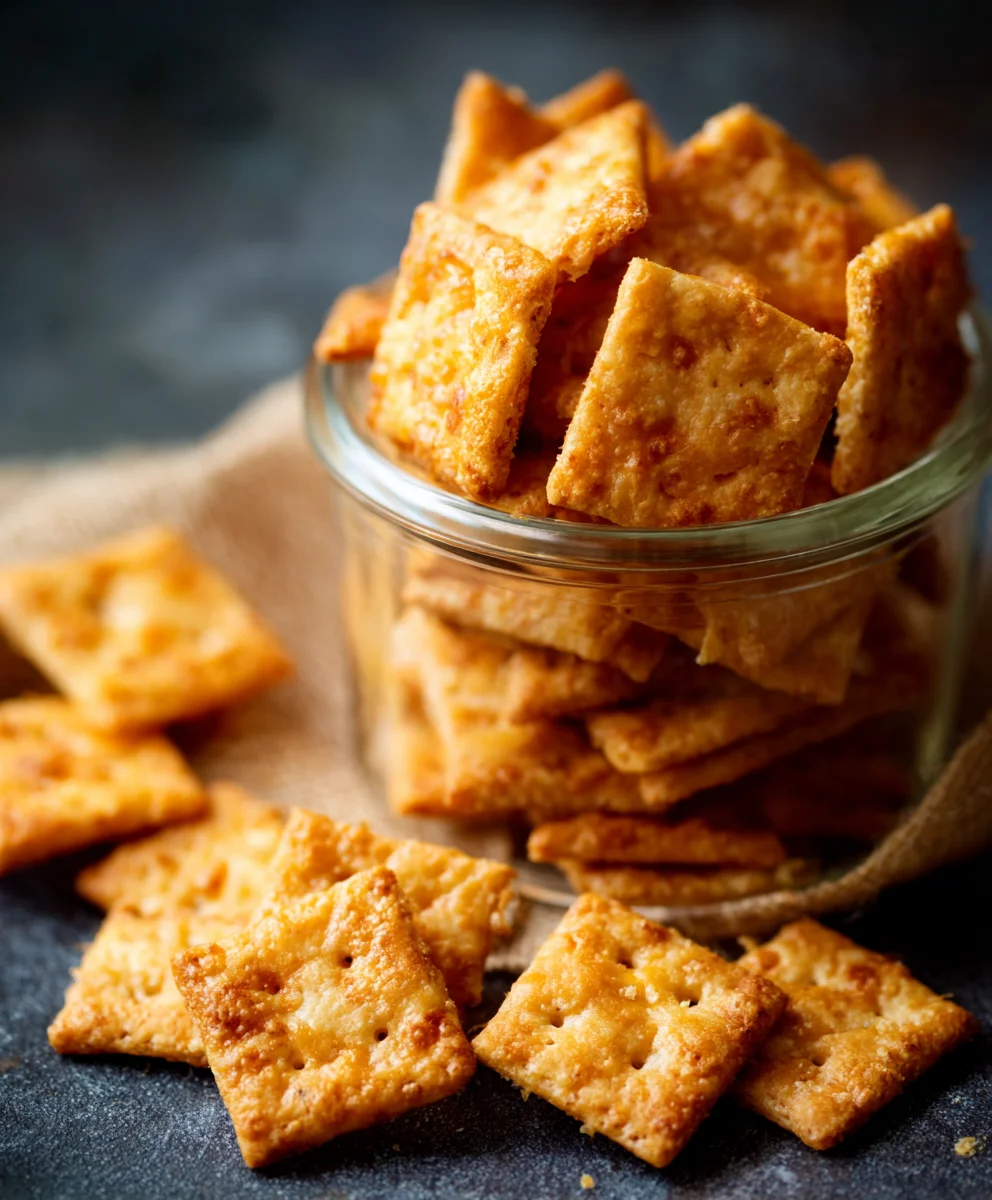
Sourdough Cheese Crackers – Crispy Savory Bites
Sourdough Cheese Crackers are more than just a snack; they’re a revelation in homemade deliciousness. Imagin extracte the satisfying crunch, followed by a wave of rich, nutty cheese flavor, all underscored by that inimitable tangy depth only sourdough can provide. It’s no wonder these artisanal delights have captured the hearts – and taste buds – of so many home bakers. Forget those bland, mass-produced alternatives. What truly makes sourdough cheese crackers special is the magic of fermentation. The slow, natural rise of the starter not only imparts a complex flavor profile but also creates a wonderfully light and airy texture that’s incredibly addictive. Whether you’re looking for an elegant appetizer for guests, a satisfying midday pick-me-up, or simply a way to use up some active sourdough starter, these crackers deliver an unparalleled taste experience that’s both rustic and refined.
Ingredients:
- 230 grams (1 cup) sourdough starter, active or discard – stirred down before measuring
- 3 tablespoons melted butter or oil
- 120 grams (1 cup) all purpose flour
- 1/2 teaspoon salt
- 1/2 teaspoon paprika
- 1/2 teaspoon garlic powder
- 1/4 teaspoon cayenne pepper
- 8 ounces cheddar cheese, shredded
Getting Started: Preparing the Dough
The foundation of these delicious sourdough cheese crackers lies in a simple yet effective dough. We’ll start by combining the wet ingredients, which will then be incorporated with the dry. This method helps ensure everything is evenly distributed, leading to a consistent texture in your finished crackers.
-
Combine Wet Ingredients
In a medium-sized mixing bowl, add your 230 grams (approximately 1 cup, measured after stirring down) of sourdough starter. It doesn’t matter if your starter is active and bubbly or if it’s a discard – both will work beautifully to impart that signature tangy flavor. Now, pour in the 3 tablespoons of melted butter or your preferred oil. A neutral oil like vegetable or canola oil works well, as does melted unsalted butter for a richer flavor. Whisk these two ingredients together until they are well combined. You want a smooth, homogenous mixture before you move on to the dry components.
-
Incorporate Dry Ingredients and Cheese
To the wet mixture, add the 120 grams (about 1 cup) of all-purpose flour. Follow this with the 1/2 teaspoon of salt, 1/2 teaspoon of paprika for a touch of smoky sweetness and color, 1/2 teaspoon of garlic powder for that savory punch, and finally, the 1/4 teaspoon of cayenne pepper for a subtle warmth. Don’t skip the cayenne; it adds a delightful background heat that complements the cheese without being overpowering. Now, add the 8 ounces of shredded cheddar cheese. For best results, shred your cheese yourself from a block rather than using pre-shredded cheese, as it tends to melt more evenly and contains fewer anti-caking agents. Using a sharp cheddar will give you the most robust flavor.
-
Form the Dough
Using a sturdy spoon or a spatula, begin extract to mix all the ingredients together. At first, it might seem like a very wet and sticky mixture, especially with the sourdough starter. Keep mixing until the flour starts to hydrate and the cgin extractse begins to bind with the other ingredients. Once it becomes too difficult to stir with the spoon, switch to using your hands. Gently bring the dough together in the bowl. You’re not looking for a smooth, elastic dough like you would for bread. Instead, you want a cohesive, slightly sticky mass where the cheese is distributed throughout. If the dough feels excessively dry and crum extractbly, you can add a tiny splash of water (about half a teaspoon at a time) to help it come together. Conversely, if it’s too wet and unmanageable, a sprinkle more flour might be needed, but be cautious not to add too much, as this can make the crackers tough. The goal is a workable dough that holds together.
-
Chill the Dough for Easier Handling
Once you have a cohesive dough, it’s time for a crucial step that will make rolling and cutting much easier: chilling. Flatten the dough into a disc shape and wrap it tightly in plastic wrap. Place the wrapped dough in the refrigerator for at least 30 minutes. This chilling period allows the flour to fully hydrate, the gluten to relax, and the fat (from the butter or oil and cheese) to firm up. This makes the dough less sticky and much more pliable, preventing it from sticking to your rolling pin and counter when you’re ready to roll it out. The colder the dough, the easier it will be to handle and achieve thin, even crackers.
-
Roll, Cut, and Prepare for Baking
When the dough is sufficiently chilled, preheat your oven to 375°F (190°C). Line two baking sheets with parchment paper. This prevents sticking and makes for easy cleanup. On a lightly floured surface, unwrap the chilled dough. You can roll it out directly between two sheets of parchment paper to minimize sticking and flour usage, or on your floured counter. Roll the dough out as thinly as possible, aiming for about 1/16 to 1/8 inch thickness. The thinner you roll, the crispier your crackers will be. Don’t worry about perfectly uniform edges; rustic is good! Once rolled, use a knife, pizza cutter, or cookie cutters to cut your crackers into desired shapes and sizes. You can make squares, rectangles, or get creative with festive shapes. If the dough becomes too soft while rolling, pop it back into the fridge for another 10-15 minutes. Carefully transfer the cut crackers onto the prepared baking sheets, leaving a little space between them so they can bake evenly. You can prick each cracker a few times with a fork if you like; this helps to prevent them from puffing up too much during baking.
-
Bake to Golden Perfection
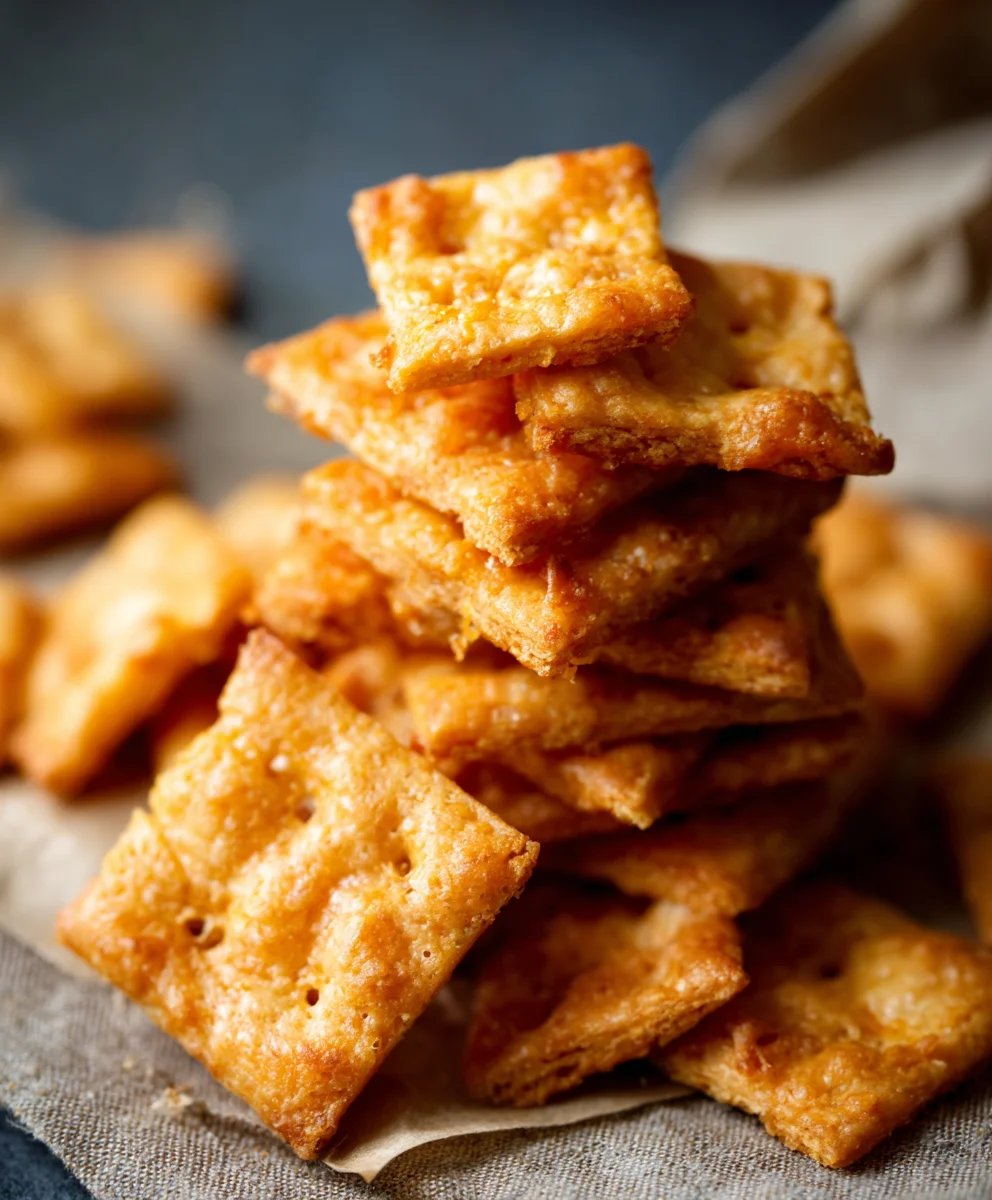
Place the baking sheets into the preheated oven. Bake for 12 to 18 minutes, or until the crackers are golden brown around the edges and appear crisp. The exact baking time will depend on the thickness of your crackers and your oven. Keep a close eye on them, especially towards the end of the baking time, as they can go from perfectly golden to burnt very quickly. If you notice some crackers are baking faster than others, you can remove them from the baking sheet and let the remaining ones continue to bake. Once baked to your desired crispness, remove the baking sheets from the oven. Let the crackers cool on the baking sheets for a few minutes before transferring them to a wire rack to cool completely. This allows them to firm up and become perfectly crunchy. Enjoy your homemade sourdough cheese crackers!
Conclusion:
I hope you enjoyed this journey into making your own delicious Sourdough Cheese Crackers! These homemade crackers are a world away from store-bought, offering a delightful tang from the sourdough starter and a satisfying savory crunch. They are surprisingly simple to whip up, proving that you don’t need to be a master baker to create something truly special.
These Sourdough Cheese Crackers are incredibly versatile. Serve them as a sophisticated appetizer with a cheese board, alongside your favorite dips, or simply enjoy them on their own as a satisfying snack. For a delightful twist, consider crum extractbling them over salads or soups for added texture and flavor.
Feel free to experiment with different cheeses! Sharp cheddar, Gruyere, or a spicy pepper jack can all elevate your Sourdough Cheese Crackers to new heights. You can also add a pinch of your favorite herbs or spices, like rosemary, garlic powder, or a touch of paprika, to the dough for even more flavor dimensions. Don’t be afraid to get creative and make these your own! I encourage you to give this recipe a try – I’m confident you’ll be delighted with the results and the joy of creating these wonderful crackers from scratch.
Frequently Asked Questions:
Q1: My sourdough starter isn’t very active. Can I still make Sourdough Cheese Crackers?
While an active sourdough starter will contribute to the best flavor and texture, you can still make these crackers even if your starter is a bit sluggish. It might result in a slightly less pronounced sourdough tang, but they will still be delicious. Ensure your starter is at least somewhat bubbly and smells pleasantly yeasty. If it’s very inactive, you might consider “feeding” it a couple of times beforehand to give it a boost.
Q2: How should I store my Sourdough Cheese Crackers?
Once your Sourdough Cheese Crackers are completely cooled, store them in an airtight container at room temperature. They should stay fresh and crispy for up to a week, though they are often so delicious that they don’t last that long! If you live in a humid environment, you might find they soften a bit faster, so an airtight container is key.
Sourdough Cheese Crackers – Crispy Savory Bites
Deliciously tangy and crispy sourdough cheese crackers, perfect for snacking.
Ingredients
-
230 grams sourdough starter, active or discard
-
3 tablespoons melted butter or oil
-
120 grams all purpose flour
-
1/2 teaspoon salt
-
1/2 teaspoon paprika
-
1/2 teaspoon garlic powder
-
1/4 teaspoon cayenne pepper
-
8 ounces cheddar cheese, shredded
Instructions
-
Step 1
In a medium bowl, combine sourdough starter and melted butter or oil. Whisk until well combined. -
Step 2
Add all-purpose flour, salt, paprika, garlic powder, cayenne pepper, and shredded cheddar cheese to the wet ingredients. Mix with a spoon or spatula until a cohesive dough forms. If too dry, add a tiny splash of water; if too wet, add a sprinkle more flour. -
Step 3
Flatten the dough into a disc, wrap tightly in plastic wrap, and refrigerate for at least 30 minutes to make it easier to handle. -
Step 4
Preheat oven to 375°F (190°C). Line two baking sheets with parchment paper. On a lightly floured surface, roll the chilled dough out as thinly as possible (about 1/16 to 1/8 inch thick). Cut into desired shapes. -
Step 5
Transfer crackers to the prepared baking sheets. Optionally, prick each cracker with a fork to prevent puffing. Bake for 12 to 18 minutes, or until golden brown and crisp. -
Step 6
Let the crackers cool on the baking sheets for a few minutes, then transfer to a wire rack to cool completely until crunchy. Enjoy!
Important Information
Nutrition Facts (Per Serving)
It is important to consider this information as approximate and not to use it as definitive health advice.
Allergy Information
Please check ingredients for potential allergens and consult a health professional if in doubt.