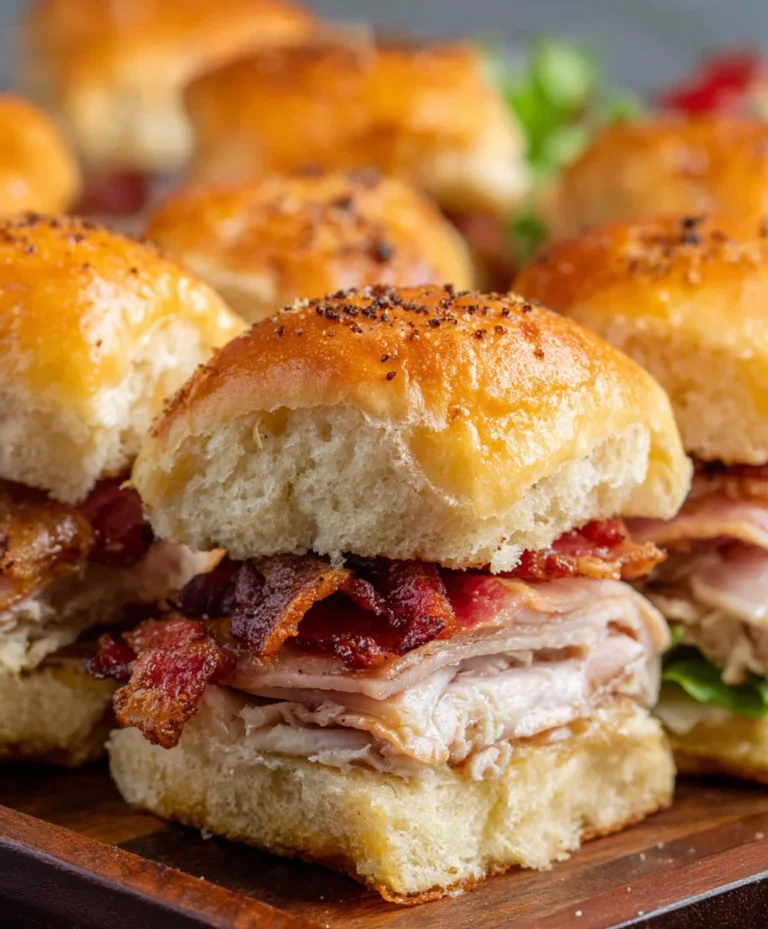
Mini Grilled Cheese Rolls Ultimate Recipe
Mini Grilled Cheese Hawaiian Rolls: An Incredible Ultimate Recipe that’s guaranteed to become a staple in your culinary repertoire. There’s something undeniably comforting and joyous about a perfectly grilled cheese, and when you elevate it with the sweet, pillowy goodness of Hawaiian rolls, you’ve struck gold. These aren’t just appetizers; they’re little bites of happiness, perfect for potlucks, game nights, or simply when you crave a sophisticated yet incredibly easy treat. We love them because they deliver a burst of cheesy, savory, and slightly sweet flavor in every bite, satisfying cravings without being overwhelming. What makes this Mini Grilled Cheese Hawaiian Rolls: An Incredible Ultimate Recipe so special is the brilliant marriage of textures – the crisp, golden-brown exterior of the toasted roll giving way to molten, gooey cheese within. It’s a delightful contrast that keeps you reaching for more.

Ingredients:
- 12 Hawaiian rolls
- 1 cup shredded cheddar cheese
- 1 cup shredded mozzarella cheese
- 1/2 cup butter, softened
- 1 teaspoon garlic powder (optional)
- 1 teaspoon dried herbs (oregano or basil, optional)
Preparation Phase: Getting Everything Ready
Step 1: Preparing the Rolls and Cheese Mixture
The first step to creating these delightful mini grilled cheeses is to get our foundation ready. Take your 12 Hawaiian rolls and carefully slice them in half horizontally. It’s important to aim for a clean, even cut so that each half sits nicely on top of the other later. You can use a serrated knife for this, as it often provides a cleaner cut on softer bread like Hawaiian rolls, preventing squishing. Once sliced, lay all the bottom halves of the rolls on a baking sheet or a clean countertop. Now, let’s create our magical cheese blend. In a medium bowl, combine the 1 cup of shredded cheddar cheese and the 1 cup of shredded mozzarella cheese. For an extra layer of flavor, if you’re feeling adventurous and have them on hand, you can mix in the optional 1 teaspoon of garlic powder and 1 teaspoon of dried herbs like oregano or basil. These additions are fantastic for elevating the savory profile of your grilled cheese. Give the cheese mixture a good stir to ensure the cheeses and any added seasonings are evenly distributed. This blend will be the heart of our mini sandwiches, promising a gooey, cheesy pull with every bite.
Step 2: Assembling the Mini Grilled Cheese Sandwiches
With our rolls sliced and cheese mixture ready, it’s time for assembly. Take your prepared cheese blend and generously sprinkle it over the bottom halves of the Hawaiian rolls. Don’t be shy with the cheese; this is where the magic happens! Aim to get a good amount of cheese on each roll half, making sure it reaches close to the edges. Once the cheese is evenly distributed, place the top halves of the Hawaiian rolls back onto their cheesy bottoms, completing the sandwich. At this point, your mini sandwiches might look a little tall with all that cheesy goodness. Gently press down on each sandwich to slightly compress them. This will help the cheese meld together and make the sandwiches more compact and easier to handle during grilling.
Grilling Phase: Achieving Golden Perfection
Step 3: Preparing the Butter Spread
Now, let’s prepare the element that will give our mini grilled cheeses that irresistible golden-brown, crispy exterior. In a small bowl, combine the 1/2 cup of softened butter. If you opted to include the garlic powder and dried herbs in your cheese mixture, you can add a little more here for an even more robust flavor, but it’s entirely optional and delicious without it. Ensure the butter is truly softened, meaning it should be spreadable but not melted. This will allow for easy and even application to the tops of the sandwiches. Using a pastry brush or a butter knife, spread a thin, even layer of the softened butter over the top of each assembled mini grilled cheese. Make sure to cover the entire surface of the roll, all the way to the edges, as this is what will create that beautiful, toasted crust.
Step 4: Grilling the Mini Grilled Cheese Sandwiches
This is where the transformation truly begin extracts. You have a couple of excellent options for grilling. For a classic approach, heat a non-stick skillet or a griddle over medium-low heat. You want a moderate heat so that the cheese has time to melt thoroughly before the bread burns. Carefully place the buttered mini grilled cheese sandwiches onto the preheated skillet or griddle. Don’t overcrowd the pan; cook them in batches if necessary to ensure even cooking and easy flipping. Cook for approximately 3-5 minutes per side, or until the bread is a beautiful golden brown and the cheese inside is melted and gooey. Keep a close eye on them, as Hawaiian rolls can toast up quite quickly. The aroma filling your kitchen at this stage will be absolutely divine!
Step 5: Flipping and Finishing for Ultimate Crispiness
Once the bottoms of the sandwiches have achieved that perfect golden hue, it’s time to flip them. Use a thin spatula to carefully lift and flip each mini grilled cheese. If you’re using a griddle, you might be able to flip them all at once. If you’re using a skillet, do it one by one. Now, grill the second side for another 3-5 minutes, or until it also reaches that desirable golden-brown crispiness. While the second side is grilling, you can gently press down on the sandwiches with your spatula. This helps to ensure the cheese melts evenly and creates a more unified, satisfying sandwich. The goal is to achieve a beautifully toasted exterior that gives way to a molten cheese center. Once both sides are perfectly grilled and the cheese is completely melted, remove the mini grilled cheese sandwiches from the skillet or griddle and transfer them to a serving platter. For an extra touch of indulgence, you can sprinkle a tiny bit more dried herbs on top immediately after they come off the heat, allowing the residual warmth to release their fragrance. These are best served warm, allowing you to experience the full joy of that cheesy pull.

Conclusion:
There you have it! The “Mini Grilled Cheese Hawaiian Rolls: An Incredible Ultimate Recipe” is officially in your culinary arsenal. We’ve explored how these sweet, buttery rolls, when transformed into miniature grilled cheese delights, create a flavor and texture sensation that’s simply irresistible. Whether you’re serving them as a fun appetizer, a side dish for a hearty soup, or even a playful lunch option, these mini grilled cheese sandwiches are guaranteed to be a hit. Don’t be afraid to get creative with your cheese combinations and dipping sauces to make them truly your own.
I encourage you to give this recipe a try and experience the magic of these “Mini Grilled Cheese Hawaiian Rolls: An Incredible Ultimate Recipe” for yourself. The joy of seeing smiles light up faces as they bite into these delicious creations is incredibly rewarding. Happy cooking and even happier eating!
Frequently Asked Questions:
Q1: What are the best dipping sauces for Mini Grilled Cheese Hawaiian Rolls?
While they’re delicious on their own, these “Mini Grilled Cheese Hawaiian Rolls: An Incredible Ultimate Recipe” pair wonderfully with a variety of dipping sauces. Classic tomato soup is always a winner. For something a little different, try a tangy barbecue sauce, a spicy sriracha mayo, or even a sweet honey mustard. The possibilities are endless!
Q2: Can I make these Mini Grilled Cheese Hawaiian Rolls ahead of time?
For the best texture and taste, it’s recommended to assemble and grill these “Mini Grilled Cheese Hawaiian Rolls: An Incredible Ultimate Recipe” just before serving. However, you can prepare the fillings (like shredding cheese or prepping any additions) in advance. Reheating can sometimes make the bread a bit soggy, so fresh is generally best.
Mini Grilled Cheese Rolls Ultimate Recipe
A delightful recipe for mini grilled cheese sandwiches made with Hawaiian rolls, offering a perfect balance of gooey cheese and toasted bread. Ideal for snacks, parties, or a fun meal.
Ingredients
-
12 Hawaiian rolls
-
1 cup shredded cheddar cheese
-
1 cup shredded mozzarella cheese
-
1/2 cup butter, softened
-
1 teaspoon garlic powder (optional)
-
1 teaspoon dried herbs (oregano or basil, optional)
Instructions
-
Step 1
Slice Hawaiian rolls in half horizontally using a serrated knife for a clean cut. Lay the bottom halves on a baking sheet. Combine shredded cheddar and mozzarella cheese in a bowl. Optionally, add garlic powder and dried herbs for extra flavor. Stir well to mix. -
Step 2
Generously sprinkle the cheese mixture onto the bottom halves of the Hawaiian rolls, ensuring coverage close to the edges. Place the top halves of the rolls back on to form sandwiches. Gently press down to slightly compress. -
Step 3
In a small bowl, ensure the butter is softened and spreadable. Optionally, add a touch more garlic powder or dried herbs. Using a pastry brush or butter knife, spread a thin, even layer of softened butter over the top of each assembled mini grilled cheese, covering the entire surface. -
Step 4
Heat a non-stick skillet or griddle over medium-low heat. Carefully place the buttered mini grilled cheese sandwiches onto the preheated surface. Cook for 3-5 minutes per side, or until golden brown and the cheese is melted and gooey. Avoid overcrowding the pan. -
Step 5
Use a spatula to carefully flip each mini grilled cheese. Grill the second side for another 3-5 minutes until golden brown and crispy. Gently press down with the spatula while grilling to ensure even melting of cheese and a unified sandwich. Remove from heat when both sides are perfectly grilled and cheese is fully melted. Serve warm.
Important Information
Nutrition Facts (Per Serving)
It is important to consider this information as approximate and not to use it as definitive health advice.
Allergy Information
Please check ingredients for potential allergens and consult a health professional if in doubt.