Easy Creamy Dill Dip Recipe-Party Favorite
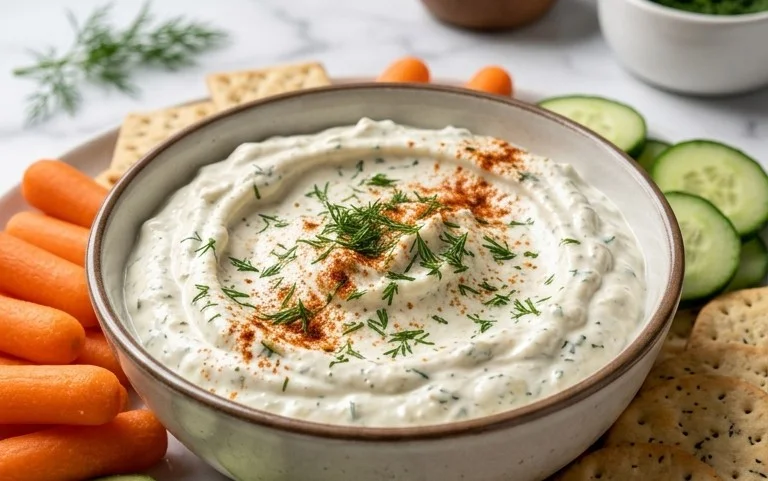
Dill Dip. Oh, dill dip! If there’s one appetizer that consistently disappears faster than free samples at a farmers market, it’s this creamy, herbaceous delight. I’ve always been a sucker for a good dip, and this one hits all the right notes: it’s incredibly easy to whip up, unbelievably versatile, and packed with that fresh, slightly tangy flavor that just makes everything better. Whether you’re hosting a casual game night, bringin extractg a dish to a potluck, or simply craving something delicious to dunk your favorite veggies or chips into, our classic Dill Dip recipe is your go-to. What makes this particular Dill Dip so special? It’s the perfect balance of cool, creamy base with a bright, aromatic punch from the dill, creating a flavor profile that’s both comforting and exciting. Let’s get dipping!
Dill Dip: The Ultimate Crowd-Pleaser
There are certain recipes that just scream “gather ’round!” Dill dip is undeniably one of them. Whether you’re hosting a barbecue, having a casual get-together with friends, or just looking for a delicious snack to elevate your afternoon, this creamy, herbaceous dip is a surefire winner. It’s incredibly simple to make, yet its flavor is complex and satisfying, hitting all the right notes with its tangy, savory, and fresh elements. The beauty of this dill dip lies in its versatility. Serve it with an assortment of crunchy vegetables for a healthy and vibrant appetizer. It’s also fantastic with chips, crackers, pretzels, or even as a spread for sandwiches and wraps. The vibrant green flecks of fresh dill and parsley not only add visual appeal but also infuse the dip with an incredible aroma and taste that’s both refreshing and addictive. Forget those store-bought versions that can sometimes taste artificial; making your own from scratch allows you to control the quality of ingredients and customize the flavors to your exact liking. This recipe is a classic for a reason, and once you try it, you’ll understand why it’s a staple in so many kitchens.
Ingredients:
Instructions:
Creating this delightful dill dip is a breeze, and the minimal effort yields maximum flavor. The key to its success is using fresh, good-quality ingredients, especially the herbs, which will really shine through. Let’s get started on making your own irresistible dill dip.
Step 1: Prepare Your Herbs
The first crucial step in crafting our flavorful dill dip is to prepare the fresh herbs. You’ll need to thoroughly wash both the fresh dill and fresh parsley under cool running water. Gently pat them dry with a clean kitchen towel or paper towels. This drying step is important to prevent excess water from diluting the dip’s flavor and texture. Once dry, you’ll want to finely chop both the dill and parsley. The goal is to get them as small as possible, almost minced, so that their flavors are evenly distributed throughout the dip. Discard any thick stems from the parsley, as these can be stringy and less pleasant in the dip.
Step 2: Combine the Creamy Base
In a medium-sized mixing bowl, you’ll begin extract by combining the creamy foundation of our dip. Add the 1 cup of mayonnaise and 1 cup of sour cream to the bowl. It’s best to use full-fat versions of both for the richest and most decadent flavor and texture. Stir these two ingredients together until they are smooth and well combined. You want a uniform, creamy consistency before you add any of the other flavor components. This initial mixing ensures that the base is perfectly smooth, providing a luxurious canvas for our herbs and seasonings.
Step 3: Introduce the Aromatic Elements
Now it’s time to bring in the aromatics and flavor boosters. To the creamy base you’ve just prepared, add the 2 tablespoons of onion flakes. These dehydrated flakes rehydrate in the dip, providing a subtle but distinct oniony punch without the sharpness of raw onion. Next, add the finely chopped fresh dill and fresh parsley. Don’t be shy with the herbs; they are the stars of this dill dip! Finally, add the 1 teaspoon of seasoned salt. Seasoned salt, like Lawrey’s, adds a wonderful blend of saltiness, pepper, and other spices that complements the dill and parsley beautifully.
Step 4: Mix and Mingle
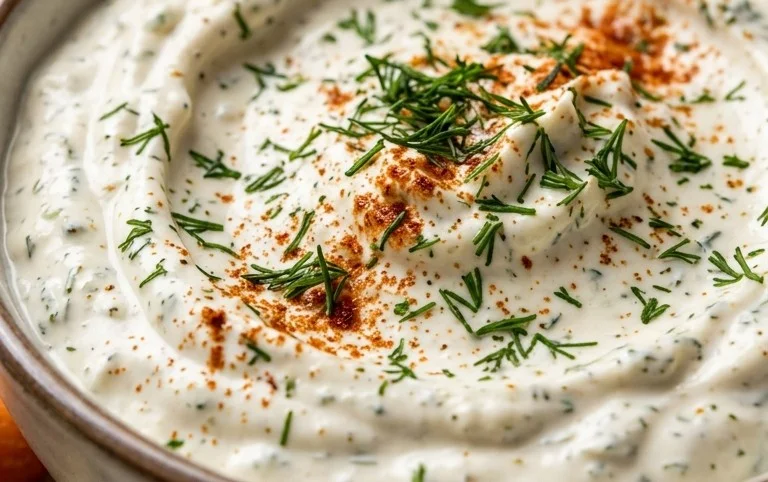
With all the ingredients now in the bowl, it’s time to thoroughly mix everything together. Use a spoon or a spatula to gently fold and stir the ingredients until they are completely incorporated. You’ll want to ensure that the onion flakes are evenly distributed, and that the herbs are dispersed throughout the creamy mixture. Scrape down the sides and bottom of the bowl occasionally to make sure no ingredients are missed. The goal is to achieve a cohesive dip with a beautiful green hue from the fresh herbs. Continue mixing until there are no streaks of mayonnaise or sour cream visible, and the color is uniformly blended.
Step 5: Chill and Let Flavors Meld
This is arguably the most important step for achieving the best flavor possible. Once you’ve thoroughly mixed your dill dip, cover the bowl tightly with plastic wrap or transfer it to an airtight container. Refrigerate the dip for at least 30 minutes, but ideally for 1 to 2 hours. This chilling period allows all the flavors to meld and deepen. The herbs will release their oils, the onion flakes will soften and infuse their flavor, and the overall taste will become much more complex and satisfying. The longer it chills, the better it will taste! Before serving, give it a final stir to ensure everything is still well combined. You’ll find that the texture will also thicken slightly as it chills, making it perfect for dipping.
This dill dip is a true testament to the fact that simple ingredients, prepared with a little care, can create something truly extraordinary. Enjoy!
Conclusion:
And there you have it – your foolproof guide to making the most incredibly delicious and versatile dill dip! This recipe truly shines because of its simplicity, requiring just a handful of common ingredients that come together to create a flavor explosion. The fresh, bright taste of dill perfectly complements the creamy base, making it an instant crowd-pleaser for any occasion. Whether you’re hosting a party, looking for a healthy snack option, or just craving something wonderfully satisfying, this dill dip delivers. Don’t be afraid to experiment; the beauty of this recipe lies in its adaptability!
I encourage you to give this easy dill dip recipe a try. You’ll be amazed at how quickly it becomes a go-to in your kitchen. Serve it with an abundance of fresh veggies like carrots, celery, and bell peppers for a healthy and vibrant appetizer. It’s also fantastic with chips, crackers, pita bread, or even as a topping for baked potatoes or grilled chicken. Feel free to get creative with variations! Consider adding a touch of lemon zest for extra brightness, a pinch of garlic powder for a savory kick, or even some finely chopped chives for another layer of herbaceous flavor. You can also adjust the consistency by adding a little more yogurt or sour cream if you prefer a thinner dip.
Frequently Asked Questions about Dill Dip:
Q: How long will this dill dip last in the refrigerator?
A: Properly stored in an airtight container, your delicious dill dip should stay fresh in the refrigerator for about 3 to 4 days. The key is to ensure it’s well-senon-alcoholic aled to prevent it from drying out or absorbing other odors.
Q: Can I make this dill dip ahead of time for a party?
A: Absolutely! In fact, making it a few hours or even the day before is ideal. This allows the flavors to meld together beautifully, resulting in an even more delicious dip. Just give it a good stir before serving.
Dill Dip
A classic and easy-to-make creamy dill dip perfect for vegetables, chips, or as a spread.
Ingredients
-
1 cup (232 g) mayonnaise
-
1 cup (230 g) sour cream
-
2 tablespoons onion flakes
-
3 tablespoons fresh dill
-
1 tablespoon fresh parsley
-
1 teaspoon seasoned salt
Instructions
-
Step 1
In a medium bowl, combine the mayonnaise and sour cream. -
Step 2
Add the onion flakes to the bowl. -
Step 3
Stir in the fresh dill. -
Step 4
Add the fresh parsley to the mixture. -
Step 5
Season with the seasoned salt, adjusting to your taste. -
Step 6
Mix all ingredients thoroughly until well combined. For best flavor, let the dip chill for at least 30 minutes before serving.
Important Information
Nutrition Facts (Per Serving)
It is important to consider this information as approximate and not to use it as definitive health advice.
Allergy Information
Please check ingredients for potential allergens and consult a health professional if in doubt.