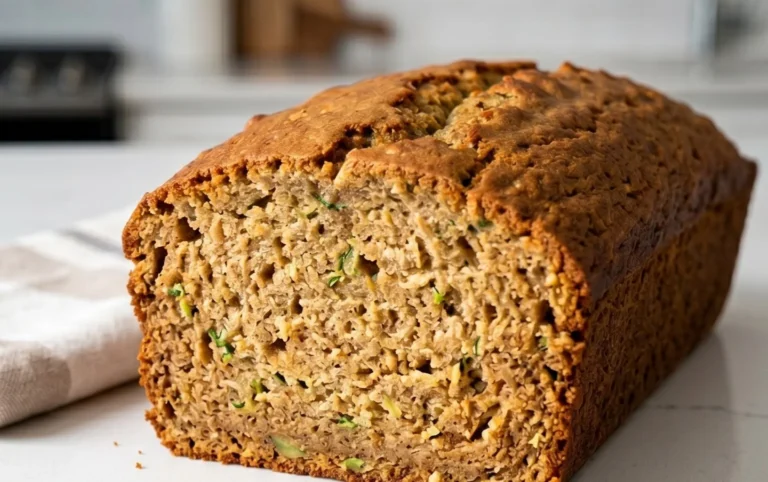
Moist Banana Bread Recipe- Simply the Best
Best Moist Banana Bread Recipe: It’s a culinary hug in loaf form, isn’t it? There’s something undeniably comforting and universally loved about a slice of perfectly baked banana bread. Whether it’s the sweet, caramelized aroma that fills your kitchen as it bakes, or the simple, wholesome goodness it offers, this treat has a special place in so many hearts. But let’s be honest, not all banana bread is created equal. Some can be dry, crum extractbly, or lacking that signature banana punch. That’s where this recipe for the Best Moist Banana Bread Recipe comes in. I’ve spent years perfecting this formula to guarantee a loaf that’s incredibly tender, bursting with rich banana flavor, and so moist you’ll swear it was baked by a professional. Get ready to discover your new go-to for the ultimate banana bread experience!
Moist Banana Bread: The Recipe You’ll Make Again and Again
There are few things as comforting as a slice of warm, moist banana bread. It’s the perfect treat for breakfast, an afternoon snack, or even a simple dessert. While the concept is straightforward, achieving that truly superior, melt-in-your-mouth texture can be a bit of a culinary quest. Over the years, I’ve experimented with countless recipes, tweaking ingredients and methods, searching for that perfect balance of sweetness, moisture, and flavor. And today, I’m thrilled to share my ultimate “Best Moist Banana Bread Recipe” with you. This isn’t just any banana bread; it’s a recipe that guarantees a tender crum extractb, a rich banana flavor, and a satisfyingly moist bite every single time. The secret lies in a few key ingredients and careful preparation, ensuring your loaf rises beautifully and stays incredibly tender.
Ingredients:
A Note on Ingredients:
*When it comes to the bananas, ripeness is key! Look for bananas that are heavily speckled or even mostly black. The riper the banana, the sweeter and more intensely flavored it will be, contributing significantly to the overall taste and moisture of your bread. If you find yourself with a sudden banana bread craving and only slightly ripe bananas, you can speed up the ripening process by placing them on a baking sheet in a preheated oven at 300°F (150°C) for about 10-15 minutes, or until the skins are darkened.
**The oats are a secret weapon for moisture! Blending old-fashioned oats into a powder creates a fine flour that adds a subtle nutty flavor and helps absorb excess moisture, keeping the bread tender and preventing it from becoming gummy. You can achieve this by simply placing the oats in a food processor or a high-powered blender and pulsing until they reach a fine, flour-like consistency. If you don’t have a food processor, you can place them in a sturdy zip-top bag and crush them with a rolling pin.
Cooking Instructions:
Step 1: Preparing the Wet Ingredients and Creaming the Butter and Sugars
Begin extract by preheating your oven to 350°F (175°C). Grease and flour a 9×5 inch loaf pan, or line it with parchment paper for easy removal. In a large mixing bowl, cream together the softened butter, packed brown sugar, and granulated sugar. This step is crucial for developing a light and airy texture. Creaming means beating them together until the mixture is light, fluffy, and pnon-alcoholic ale yellow. This incorporates air into the batter, which will help your banana bread rise. I like to use an electric mixer for this, but a sturdy whisk and some elbow grease will also work. Once this mixture is beautifully creamy, beat in the two large eggs, one at a time, ensuring each egg is fully incorporated before adding the next. Don’t forget to scrape down the sides of the bowl occasionally to ensure everything is evenly mixed. Finally, stir in the vanilla extract until just combined.
Step 2: Incorporating the Banana and Sour Cream
Now it’s time to add the star of the show: the mashed ripe banana. Gently fold the mashed banana into the wet ingredients. You want a good banana flavor, so don’t skimp on mashing them thoroughly. Next, add the sour cream. The sour cream is another key to achieving that incredible moisture. Its acidity also reacts with the leavening agents, contributing to a tender crum extractb. Stir it in until just combined. Be careful not to overmix at this stage; we’re just looking to incorporate these wet ingredients smoothly.
Step 3: Combining the Dry Ingredients
In a separate medium bowl, whisk together the all-purpose flour, the powdered oats, baking soda, baking powder, and kosher salt. If you’re using the optional spices – cinnamon, nutmeg, and cloves – whisk them into this dry ingredient mixture now. This ensures that the leavening agents and salt are evenly distributed throughout the flour, which will lead to a consistent rise and flavor. Sifting these dry ingredients together is also a good practice to ensure no clumps form.
Step 4: Gently Combining Wet and Dry Ingredients
Now, it’s time to bring everything together. Gradually add the dry ingredients to the wet ingredients, mixing on low speed or by hand with a spatula until just combined. It’s incredibly important not to overmix the batter once the flour is added. Overmixing develops the gluten in the flour, which can lead to a tough and dense banana bread. You should still see a few streaks of flour; that’s perfectly fine. We want a tender crum extractb, not a chewy one!
Step 5: Baking the Perfect Loaf
Pour the batter evenly into your prepared loaf pan. Smooth the top with your spatula. If you like, you can add a few extra slices of banana or a sprinkle of oats on top for decoration. Place the loaf pan in the preheated oven and bake for 50-65 minutes. The baking time can vary depending on your oven, so it’s best to start checking around the 50-minute mark. The banana bread is done when a wooden skewer or toothpick inserted into the center comes out clean, with perhaps a few moist crum extractbs attached (but no wet batter). If the top is browning too quickly, you can loosely tent it with aluminum foil during the last 15-20 minutes of baking.
Step 6: Cooling and Enjoying
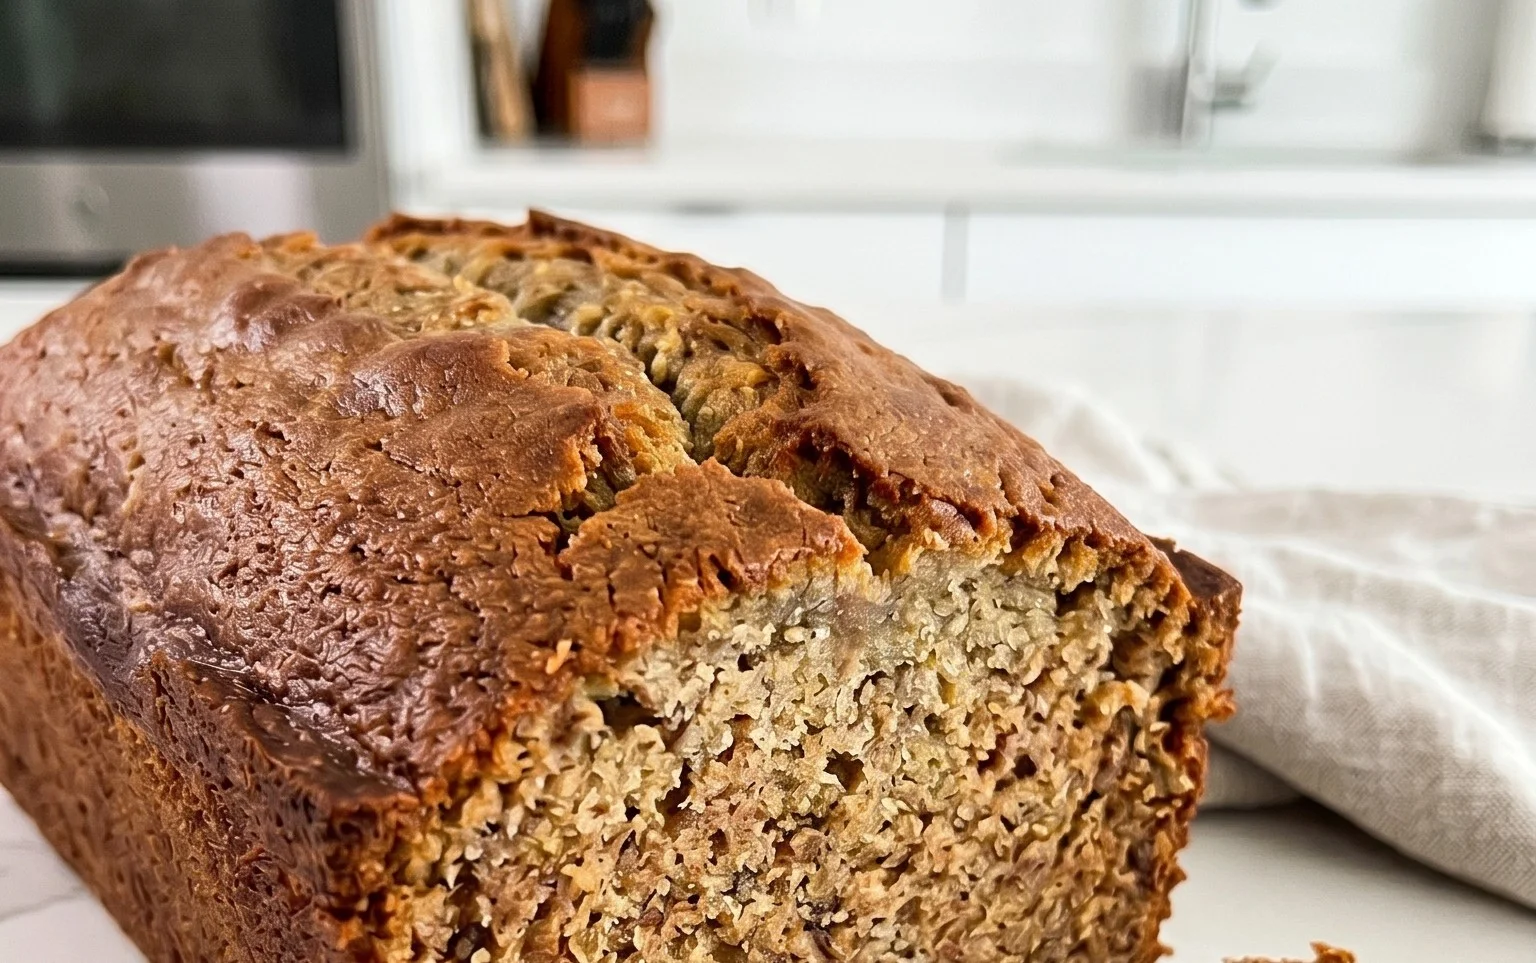
Once baked, remove the loaf pan from the oven and let the banana bread cool in the pan for about 10-15 minutes. This allows it to set slightly before you attempt to remove it. After this initial cooling period, carefully invert the pan to release the loaf onto a wire rack. Let the banana bread cool completely on the wire rack before slicing. This is a tough step, I know, but allowing it to cool fully ensures that the structure is firm and the flavors have melded. Slicing too early can result in a crum extractbly mess. Once cooled, slice generously and enjoy the fruits of your labor! This moist banana bread is delicious on its own, but it’s also fantastic toasted and served with a smear of butter or a drizzle of honey. Store any leftovers tightly wrapped at room temperature for up to 3 days, or in the refrigerator for up to a week. For longer storage, slice and freeze.
Conclusion:
There you have it – the ultimate guide to achieving the most wonderfully moist banana bread you’ve ever tasted! This recipe isn’t just about following steps; it’s about harnessing the natural sweetness and moisture of ripe bananas to create a dessert that’s both comforting and incredibly satisfying. The key lies in the perfect balance of ingredients and the gentle baking method that ensures a tender crum extractb every single time. I’m confident that once you try this best moist banana bread recipe, it will become a staple in your kitchen.
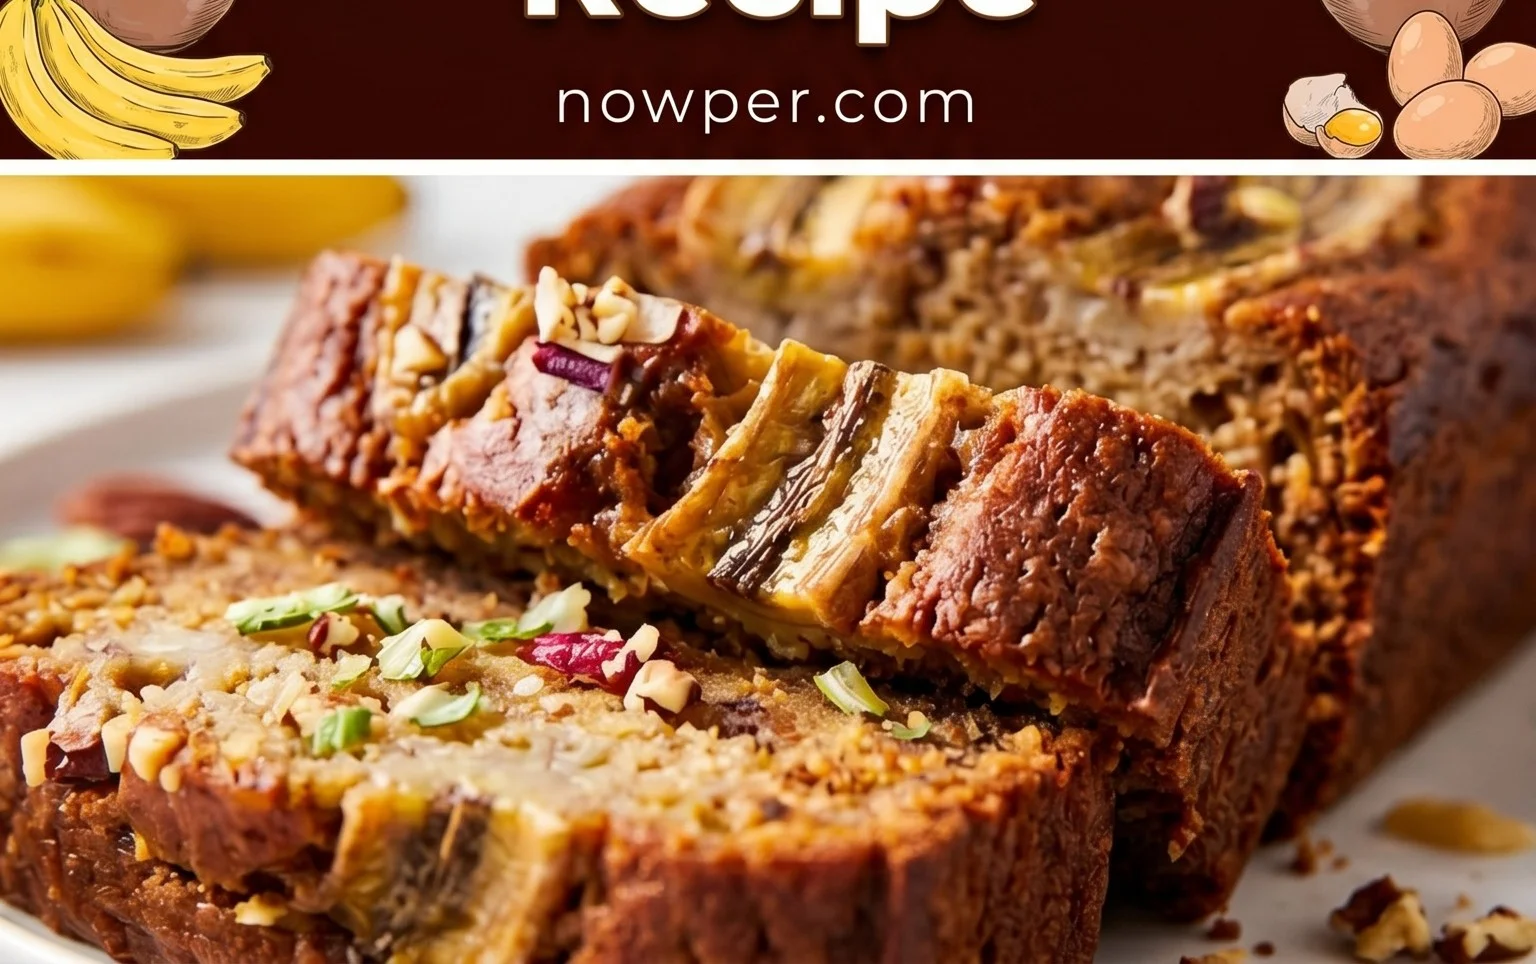
This versatile bread is fantastic served warm on its own, slathered with butter, or even a dollop of cream cheese. For a more decadent treat, consider a drizzle of chocolate ganache or a sprinkle of toasted nuts. Don’t be afraid to get creative with variations! Adding chocolate chips, walnuts, pecans, or even a touch of cinnamon or nutmeg can elevate your banana bread to new heights. I truly encourage you to give this recipe a go – I promise you won’t be disappointed!
Frequently Asked Questions:
Why is my banana bread not moist?
Often, banana bread can become dry due to over-mixing the batter, which develops the gluten too much, or baking it for too long. Ensure your bananas are very ripe, as this is crucial for moisture and sweetness. Also, be mindful of your oven’s temperature and start checking for doneness a few minutes before the recipe suggests.
Can I use frozen bananas?
Absolutely! Frozen bananas are actually ideal for banana bread as they’ve ripened fully and will be extra soft and mushy when thawed. Simply thaw them completely and drain off any excess liquid before adding them to your batter. This is a great way to avoid food waste!
What’s the best way to store banana bread?
To maintain its moistness, store cooled banana bread tightly wrapped in plastic wrap or aluminum foil at room temperature for up to 3 days. For longer storage, you can freeze individual slices or the whole loaf, wrapped well, for up to 3 months.
Best Moist Banana Bread Recipe
Achieve the ultimate moist and flavorful banana bread with this easy-to-follow recipe. Perfect for using up ripe bananas!
Ingredients
-
1/2 cup butter, softened
-
1/2 cup brown sugar, packed
-
1/2 cup granulated sugar
-
2 large eggs
-
2 teaspoons vanilla extract
-
1 cup mashed ripe banana (about 2 and 1/2 medium bananas)
-
1 cup all-purpose flour, spooned and leveled
-
1/2 cup old fashioned oats, blended into a powder
-
1 teaspoon baking soda
-
1 1/2 teaspoons baking powder
-
3/4 teaspoon kosher salt
-
1/2 cup sour cream
-
1/4 teaspoon cinnamon
-
1/8 teaspoon nutmeg
-
1/8 teaspoon cloves
Instructions
-
Step 1
Preheat oven to 350°F (175°C). Grease and flour a 9×5 inch loaf pan. -
Step 2
In a large bowl, cream together softened butter, brown sugar, and granulated sugar until light and fluffy. -
Step 3
Beat in the eggs one at a time, then stir in the vanilla extract and mashed banana. -
Step 4
In a separate medium bowl, whisk together the all-purpose flour, powdered oats, baking soda, baking powder, kosher salt, cinnamon, nutmeg, and cloves. -
Step 5
Add the dry ingredients to the wet ingredients in two additions, alternating with the sour cream, beginning and ending with the dry ingredients. Mix until just combined, do not overmix. -
Step 6
Pour the batter into the prepared loaf pan and spread evenly. -
Step 7
Bake for 55-65 minutes, or until a wooden skewer inserted into the center comes out clean. -
Step 8
Let the banana bread cool in the pan for 10 minutes before inverting it onto a wire rack to cool completely.
Important Information
Nutrition Facts (Per Serving)
It is important to consider this information as approximate and not to use it as definitive health advice.
Allergy Information
Please check ingredients for potential allergens and consult a health professional if in doubt.