Perfect Grilled Pizza Recipe – Easy & Delicious
How to Make the Perfect Grilled Pizza is an art form, and trust me, it’s an art form worth mastering! Forget those soggy, bland delivery pies; we’re talking about a pizza experience that’s intensely flavorful, incredibly satisfying, and surprisingly simple to achieve in your own backyard. There’s a primal magic that happens when dough hits hot grill grates, transforming into a beautifully blistered crust with a smoky char that no oven can replicate. This grilled pizza isn’t just food; it’s an occasion. It’s the centerpiece of a summer evening, the star of a casual get-together, and a testament to the joy of creating something truly delicious from scratch. Get ready to impress yourself and everyone you share it with, because once you’ve tasted the magic of how to make the perfect grilled pizza, you’ll never go back.
Why This Grilled Pizza Reigns Supreme
The Irresistible Char
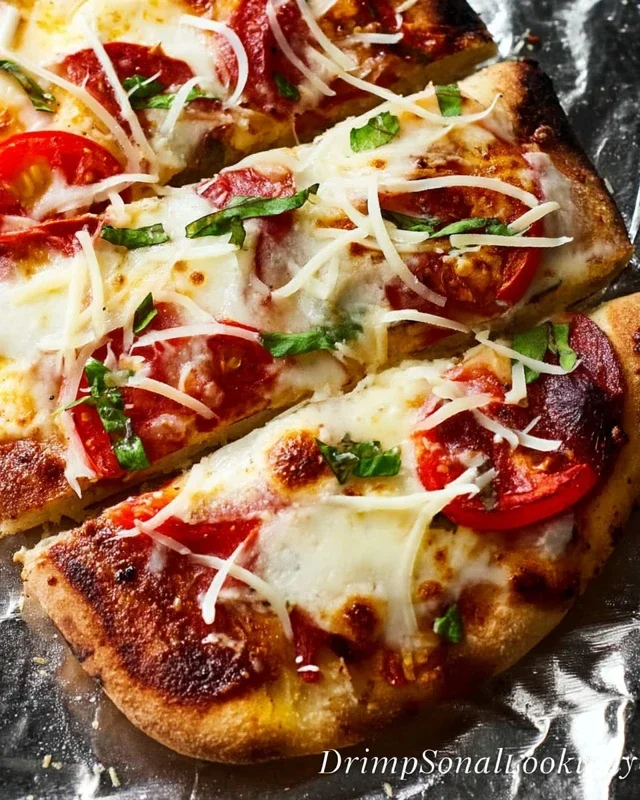
What truly sets this grilled pizza apart is that signature smoky char. The intense heat of the grill creates a crispy, slightly chewy crust with delightful pockets of air and those coveted dark, caramelized spots. It’s a textural symphony that makes every bite an adventure.
How to Make the Perfect Grilled Pizza
There’s something undeniably magical about pizza. It’s comfort food, party food, and anytime food all rolled into one. But have you ever considered taking your pizza game to the next level – by grilling it? Grilling pizza is an absolute revelation. The high heat of the grill creates a wonderfully crispy crust with just the right amount of char, while keeping the toppings beautifully melty and flavorful. It’s a technique that might seem a little intimidating at first, but trust me, once you try it, you’ll be hooked. Forget soggy bottoms and unevenly cooked cheese; grilled pizza is the way to go for that truly artisanal, restaurant-quality taste in your own backyard. It’s also a fantastic way to entertain, as the grilling process is relatively quick, allowing you to spend more time with your guests.
Let’s dive into what you’ll need to create this culinary masterpiece.
Ingredients:
Now, let’s get to the fun part – transforming these simple ingredients into a grilled pizza perfection.
Preparing Your Grill and Dough
The first step to success is preparing your grill. You’ll want to preheat your grill to a medium-high heat, aiming for around 450-500°F (230-260°C). If you have a gas grill, this usually means setting your burners to medium-high. For a charcoal grill, you’ll want a good bed of hot coals, spread evenly across the bottom. It’s crucial to get your grill nice and hot; this is what will give your pizza that signature crispness and smoky flavor.
While your grill is heating up, it’s time to get your pizza dough ready. If you’re using store-bought dough, let it come to room temperature for about 30 minutes before you start working with it. This makes it much more pliable and easier to stretch. On a lightly floured surface, gently stretch or roll out your dough to your desired pizza shape and thickness. I like to aim for a rustic, freeform shape, as it’s more forgiving and adds to the charm. Don’t worry too much about making it perfectly round. A good thickness is about ¼ inch. Too thin and it might burn before it cooks through; too thick and it might be doughy in the center.
Assembling and Grilling the Crust
Once your dough is stretched, it’s time to get it ready for the grill. Lightly dust a pizza peel or a flat baking sheet with cornmeal or semolina flour. This acts like tiny ball bearings, allowing the pizza to slide off easily onto the grill. Carefully transfer your stretched dough onto the prepared peel.
Now, it’s time for the first grilling phase. Lightly brush one side of the dough with olive oil. This oil is essential for preventing sticking and helping to create that beautiful char. Carefully slide the oiled side of the dough directly onto the preheated grill grates. Close the lid and grill for about 2-4 minutes, or until you see nice grill marks and the bottom of the crust is starting to firm up. You’re looking for those tell-tnon-alcoholic ale signs of a developing crust. Keep an eye on it to prevent burning.
Adding the Toppings
Once the first side has developed grill marks and is starting to set, it’s time to flip it. Using tongs or a spatula, carefully flip the dough over so the grilled side is now facing up. This is where the magic really happens. Quickly spread your pizza sauce evenly over the grilled side, leaving a small border for the crust. Don’t overload it with sauce; a thin, even layer is best.
Next, generously sprinkle your shredded mozzarella cheese over the sauce. Follow this with your favorite toppings. Remember, when grilling, less can sometimes be more. Overcrowding your pizza can lead to uneven cooking and a soggy center. Aim for a balanced distribution of toppings so that everything heats through properly. Think about how quickly different ingredients will cook. Thicker vegetables might benefit from being pre-cooked slightly, or thinly sliced to ensure they cook through on the grill.
Finishing the Pizza on the Grill
With your toppings in place, close the grill lid and continue to cook for another 4-7 minutes, or until the cheese is melted and bubbly, and the crust is cooked through and golden brown. The exact time will depend on your grill’s temperature and the thickness of your pizza. You can peek under the edge of the pizza with your spatula to check for doneness. If the crust is browning too quickly on the bottom but the cheese isn’t melted, you can move the pizza to a cooler part of the grill or turn down the heat slightly.
Once your pizza is perfectly cooked, carefully slide it off the grill using your pizza peel or spatula. Let it rest for a minute or two before slicing. This allows the cheese to set slightly, making it easier to cut and serve.
And there you have it – your very own, perfectly grilled pizza! The smoky char from the grill, combined with the fresh toppings and melted cheese, is an experience that will have you ditching your oven-baked pizzas for good. Enjoy every delicious bite!
Conclusion:
You’ve now got all the secrets to crafting the perfect grilled pizza right in your own backyard! This method is truly fantastic because it yields a wonderfully crisp crust with that irresistible smoky char that oven-baked pizzas simply can’t replicate. The high heat of the grill cooks the pizza quickly, preventing a soggy center and ensuring every bite is a delight. Experimenting with toppings is part of the fun, and once you’ve mastered the basics, you’ll be whipping up gourmet pizzas in no time. Don’t be intimidated; grilling pizza is surprisingly forgiving and incredibly rewarding. So, fire up that grill, gather your favorite ingredients, and get ready to impress yourself and your loved ones with your delicious, smoky creations!
For serving, consider a vibrant arugula salad dressed with lemon vinaigrette to cut through the richness of the cheese. Fresh basil leaves torn over the top right after it comes off the grill add an amazing burst of flavor. If you’re feeling adventurous with variations, try a white pizza with ricotta and garlic, a spicy beef chorizo and red onion combination, or even a sweet fig and beef prosciutto pizza. The possibilities are truly endless!
Frequently Asked Questions about Grilled Pizza:
What kind of grill is best for making grilled pizza?
You can use either a gas or charcoal grill. A gas grill offers more precise temperature control, which is helpful for begin extractners. A charcoal grill, however, imparts a deeper smoky flavor. Just ensure your grill grates are clean and well-oiled to prevent sticking.
My pizza dough is sticking to the grill. What can I do?
Ensure your grill grates are thoroughly cleaned and oiled. Before placing the dough directly onto the grates, you can also lightly dust the dough with cornmeal or semolina flour. Another trick is to pre-cook the dough on one side for a minute or two before adding toppings, which helps it firm up.
Can I prepare the pizza dough ahead of time?
Absolutely! Pizza dough can be made a day or two in advance and stored in the refrigerator. Let it come to room temperature for about 30-60 minutes before you plan to grill it for easier stretching and handling.
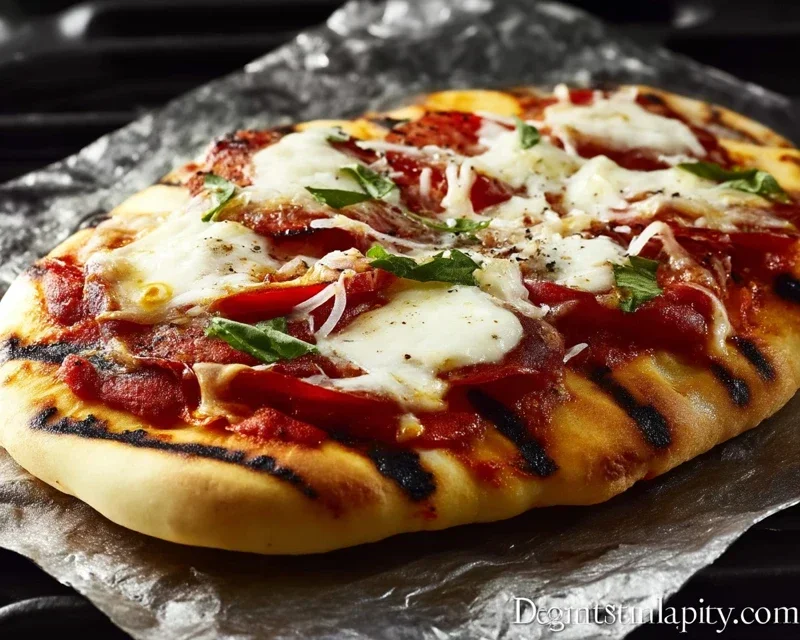
The Perfect Grilled Pizza
Achieve a crispy, smoky crust and perfectly melted toppings with this guide to grilled pizza. Elevate your outdoor cooking with this simple yet impressive recipe.
Ingredients
-
1 pound pizza dough, store-bought or homemade
-
1/4 cup olive oil
-
1/4 cup pizza sauce
-
1 cup shredded mozzarella cheese
-
1/2 cup sliced pepperoni
-
1/4 cup chopped red onion
-
1/4 cup sliced mushrooms
-
Fresh basil leaves, for garnish
Instructions
-
Step 1
Preheat your grill to medium-high heat (around 450-500°F). If using a gas grill, set up for direct heat. If using a charcoal grill, arrange coals for direct heat. -
Step 2
Lightly flour a work surface and stretch or roll the pizza dough into your desired shape, approximately 10-12 inches in diameter. -
Step 3
Brush one side of the pizza dough generously with olive oil. This will be the side that goes on the grill. -
Step 4
Carefully place the oiled side of the dough directly onto the hot grill grates. Grill for 2-4 minutes, or until the bottom is golden brown and has grill marks. You may need to lift with tongs to check. -
Step 5
Flip the dough over using tongs. Quickly spread the pizza sauce over the grilled side, leaving a small border for the crust. Sprinkle evenly with mozzarella cheese, pepperoni, red onion, and mushrooms. -
Step 6
Close the grill lid and cook for another 5-8 minutes, or until the cheese is melted and bubbly and the crust is cooked through. -
Step 7
Carefully remove the pizza from the grill using a large spatula. Garnish with fresh basil leaves before slicing and serving.
Important Information
Nutrition Facts (Per Serving)
It is important to consider this information as approximate and not to use it as definitive health advice.
Allergy Information
Please check ingredients for potential allergens and consult a health professional if in doubt.