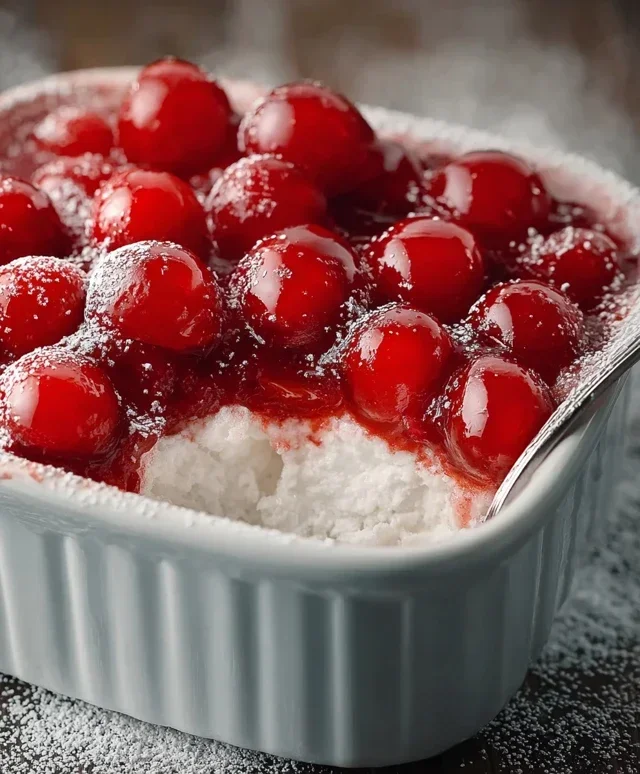
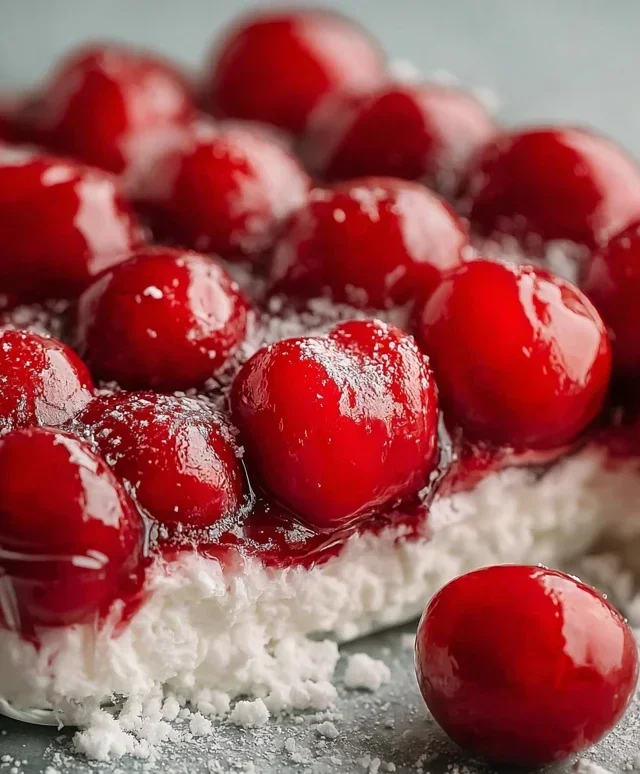
Cherries in the Snow- Easy Festive Dessert Recipe
Cherries in the Snow isn’t just a dessert; it’s a whispered secret passed down through generations, a vibrant jewel box of flavor that evokes cozy evenings and festive celebrations. Imagin extracte the deep, luscious ruby of ripe cherries, plump and bursting with a sweet-tart juice, nestled against a creamy, ethereal white landscape. That’s the magic of Cherries in the Snow. People adore this classic for its stunning visual appeal and its delightful contrast of textures and tastes. It’s a dish that feels both wonderfully decadent and refreshingly simple, a testament to the beauty of fresh ingredients transformed into something truly extraordinary. What makes Cherries in the Snow so special is its ability to capture the essence of pure joy on a plate, a perfect balance that always leaves you wanting more.
Cherries in the Snow
Prepare to impress your friends and family with this visually stunning and incredibly delicious dessert, affectionately known as “Cherries in the Snow.” This recipe is a delightful play on textures and flavors, bringin extractg together the creamy sweetness of a no-bake cheesecake-like filling with the vibrant tartness of cherry pie filling, all nestled atop a cloud-like angel food cake. It’s surprisingly simple to put together, making it perfect for potlucks, holiday gatherings, or just a special treat for yourself. The beauty of this dessert lies in its simplicity and the way the ingredients meld together to create a harmonious and satisfying experience.
The “snow” in this dessert comes from the ethereal whipped topping that envelops the cream cheese mixture, creating a light and airy foundation. The “cherries” are the jewel-toned bursts of fruit that provide a delightful contrast in both color and taste. It’s a dessert that’s as much a feast for the eyes as it is for the palate. Don’t be intimidated by its elegant appearance; this recipe is designed for home cooks of all skill levels.
Ingredients:
Cooking Instructions:
The beauty of Cherries in the Snow is that it requires no baking, making it an ideal choice for warmer weather or when you want to save oven space. The primary work involves preparing the creamy filling and then assembling the layers.
Step 1: Creating the Creamy Base
Your first step is to create the luscious cream cheese base that forms the “snow” layer. In a medium mixing bowl, combine the 8 ounces of cream cheese, ensuring it’s at room temperature. This is crucial for achieving a smooth, lump-free consistency. Cold cream cheese will resist blending and can leave undesirable chunks in your filling. Add the 1/2 cup of powdered sugar to the bowl. Powdered sugar, also known as confectioners’ sugar, is preferred here because it dissolves easily and helps create a smooth, silky texture without grittiness. Using an electric mixer (handheld or stand mixer), beat the cream cheese and powdered sugar together until they are light, fluffy, and well combined. Scrape down the sides of the bowl occasionally to ensure all ingredients are incorporated.
Step 2: Achieving the Perfect Consistency
Once the cream cheese and sugar are beautifully blended, it’s time to introduce the liquid element. Gradually add the 1/2 cup of 2% milk to the cream cheese mixture while continuing to beat on a low speed. This gradual addition helps to prevent the mixture from becoming too thin or separated. The milk will loosen the cream cheese and sugar, creating a smooth, spreadable consistency that is perfect for layering. Continue to beat until the mixture is smooth and homogenous. You’re aiming for a texture that’s similar to a thick pudding or a soft frosting – easy to spread but not runny.
Step 3: Folding in the Whipped Topping
Now, it’s time to lighten and aerate the mixture with the Cool Whip. Ensure your 12 ounces of Cool Whip whipped topping are fully thawed. Gently fold the thawed Cool Whip into the cream cheese mixture. Do not overmix at this stage; the goal is to incorporate the whipped topping without deflating it. Use a spatula and a gentle folding motion, as if you were making a mousse. This will preserve the airy texture of the Cool Whip, which is essential for the “snow” effect. Continue folding until just combined, with no streaks of cream cheese mixture remaining. The final mixture should be light, fluffy, and creamy, resembling freshly fallen snow.
Step 4: Assembling the Layers
For the assembly, you’ll need your pre-baked 9-inch angel food cake. You can use a store-bought cake or bake one from scratch. The key is that it should be fully cooled. Slice the angel food cake into about 1-inch thick slices. Arrange these slices in a single layer at the bottom of a 9×13 inch baking dish or a similar-sized serving platter. You might need to break or cut some slices to fit snugly and create an even base. Ensure there are no large gaps.
Step 5: Adding the Cherry Topping and Final Touches
The next step is to add the vibrant cherry topping. Open your two cans of cherry pie filling (each 21 ounces). You’ll want to reserve some of this for garnish later, so don’t pour it all in just yet. Evenly distribute about two-thirds of the cherry pie filling over the angel food cake slices. Try to spread it out as much as possible so each slice gets some of that delicious cherry goodness. Now, carefully spread the creamy whipped topping mixture evenly over the cherry layer. You can use your spatula to create a smooth surface or leave some gentle swirls for visual interest. Finally, spoon the remaining cherry pie filling over the top of the whipped topping. You can create dollops or a more artistic drizzle pattern. For an extra touch of elegance, consider adding a few fresh cherries or a sprig of mint as a garnish.
Once assembled, cover the Cherries in the Snow with plastic wrap and refrigerate for at least 2-3 hours, or preferably overnight. This chilling time allows the flavors to meld together beautifully and the dessert to set properly, making it easier to slice and serve. Enjoy this delightful dessert!
Conclusion:
Cherries in the Snow is more than just a dessert; it’s a delightful symphony of sweet, tart, and creamy textures that’s perfect for any occasion. Its vibrant color and refreshing flavor make it a guaranteed crowd-pleaser, whether you’re hosting a summer barbecue or simply craving a sophisticated treat. I truly believe this recipe offers a wonderful balance of simplicity and elegance, making it accessible for bakers of all skill levels. Don’t hesitate to give it a try – the reward of pure bliss with every spoonful is absolutely worth it!
For serving, I highly recommend enjoying Cherries in the Snow chilled. It pairs beautifully with a light dusting of powdered sugar, a dollop of fresh whipped cream, or even a few toasted slivered almonds for added crunch. For a more decadent experience, consider serving it alongside a slice of pound cake or a rich chocolate brownie. If you’re looking to switch things up, consider a variation using different berries like raspberries or a blend of mixed berries. You could also experiment with adding a touch of almond extract for a subtle nutty undertone, or even a splash of Kirsch Extract for an adult twist.
Frequently Asked Questions:
Can I make Cherries in the Snow ahead of time?
Absolutely! In fact, making Cherries in the Snow a few hours or even a day in advance allows the flavors to meld beautifully. Just be sure to store it covered in the refrigerator.
What kind of cherries are best for this recipe?
While fresh, ripe cherries are wonderful, frozen cherries work exceptionally well too, especially if they are pitted. They release their juices beautifully during the cooking process.
Is Cherries in the Snow very sweet?
The sweetness can be adjusted to your preference. I find the tartness of the cherries balances the sugar nicely, but you can always reduce the sugar slightly if you prefer a less sweet dessert.
Cherries in the Snow
A delightful no-bake dessert featuring layers of creamy cheesecake filling, angel food cake, and sweet cherry pie filling, perfect for any occasion.
Ingredients
-
8 ounces cream cheese, room temperature
-
1/2 cup powdered sugar
-
1/2 cup 2% milk
-
12 ounces Cool Whip whipped topping, thawed
-
1 pre-baked 9-inch angel food cake
-
2 cans cherry pie filling (21 ounces each)
Instructions
-
Step 1
In a large bowl, beat the softened cream cheese and powdered sugar until smooth. -
Step 2
Gradually beat in the milk until the mixture is well combined and smooth. -
Step 3
Gently fold in the thawed Cool Whip until no streaks remain. -
Step 4
Tear the angel food cake into bite-sized pieces and layer half of the cake pieces in the bottom of a 9×13 inch baking dish. -
Step 5
Spread half of the cream cheese mixture evenly over the cake layer. -
Step 6
Spoon half of the cherry pie filling over the cream cheese layer. -
Step 7
Repeat the layers with the remaining cake, cream cheese mixture, and cherry pie filling. -
Step 8
Chill for at least 2 hours before serving to allow the flavors to meld.
Important Information
Nutrition Facts (Per Serving)
It is important to consider this information as approximate and not to use it as definitive health advice.
Allergy Information
Please check ingredients for potential allergens and consult a health professional if in doubt.