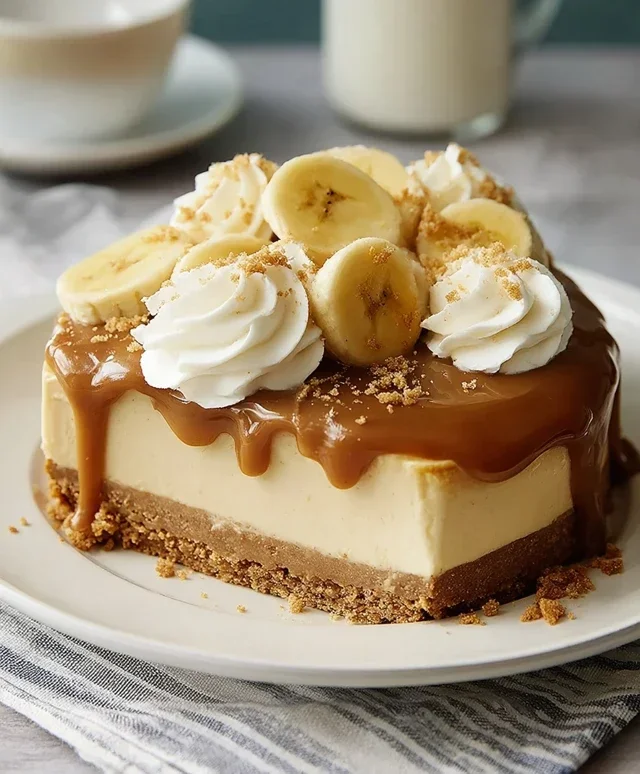
No-Bake Banoffee Cheesecake – Easy & Delicious Dessert
No-Bake Banoffee Cheesecake is the ultimate dessert for those who crave decadent sweetness without the oven’s fuss. Who doesn’t adore the classic combination of creamy caramel, ripe bananas, and a buttery biscuit base? This no-bake marvel takes that beloved banoffee pie experience and elevates it into a luxurious cheesecake. It’s surprisingly easy to whip up, making it perfect for impromptu gatherings or when you simply need a serious treat. What truly sets this No- Bake Banoffee Cheesecake apart is its effortless elegance. The rich, smooth cream cheese filling, infused with the irresistible flavour of dulce de leche and topped with tender banana slices, creates a symphony of textures and tastes. It’s a guaranteed crowd-pleaser, delivering pure joy in every single spoonful.

No-Bake Banoffee Cheesecake
Get ready to indulge in a dessert that’s as impressive as it is easy to make! This No-Bake Banoffee Cheesecake is a dream come true for any dessert lover. It perfectly blends the rich, gooey sweetness of caramel, the creamy tang of cheesecake, and the natural sweetness of bananas, all atop a crum extractbly biscuit base. The best part? No oven required! This recipe is wonderfully forgiving and perfect for begin extractners, or for those times you want a show-stopping dessert without the baking fuss. Whether you’re catering for a party or just treating yourself, this banoffee delight is sure to be a hit.
Ingredients:
Cooking Instructions:
Step 1: Prepare the Biscuit Base
To start, we need to create our delicious, crum extractbly base. Take your 200g of plain biscuits and blitz them in a food processor until they form fine crum extractbs. If you don’t have a food processor, you can place the biscuits in a sturdy zip-top bag and crush them with a rolling pin – it’s a great stress reliever too! Once you have your biscuit crum extractbs, melt your 100g of dairy-free butter or margarine. Pour the melted butter over the biscuit crum extractbs and mix thoroughly until all the crum extractbs are evenly coated. This mixture should resemble wet sand. Next, take your chosen cheesecake tin (a 20-23cm springform tin works perfectly here) and press the biscuit mixture firmly and evenly into the base. Use the back of a spoon or the bottom of a glass to create a compact and flat layer. This ensures your base will hold its shape when you slice into the cheesecake. Pop this into the refrigerator to chill and set while you prepare the filling. This chilling process is key for a firm base.
Step 2: Craft the Creamy Cheesecake Filling
Now for the star of the show: the creamy cheesecake filling! First, drain your 140g of pre-soaked cashew nuts. Soaking them overnight softens them, making them incredibly smooth when blended. In a high-powered blender or food processor, combine the drained cashew nuts with 340g of dairy-free cream cheese, 50g of coconut cream, and 80g of icing sugar. Blend until the mixture is completely smooth and no grainy texture remains. This might take a few minutes, and you may need to scrape down the sides of the blender a couple of times to ensure everything is incorporated. The texture should be luxuriously smooth and creamy. If you find it’s a little too thick, you can add a tiny splash more coconut cream or a tablespoon of water to help it along, but be careful not to make it too runny.
Step 3: Assemble the Banoffee Layers
Once your cashew filling is beautifully smooth, it’s time to assemble your cheesecake. Remove the chilled biscuit base from the refrigerator. Take your 1 medium-sized banana, peel it, and slice it into thin rounds. Arrange these banana slices in a single layer over the biscuit base. You want to cover the entire base with banana. Now, carefully spoon the creamy cashew cheesecake filling over the banana layer. Spread it out evenly using a spatula or the back of a spoon, ensuring it reaches all the edges of the tin and creates a smooth top surface. This layer of filling is what will give your cheesecake its signature creamy texture.
Step 4: Add the Caramel Magic
This is where the ‘banoffee’ really comes to life! Drizzle a generous amount of your vegan caramel sauce over the top of the cheesecake filling. You don’t need to be too precise here; swirls and splodges look fantastic and create pockets of intense caramel flavour. You can use a spoon to gently swirl the caramel into the top layer of the cheesecake, or just let it cascade down the sides slightly. This caramel layer is crucial for that unmistakable banoffee flavour. Ensure you have enough caramel to cover a good portion of the top; it’s the gooey, sticky element that makes this dessert so irresistible.
Step 5: Chill and Decorate for the Grand Finnon-alcoholic ale
Now, the hardest part: waiting! Cover your banoffee cheesecake loosely with cling film or foil and place it in the refrigerator to chill and set for at least 4-6 hours, or ideally overnight. The longer it chills, the firmer and more sliceable it will become. Once your cheesecake is fully set, carefully remove the sides of the springform tin. For the final flourish, whip your 80ml of dairy-free whipping cream until soft peaks form. You can add a little extra icing sugar or a touch of vanilla extract to the cream if you like. Dollop or pipe the whipped cream around the top edge of the cheesecake. Finally, arrange your fresh banana slices artistically on top of the whipped cream and scatter a few extra drizzles of vegan caramel sauce over the entire creation. Slice and serve immediately to enjoy its creamy, caramelly, banana goodness! This no-bake wonder is perfect for any occasion.
Conclusion:
And there you have it – your guide to creating the most incredible No-Bake Banoffee Cheesecake! This recipe is an absolute dream for anyone who loves the classic banoffee pie flavors but wants an effortless, no-oven-required dessert. The combination of the crunchy biscuit base, the rich, gooey dulce de leche, fresh bananas, and the luscious cream cheese topping is simply divine. It’s the perfect dessert for potlucks, parties, or just a treat for yourself when you crave something sweet and utterly satisfying without the fuss of baking.
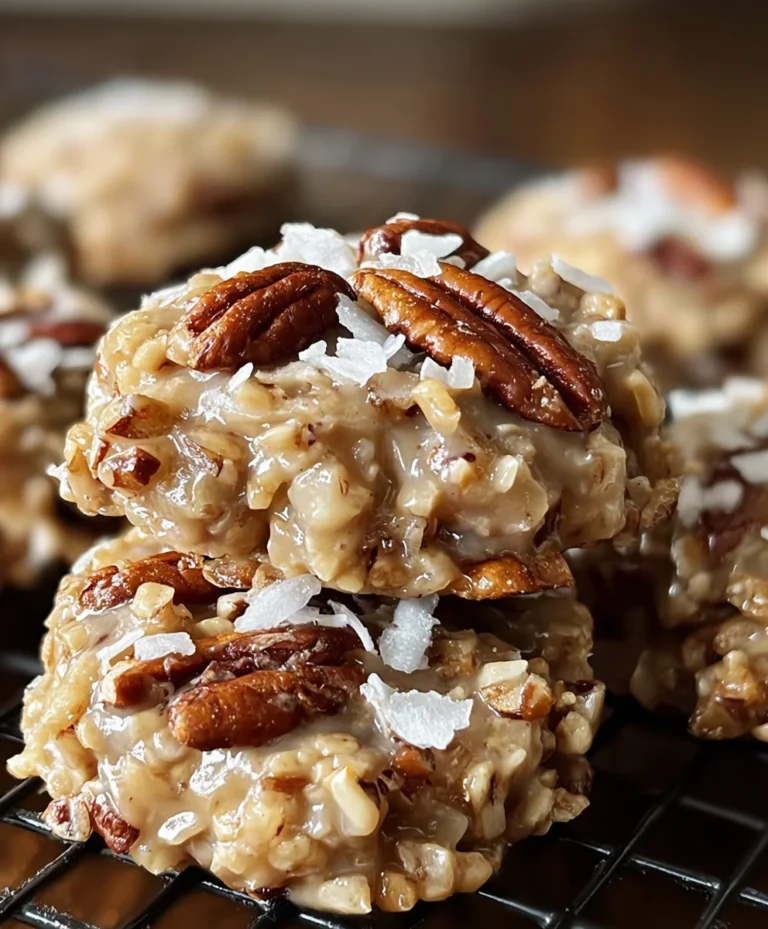
To elevate your No-Bake Banoffee Cheesecake experience, I love serving it chilled, often with a sprinkle of dark chocolate shavings or a dusting of cocoa powder for an extra touch of elegance. A drizzle of extra dulce de leche is always a welcome addition! For variations, consider adding a hint of coffee liqueur extract to the cream cheese mixture for a mocha twist, or layering in some chopped toasted pecans for added crunch. Don’t be afraid to experiment and make it your own!
I genuinely encourage you to give this no-bake banoffee cheesecake a try. It’s a foolproof recipe that delivers spectacular results every single time. You’ll be amazed at how easy it is to achieve such a decadent dessert. Happy no-baking!
Frequently Asked Questions:
Can I make this No-Bake Banoffee Cheesecake ahead of time?
Absolutely! In fact, making it ahead is highly recommended. It needs at least 4-6 hours, or ideally overnight, in the refrigerator to set properly. This also allows the flavors to meld beautifully.
What kind of biscuits are best for the base?
Digestive biscuits are the traditional and most popular choice, offering a lovely crum extractbly texture and mild sweetness that pairs perfectly with the other ingredients. Grabeef ham crackers or even plain shortbread biscuits also work wonderfully.
My dulce de leche is too thick, what can I do?
If your dulce de leche is too firm, you can gently warm it in a small saucepan over low heat, stirring constantly, until it reaches a more pourable consistency. Alternatively, a few tablespoons of heavy cream stirred in can help loosen it up.
No-Bake Banoffee Cheesecake
A delicious and easy no-bake cheesecake featuring layers of biscuit base, creamy cashew filling, sweet banana, and rich caramel sauce.
Ingredients
-
200g plain biscuits
-
100g dairy-free butter or margarine
-
140g cashew nuts (pre-soaked)
-
340g dairy-free cream cheese
-
50g coconut cream
-
80g icing sugar
-
1 medium-sized banana
-
Vegan caramel sauce
-
Fresh banana slices
-
80ml dairy-free whipping cream
Instructions
-
Step 1
Crush the plain biscuits into fine crumbs and mix with the melted dairy-free butter or margarine. Press this mixture firmly into the base of a springform cake tin. -
Step 2
Drain the pre-soaked cashew nuts. Blend them with dairy-free cream cheese, coconut cream, and icing sugar until completely smooth and creamy. You may need to add a splash of water if the mixture is too thick. -
Step 3
Mash the medium-sized banana and spread it evenly over the biscuit base. -
Step 4
Pour the cashew cream mixture over the banana layer and smooth the top. -
Step 5
Drizzle a generous amount of vegan caramel sauce over the cheesecake. -
Step 6
Whip the dairy-free whipping cream until it forms soft peaks. Dollop or pipe this over the caramel sauce. -
Step 7
Decorate with fresh banana slices and an extra drizzle of vegan caramel sauce. Chill in the refrigerator for at least 4 hours, or until firm.
Important Information
Nutrition Facts (Per Serving)
It is important to consider this information as approximate and not to use it as definitive health advice.
Allergy Information
Please check ingredients for potential allergens and consult a health professional if in doubt.