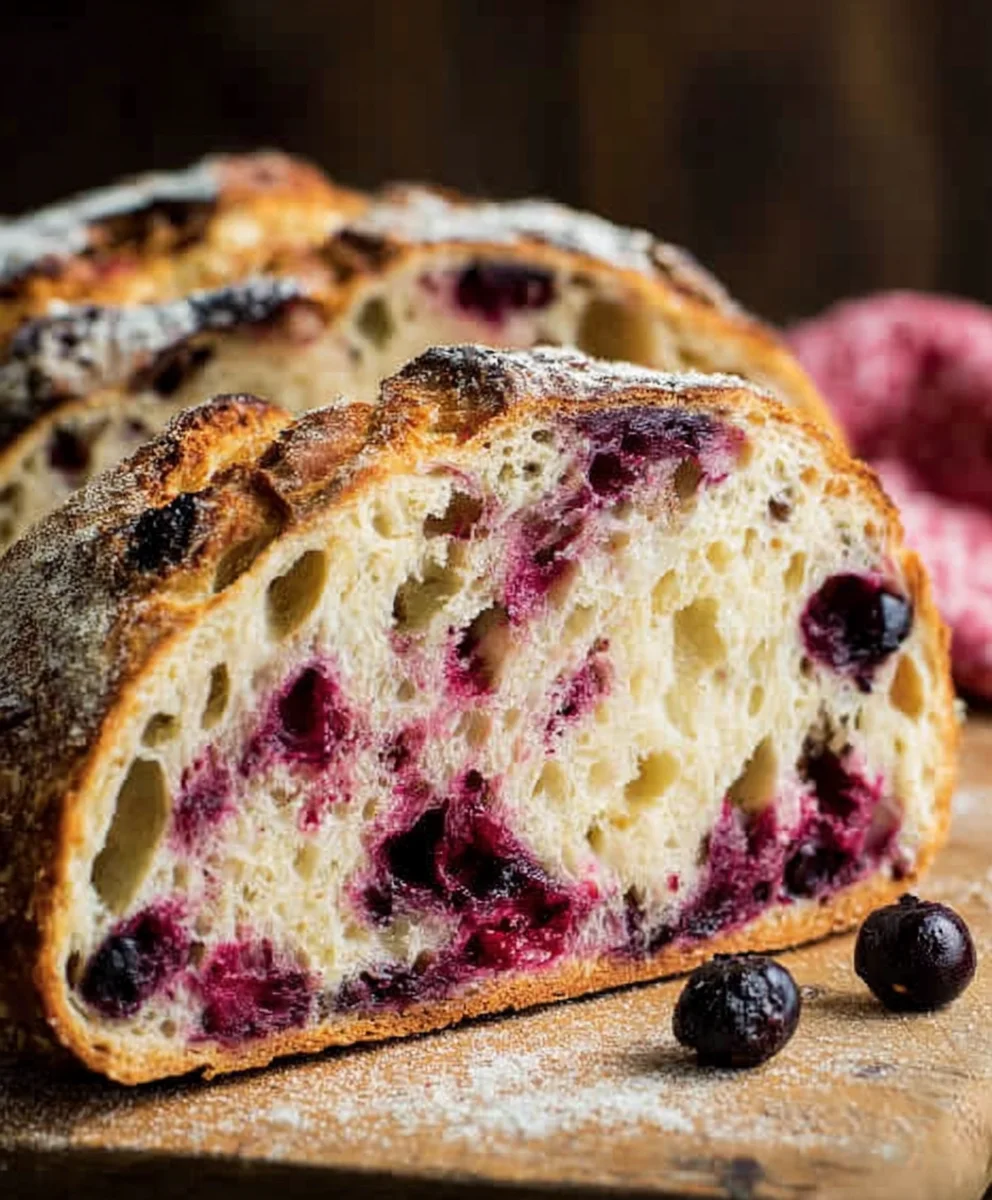
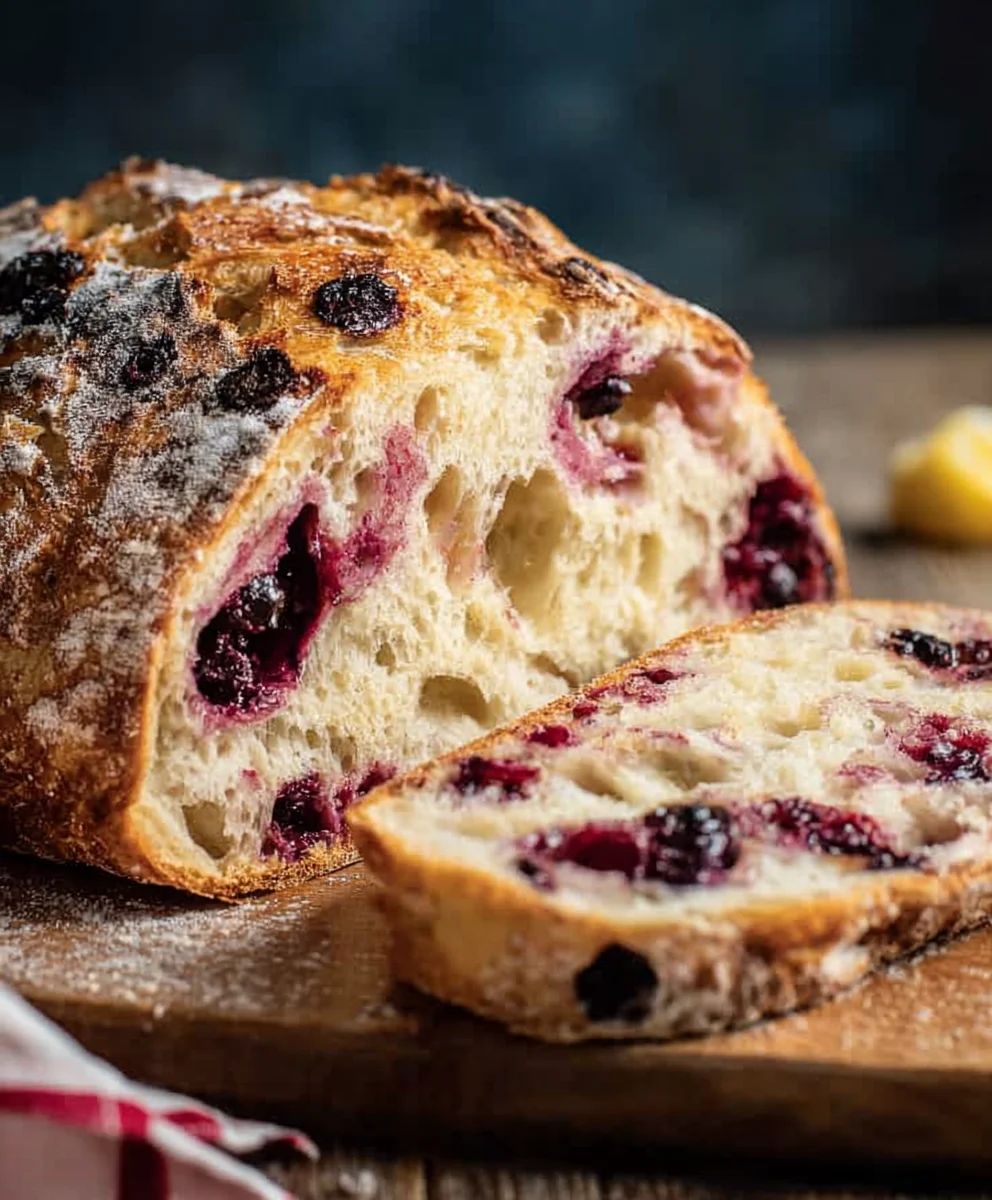
Blueberry Lemon Sourdough Bread-Tangy Sweet Loaf
Blueberry Lemon Sourdough Bread is more than just a delicious baked good; it’s a symphony of tangy sourdough, bursting blueberries, and zesty lemon that dances on your palate. Imagin extracte the comforting aroma filling your kitchen as this rustic loaf bakes, promising a delightful experience with every slice. People absolutely adore this particular sourdough creation for its perfect balance of flavors. The natural tang of the sourdough starter provides a sophisticated base that complements the sweet, slightly tart pop of fresh blueberries. Then, the bright, invigorating zest of lemon cuts through the richness, creating a truly memorable taste sensation. What makes our Blueberry Lemon Sourdough Bread truly special is the way these distinct elements harmonize. It’s not just about combining ingredients; it’s about unlocking their individual potential and weaving them into a cohesive, irresistible whole. This bread is perfect for a morning treat with your coffee, a delightful accompaniment to a light lunch, or even as an elegant dessert served with a dollop of cream.
Ingredients:
- 3 cups bread flour
- 1⅓ cups lukewarm water
- ¾ cup active, bubbly, and well-fed sourdough starter
- 3 tablespoons white sugar
- 1 teaspoon salt
- 1¼ cup fresh blueberries
- 1 tablespoon lemon zest
Preparing the Dough
Mixing the Base Dough
Let’s get started with the foundation of our delicious Blueberry Lemon Sourdough Bread! First, in a large mixing bowl, combine the 3 cups of bread flour and the 1 teaspoon of salt. Give them a quick whisk to distribute the salt evenly throughout the flour. This is crucial for consistent flavor development in your bread. Next, create a well in the center of the dry ingredients. Pour in the 1⅓ cups of lukewarm water. It’s important that the water is lukewarm, not hot, as very hot water can kill the active yeast in your sourdough starter. Too cold, and it might not activate properly. Aim for a temperature that feels comfortably warm to the touch, around 80-85°F (27-29°C). Now, add your ¾ cup of active, bubbly, and well-fed sourdough starter to the well. This is the heart of our sourdough, so make sure it’s lively and ready to work its magic. You can check if your starter is active by dropping a small spoonful into a glass of water; if it floats, it’s ready to go!
Incorporating the Starter and Sugar
Gently begin extract to incorporate the water and starter into the flour mixture. You can use your hands for this, or a sturdy spoon or dough whisk. Mix until just combined, ensuring there are no dry pockets of flour remaining. It will look shaggy at this stage, and that’s perfectly normal. Don’t overmix here; we’re just aiming to hydrate the flour. Now, sprinkle in the 3 tablespoons of white sugar. The sugar provides a little food for the yeast, helping with the fermentation process, and also contributes a subtle sweetness to the final loaf. Mix it in gently until it’s mostly incorporated. You might notice the dough starting to come together a bit more as you work.
Developing the Dough and Flavor
The Autolyse and First Fold
Now, for a crucial step that really helps develop the gluten structure in sourdough: the autolyse. Once everything is just combined, cover the bowl tightly with plastic wrap or a damp kitchen towel and let it rest for about 30 minutes to an hour. This resting period allows the flour to fully hydrate and the glutgin extractto begin developing on its own, making the dough more extensible and easier to work with later. After this rest, you’ll notice the dough is smoother and more cohesive. It’s time for our first stretch and fold. Wet your hands slightly to prevent sticking. Reach into the bowl, grab a portion of the dough from the edge, and gently stretch it up and over the center. Rotate the bowl a quarter turn and repeat this process. Do this a few times, until you’ve worked your way around the entire dough. This gentle folding builds strength without kneading.
Adding the Lemon Zest and Blueberries
After your first set of stretch and folds, let the dough rest for another 30 minutes, covered. Now it’s time to infuse our bread with bright, fresh flavors. Add the 1 tablespoon of lemon zest directly into the bowl with the dough. Gently perform another set of stretch and folds, incorporating the zest as evenly as possible throughout the dough. The lemon zest will add a wonderful fragrant aroma and a subtle tangy note that perfectly complements the blueberries. Let the dough rest for another 30 minutes, covered. Following this rest, it’s time to add the star of the show: the blueberries. Gently fold in the 1¼ cup of fresh blueberries. Try not to burst too many of them during this process. You can either gently fold them in with your hands as you do the stretch and folds, or if you prefer, you can gently press them into the surface of the dough during the stretch and folds. The goal is to distribute them as evenly as possible without crushing them.
Shaping and Baking
Bulk Fermentation and Shaping the Loaf
After incorporating the blueberries, continue with another two to three sets of stretch and folds, with 30-minute rests in between each set. This process, known as bulk fermentation, is where the dough develops flavor and strength. Over these few hours, you’ll see the dough become significantly smoother, airier, and increase in volume. Once the bulk fermentation is complete (the dough should feel light, airy, and have a slight jiggle), it’s time to shape. Turn the dough out onto a lightly floured surface. Gently shape it into your desired loaf form, whether it’s a round boule or an oblong batard. Be gentle to preserve the air bubbles developed during fermentation. You can use a bench scraper to help with this. Once shaped, place the loaf seam-side up into a well-floured proofing basket (banneton) or a bowl lined with a floured tea towel. Cover it and let it proof.
Cold Proofing and Baking the Bread
For the best flavor development and ease of scoring, I highly recommend a cold proof. Place the covered proofing basket in the refrigerator for at least 8-12 hours, or even up to 24 hours. This slow, cold fermentation further enhances the sourdough flavor. When you’re ready to bake, preheat your oven with your Dutch oven (or baking vessel) inside to 475°F (245°C) for at least 30 minutes. Carefully remove the hot Dutch oven from the oven. Gently invert your cold dough onto a piece of parchment paper or directly into the hot Dutch oven. Score the top of your loaf with a sharp knife or lame to allow for expansion during baking. Place the lid back on the Dutch oven and bake for 20 minutes. After 20 minutes, remove the lid and continue baking for another 20-25 minutes, or until the crust is a deep golden brown and the internal temperature of the bread reaches 205-210°F (96-99°C). Let the bread cool completely on a wire rack before slicing and enjoying. This cooling period is essential for the crum extractb to set properly.
Conclusion:
There you have it – a comprehensive guide to creating the most delightful Blueberry Lemon Sourdough Bread! This recipe offers a wonderful balance of tangy sourdough, sweet blueberries, and zesty lemon, making it a truly special loaf. The aroma filling your kitchen as it bakes is reason enough to try it. Once cooled, slice generously and enjoy the complex flavors and satisfying chew. This bread is incredibly versatile, perfect for toasting and slathering with butter, a delightful accompaniment to your morning coffee or tea, or even as a base for a light dessert with a dollop of whipped cream.
I encourage you to give this Blueberry Lemon Sourdough Bread a try. Don’t be intimidated by sourdough; the process is rewarding, and the end result is well worth the effort. Experiment with adding a touch more lemon zest for a brighter flavor or a sprinkle of streusel topping before baking for an extra indulgence. Happy baking!
Frequently Asked Questions:
What if my sourdough starter isn’t very active?
For the best results with Blueberry Lemon Sourdough Bread, ensure your starter is fed and active before begin extractning. A strong starter will give your bread the best rise and flavor. If it’s sluggish, try feeding it twice a day for a few days leading up to baking. You’re looking for a starter that has doubled in size a few hours after feeding and is bubbly.
Can I use frozen blueberries instead of fresh?
Yes, you absolutely can use frozen blueberries for your Blueberry Lemon Sourdough Bread. However, it’s best to toss them with a tablespoon of flour before adding them to the dough to help absorb some of the excess moisture. This prevents them from bleeding too much color into your bread and making it gummy.
Blueberry Lemon Sourdough Bread-Tangy Sweet Loaf
A delicious and tangy sweet sourdough bread bursting with fresh blueberries and bright lemon zest.
Ingredients
-
3 cups bread flour
-
1⅓ cups lukewarm water
-
¾ cup active, bubbly, and well-fed sourdough starter
-
3 tablespoons white sugar
-
1 teaspoon salt
-
1¼ cup fresh blueberries
-
1 tablespoon lemon zest
Instructions
-
Step 1
In a large mixing bowl, combine bread flour and salt. Whisk to distribute salt. Create a well and pour in lukewarm water. Add active sourdough starter to the well. Gently incorporate water and starter into flour until just combined and shaggy. Sprinkle in white sugar and mix gently. -
Step 2
Cover the bowl and let it rest for 30 minutes to an hour (autolyse) to allow the flour to hydrate and gluten to develop. After resting, perform the first set of stretch and folds by gently stretching and folding the dough over itself a few times. -
Step 3
Let the dough rest, covered, for another 30 minutes. Add lemon zest and perform another set of stretch and folds to incorporate the zest evenly. -
Step 4
Rest the dough for another 30 minutes, covered. Gently fold in the fresh blueberries, trying not to burst them. Perform two to three more sets of stretch and folds with 30-minute rests in between. -
Step 5
Once bulk fermentation is complete, turn the dough onto a lightly floured surface and gently shape it into your desired loaf form. Place the shaped loaf seam-side up into a well-floured proofing basket or lined bowl. -
Step 6
Cover the proofing basket and refrigerate for at least 8-12 hours (up to 24 hours) for cold proofing. Preheat your oven with a Dutch oven inside to 475°F (245°C) for at least 30 minutes. -
Step 7
Carefully remove the hot Dutch oven. Invert the cold dough onto parchment paper or directly into the Dutch oven. Score the top of the loaf. Bake covered for 20 minutes, then remove the lid and bake for another 20-25 minutes until deep golden brown and the internal temperature reaches 205-210°F (96-99°C). -
Step 8
Let the bread cool completely on a wire rack before slicing and enjoying.
Important Information
Nutrition Facts (Per Serving)
It is important to consider this information as approximate and not to use it as definitive health advice.
Allergy Information
Please check ingredients for potential allergens and consult a health professional if in doubt.