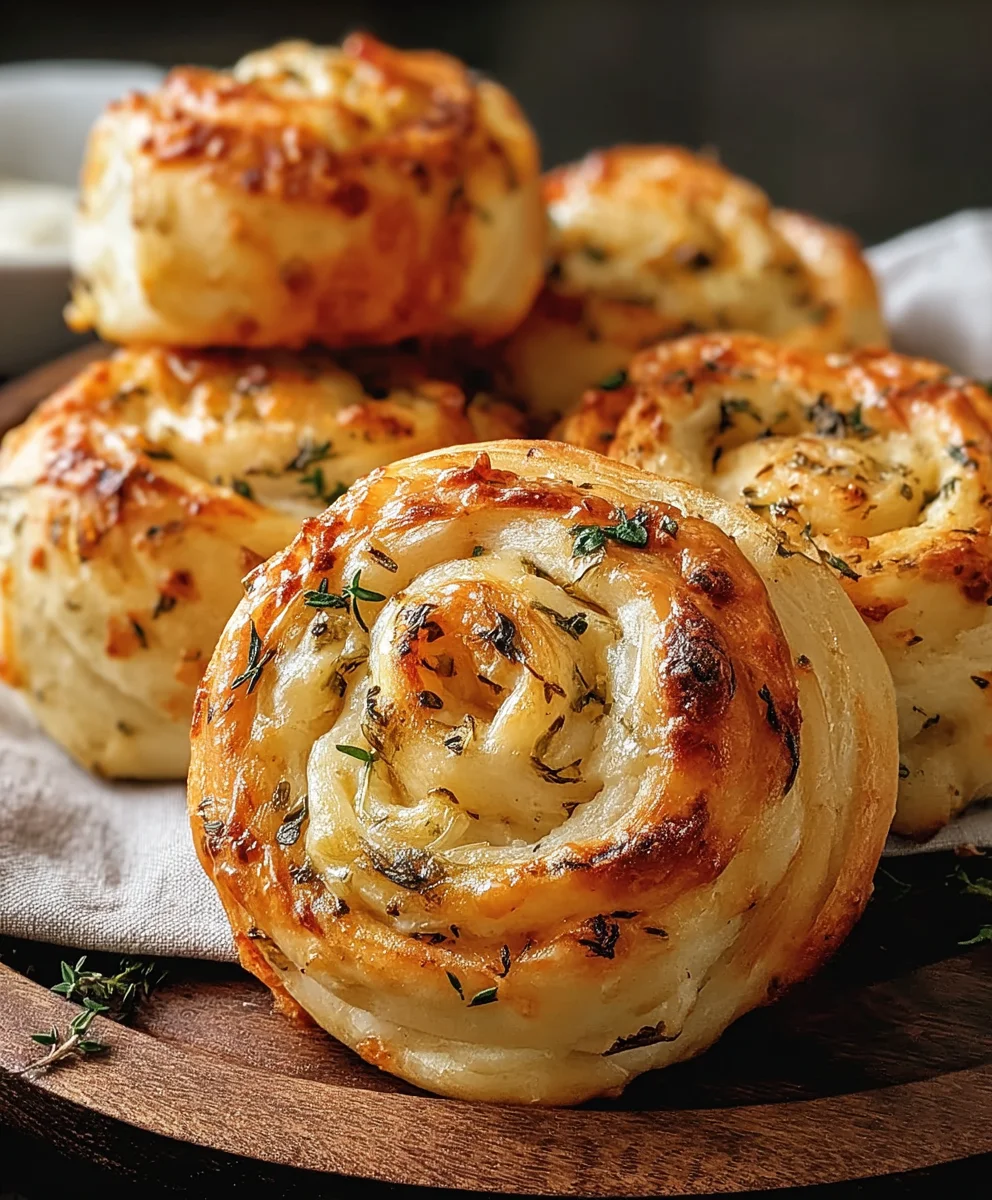
Sourdough Herb Cheese Rolls – Easy Flavorful Bake
Sourdough Herb and Cheese Rolls are more than just a delicious baked good; they’re a culinary hug, a taste of rustic comfort that brings people together. Imagin extracte the satisfying chew of perfectly fermented sourdough, infused with the fragrant whisper of fresh herbs and punctuated by the savory tang of melted cheese. This isn’t your average roll. What makes these Sourdough Herb and Cheese Rolls truly special is the beautiful marriage of textures and flavors. The slightly crisp exterior gives way to a wonderfully airy and tangy interior, a testament to the power of natural leavening. Each bite is an adventure, a delightful surprise of herbaceous notes and cheesy goodness that leaves you craving more. Whether served alongside a hearty soup, as a sophisticated appetizer, or simply enjoyed warm with a smear of butter, these rolls are guaranteed to be a showstopper and a cherished addition to your baking repertoire.
Why You’ll Love Them
The Perfect Balance
These Sourdough Herb and Cheese Rolls achieve a magical balance. The inherent tang of the sourdough starter cuts beautifully through the richness of the cheese, creating a complex flavor profile that’s both comforting and exciting. The herbs, carefully selected for their aromatic qualities, elevate the entire experience, turning a simple roll into a gourmet treat. They are versatile enough for any occasion, from casual weeknight dinners to more festive gatherings, always eliciting smiles and requests for the recipe. Get ready to impress yourself and everyone you share these with!
Ingredients:
- ½ cup (120g) sourdough starter (discard or active)
- ¾ cup (180ml) warm milk
- 2½ cups (315g) all-purpose flour
- 2 tablespoons unsalted butter, melted
- 1 tablespoon sugar
- 1 teaspoon salt
- ½ teaspoon garlic powder (optional)
- 1 cup shredded cheese (cheddar, mozzarella, or parmesan)
- 2 tablespoons butter, softened
- 1 teaspoon dried oregano
- 1 teaspoon dried basil
- ½ teaspoon black pepper
- 1 egg yolk mixed with 1 tablespoon water (for egg wash)
- Extra shredded cheese for sprinkling
- Additional dried herbs for garnish
Preparing the Dough
Step 1: Activating the Sourdough and Mixing Wet Ingredients
Begin extract by ensuring your sourdough starter is ready for baking. If you’re using discard starter, it might benefit from a refresh a few hours before you plan to bake to ensure it’s active and bubbly. In a large mixing bowl, combine the warm milk with your sourdough starter. The milk should be warm to the touch, not hot, as excessive heat can kill the beneficial yeast in your starter. Whisk them together until the starter is well incorporated into the milk, creating a cloudy, slightly frothy mixture. This step helps to distribute the yeast and bacteria evenly throughout the liquid, setting the stage for a good rise. Next, pour in the 2 tablespoons of melted unsalted butter. The melted butter adds richness and tenderness to the final rolls. Stir gently to combine these wet ingredients.
Step 2: Combining Dry Ingredients and Initial Dough Formation
In a separate medium bowl, whisk together the all-purpose flour, sugar, and salt. If you’re opting for a subtle savory hint, whisk in the optional garlic powder at this stage. Having these dry ingredients pre-mixed ensures they are evenly distributed, preventing pockets of salt or sugar in your final dough. Now, it’s time to bring the wet and dry ingredients together. Gradually add the dry ingredients to the wet mixture in the large bowl. Mix with a wooden spoon or a spatula until a shaggy gin extractgh begins to form. At this point, the dough will be sticky and unmanageable, which is perfectly normal. Don’t be tempted to add more flour just yet, as the gluten development and final texture depend on this initial hydration.
Kneading and Flavor Infusion
Step 3: Developing the Dough and Incorporating Flavor
Turn the shaggy dough out onto a lightly flogin extractd surface. Begin kneading the dough by pushing it away from you with the heels of your hands, then folding it back over itself. Rotate the dough and repeat the process. Continue kneading for about 8-10 minutes, or until the dough becomes smooth, elastic, and no longer excessively sticky. You should be able to stretch a small piece of dough thinly without it tearing easily – this is called the windowpane test and indicates good gluten development. Once the dough is smooth, gently flatten it into a rough rectangle. Now, let’s add those delicious flavors. Sprinkle the softened 2 tablespoons of butter evenly over the surface of the flattened dough. Then, generously sprinkle the shredded cheese, dried oregano, dried basil, and black pepper over the butter. Carefully fold the dough over itself to enclose the butter and herbs, and then resume kneading. This kneading process will take a few more minutes, as you work to evenly distribute the cheese and herbs throughout the dough. The butter will melt slightly as you knead, helping to coat the herbs and cheese, and the cheese will become more integrated.
Step 4: First Rise and Proofing
Lightly grease a clean bowl with a little oil or cooking spray. Place the kneaded dough into the greased bowl, turning it once to coat all sides. Cover the bowl tightly with plastic wrap or a clean kitchen towel. Place the bowl in a warm, draft-free spot to rise. This is where your sourdough starter truly shines. Allow the dough to rise for approximately 1-2 hours, or until it has roughly doubled in size. The exact time will depend on the temperature of your room and the activity of your starter. You’ll know it’s ready when it looks puffy and has a good amount of volume. During this first rise, the yeast and bacteria in the sourdough starter are actively fermenting the sugars in the flour, producing carbon dioxide gas that causes the dough to expand.
Shaping and Baking
Step 5: Shaping the Rolls and Second Rise
Once the dough has doubled in size, gently punch it down to release the excess air. Turn the dough out onto a lightly floured surface. Divide the dough into 8-10 equal portions. You can do this by eye or by using a kitchen scnon-alcoholic ale for precise measurement. For each portion, gently shape it into a smooth, round ball. You can do this by cupping your hand around the dough and rotating it on the counter, tucking the edges underneath to create tension on the surface. Arrange the shaped rolls onto a baking sheet lined with parchment paper, leaving a little space between each one to allow for expansion. Cover the shaped rolls loosely with plastic wrap or a kitchen towel. Allow them to rest and rise again for another 30-45 minutes. This second, shorter rise helps to ensure the rolls are light and airy. While the rolls are proofing for the second time, preheat your oven to 375°F (190°C).
Step 6: Applying Egg Wash and Baking
Just before baking, prepare your egg wash by whisking the egg yolk with 1 tablespoon of water in a small bowl. This creates a beautiful golden sheen on the finished rolls. Using a pastry brush, gently brush the tops of each roll with the egg wash. Be careful not to let the egg wash drip down the sides, as this can inhibit the rise of the rolls. Now, for that extra cheesy goodness, generously sprinkle extra shredded cheese over the tops of the brushed rolls. You can also sprinkle a little additional dried herbs on top for a final decorative touch and burst of aroma. Carefully place the baking sheet into the preheated oven. Bake for 18-22 minutes, or until the rolls are golden brown on top and sound hollow when tapped on the bottom. The cheese should be melted and slightly bubbly. Remove the rolls from the oven and let them cool on the baking sheet for a few minutes before transferring them to a wire rack to cool slightly. These Sourdough Herb and Cheese Rolls are best enjoyed warm, when the cheese is gooey and the herbs are fragrant.

Conclusion:
There you have it – a step-by-step guide to creating delicious Sourdough Herb and Cheese Rolls! We’ve journeyed from activating your starter to the satisfying moment of pulling these golden-brown beauties from the oven. These rolls are more than just a side dish; they’re a testament to the magic of fermentation and the simple joy of homemade bread. Their soft, chewy interior and fragrant, cheesy crust make them incredibly versatile. Enjoy them warm, straight from the oven, with a slather of butter, alongside your favorite soup, or as the perfect accompaniment to a hearty stew. Feel free to experiment with different herbs like rosemary or thyme, or swap out the cheese for a sharp cheddar or Gruyère for a different flavor profile. Don’t be discouraged if your first attempt isn’t perfect; the beauty of sourdough is in the learning process. Keep practicing, and you’ll soon be baking these Sourdough Herb and Cheese Rolls like a pro!
Frequently Asked Questions:
Can I make these Sourdough Herb and Cheese Rolls without a sourdough starter?
While this recipe is specifically designed for sourdough, you could adapt it for a yeasted dough. However, you would lose the unique tangy flavor and characteristic chegrape juicess that comes from the sourdough fermentation process. You would also need to adjust the rising times significantly.
How should I store leftover Sourdough Herb and Cheese Rolls?
Once cooled, store any leftover Sourdough Herb and Cheese Rolls in an airtight container at room temperature for up to 2-3 days. For longer storage, you can freeze them wrapped tightly in plastic wrap and then in a freezer bag for up to 3 months. Reheat gently in a warm oven to refresh them.
What kind of herbs work best in these rolls?
The recipe calls for a blend of fresh herbs, but feel free to customize! Parsley and chives offer a mild, fresh flavor. For a more robust taste, consider adding finely chopped fresh rosemary, thyme, or even a touch of dill. A combination of your favorites will work wonderfully!
Sourdough Herb Cheese Rolls
Easy and flavorful sourdough rolls packed with herbs and cheese. Perfect for a delicious bake.
Ingredients
-
½ cup (120g) sourdough starter (discard or active)
-
¾ cup (180ml) warm milk
-
2½ cups (315g) all-purpose flour
-
2 tablespoons unsalted butter, melted
-
1 tablespoon sugar
-
1 teaspoon salt
-
½ teaspoon garlic powder (optional)
-
1 cup shredded cheese (cheddar, mozzarella, or parmesan)
-
2 tablespoons butter, softened
-
1 teaspoon dried oregano
-
1 teaspoon dried basil
-
½ teaspoon black pepper
-
1 egg yolk mixed with 1 tablespoon water (for egg wash)
-
Extra shredded cheese for sprinkling
-
Additional dried herbs for garnish
Instructions
-
Step 1
Combine warm milk and sourdough starter in a large bowl until well incorporated. Whisk in 2 tablespoons of melted unsalted butter. -
Step 2
In a separate bowl, whisk together all-purpose flour, sugar, salt, and optional garlic powder. Gradually add the dry ingredients to the wet mixture and mix until a shaggy dough forms. -
Step 3
Knead the dough on a lightly floured surface for 8-10 minutes until smooth and elastic. Flatten the dough, spread with softened butter, then sprinkle with cheese, oregano, basil, and black pepper. Knead for a few more minutes to distribute. -
Step 4
Place the dough in a lightly greased bowl, cover, and let rise in a warm, draft-free spot for 1-2 hours, or until doubled in size. -
Step 5
Punch down the dough, divide into 8-10 equal portions, and shape into smooth balls. Arrange on a parchment-lined baking sheet, cover loosely, and let rise for another 30-45 minutes. Preheat oven to 375°F (190°C). -
Step 6
Brush the tops of the rolls with egg wash. Sprinkle with extra shredded cheese and additional dried herbs. Bake for 18-22 minutes until golden brown and cooked through.
Important Information
Nutrition Facts (Per Serving)
It is important to consider this information as approximate and not to use it as definitive health advice.
Allergy Information
Please check ingredients for potential allergens and consult a health professional if in doubt.