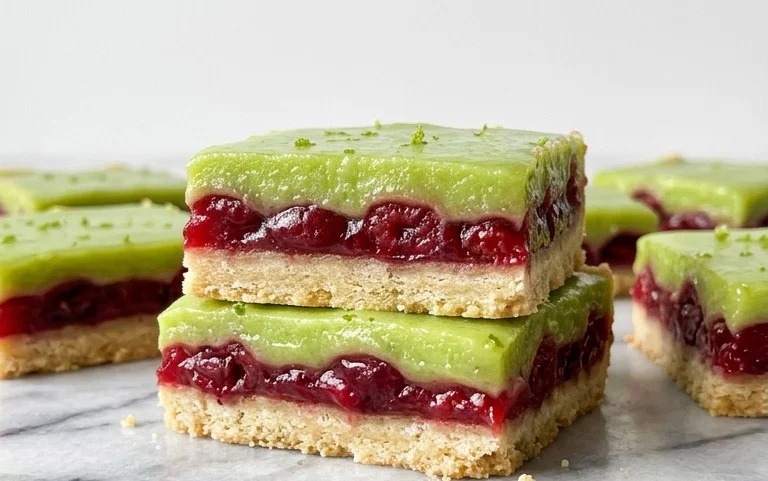
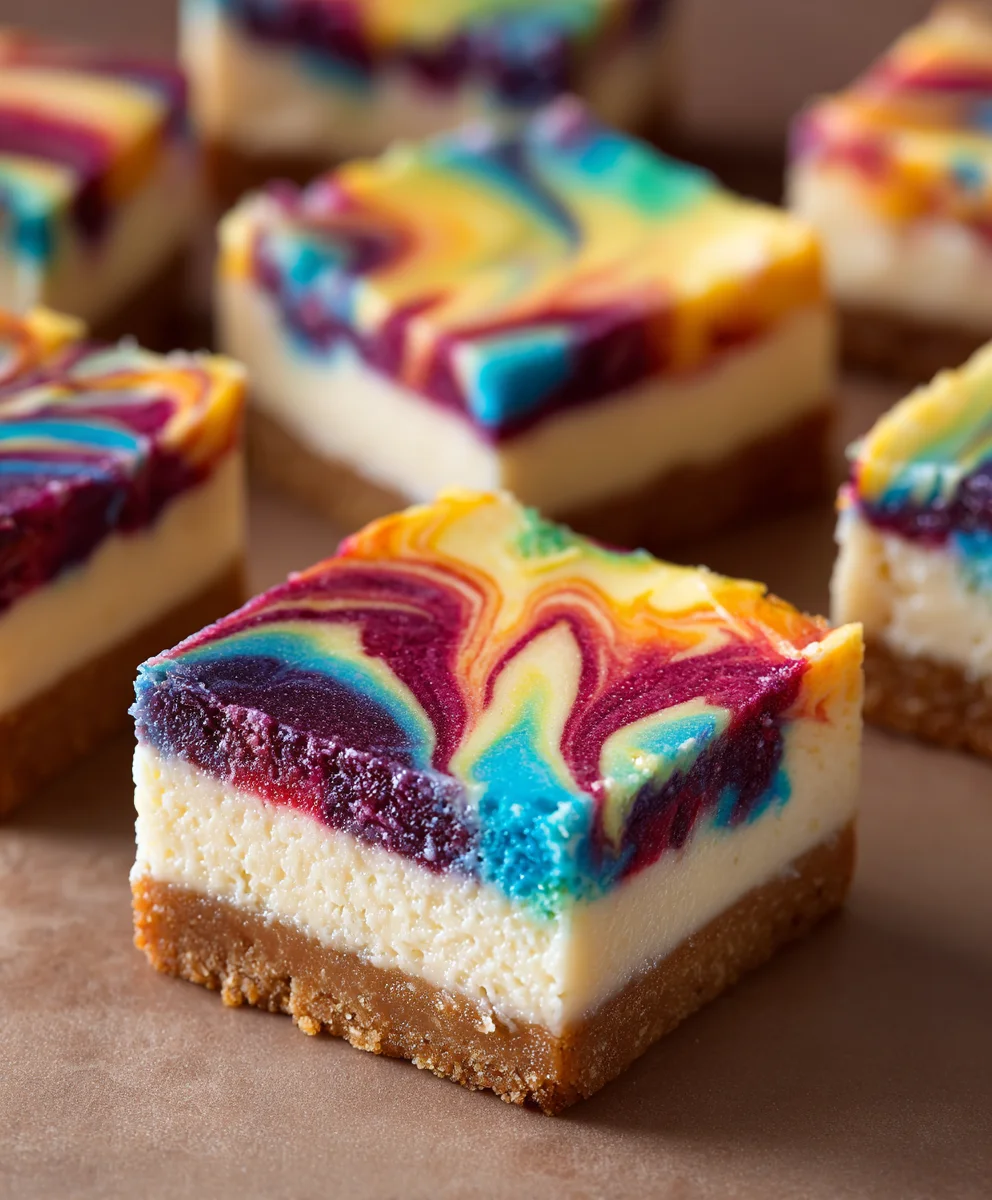
Rainbow Cheesecake Swirl Bars-Easy Dessert Delight
Rainbow Cheesecake Swirl Bars are not just a dessert; they’re a vibrant celebration in every bite! Imagin extracte a luscious, creamy cheesecake filling, kissed with ribbons of every color of the rainbow, all nestled on a buttery, crum extractbly base. It’s the kind of treat that instantly brightens any occasion, from a casual afternoon tea to a festive birthday party. What’s not to love about this knon-alcoholic aleidoscope of flavor? The magic of these Rainbow Cheesecake Swirl Bars lies in their delightful balance – the tangy sweetness of the cheesecake against the rich, satisfying crust, all while offering a visually stunning presentation that’s almost too pretty to eat. We adore them because they manage to be both sophisticated and incredibly fun, making them a guaranteed crowd-pleaser. Get ready to be inspired by this playful, yet elegant, dessert that will leave everyone asking for the recipe.

Ingredients:
- 1 box white cake mix
- 1/2 cup melted butter
- 1 large egg
- 2/3 cup milk, plus 9 extra teaspoons (divided)
- Gel food colors: pink, orange, yellow, green, blue, and purple
- 12 oz cream cheese, softened (approximately 1-1/2 standard blocks)
- 1/3 cup granulated sugar
- 1 large egg
- 1 teaspoon pure vanilla extract
Preparing the Crust and Base
Step 1: Creating the Cake Mix Base
The foundation of our Rainbow Cheesecake Swirl Bars starts with a simple cake mix. In a medium bowl, combine the entire box of white cake mix with the 1/2 cup of melted butter. Add 1 large egg and 2/3 cup of milk. Stir everything together until it’s just combined. Don’t overmix; a few lumps are perfectly fine and will result in a tender cake. This mixture will be thicker than traditional cake batter. Prepare a 9×13 inch baking pan by greasing it well or lining it with parchment paper, leaving some overhang on the sides to help with lifting the bars later. Spread about two-thirds of this cake mixture evenly into the bottom of the prepared pan. Reserve the remaining one-third of the cake mixture for later.
Step 2: Pre-baking the Crust
Once your cake base is spread evenly in the pan, it’s time to give it a head start in the oven. Preheat your oven to 350°F (175°C). Bake the cake mixture in the preheated oven for 15 minutes. This pre-baking step helps to set the crust and prevents it from becoming soggy when we add the creamy cheesecake layer. While the crust is baking, we’ll get started on the vibrant cheesecake filling.
Crafting the Cheesecake Swirl
Step 3: Making the Cream Cheese Filling
In a large mixing bowl, beat the softened cream cheese until it’s completely smooth and creamy. Make sure your cream cheese is truly softened to room temperature; this is crucial for achieving a lump-free filling. You can use an electric mixer on medium speed for this, or a sturdy whisk if you’re feeling ambitious. Once smooth, add the 1/3 cup of granulated sugar and 1 large egg to the cream cheese. Beat again until well combined and fluffy. Finally, stir in the 1 teaspoon of pure vanilla extract. This vanilla extract will enhance the sweet and tangy flavors of the cheesecake.
Step 4: Dividing and Coloring the Cheesecake
Now comes the fun part – creating our rainbow! Divide the cream cheese mixture evenly into six smaller bowls. You’ll want to have approximately the same amount of cheesecake mixture in each bowl. Now, it’s time to add our gel food colors. To each bowl, add just a tiny drop of one of the gel food colors: pink, orange, yellow, green, blue, and purple. Gel colors are highly concentrated, so a little goes a long way. Stir each color into its respective bowl until the color is uniform. If you desire a more intense color, you can add another tiny drop, but be careful not to add too much, as it can affect the texture or flavor.
Step 5: Layering and Swirling the Rainbow
After the cake base has pre-baked for 15 minutes, carefully remove it from the oven. Now, take the remaining one-third of the cake mixture and stir in the 9 extra teaspoons of milk, a tablespoon at a time, until you have a pourable, thicker batter. This thin layer will act as a separator and also add a subtle cakey texture between the crust and the swirl. Pour this thinner cake batter over the pre-baked crust and gently spread it to cover. Next, randomly dollop spoonfuls of each colored cheesecake mixture over the thinner cake layer. Don’t worry about precision here; variety in placement will create a beautiful swirl. Once all the colors are dolloped, take a butter knife or a skewer and gently swirl the colors together. Make sweeping motions through the different colored blobs, moving horizontally and vertically. Aim for a marbled effect, not a muddy mess. Over-swirling can cause the colors to blend too much.
Step 6: Baking and Cooling the Bars
Once you’ve achieved your desired swirl pattern, place the pan back into the 350°F (175°C) oven. Bake for an additional 25-30 minutes, or until the cheesecake is set around the edges and appears mostly firm in the center. A slight jiggle in the very middle is okay, as it will continue to set as it cools. Remove the pan from the oven and let it cool completely on a wire rack. This cooling process is critical for the cheesecake to set properly. Once cooled to room temperature, cover the pan tightly with plastic wrap and refrigerate for at least 4 hours, or preferably overnight. Chilling is essential for the bars to firm up enough to be cut cleanly. When ready to serve, use the parchment paper overhang to carefully lift the entire block from the pan onto a cutting board. Cut into bars using a sharp knife, wiping the knife clean between cuts for neat slices.
Conclusion:
There you have it – your ultimate guide to creating stunning and delicious Rainbow Cheesecake Swirl Bars! We’ve walked through each step, from preparing the buttery crust to swirling in those vibrant, fruity colors. These bars are more than just a dessert; they’re a celebration in every bite, perfect for birthdays, holidays, or just brightening up an ordinary day. I encourage you to give this recipe a try, experiment with the colors, and most importantly, have fun with it! Your friends and family will be absolutely delighted by this show-stopping treat.
For serving, these Rainbow Cheesecake Swirl Bars are fantastic on their own, allowing the full flavor and visual appeal to shine. However, they also pair wonderfully with a dollop of fresh whipped cream or a light dusting of powdered sugar. For variations, don’t hesitate to explore different fruit flavors for your swirls – think strawberry, blueberry, mango, or even lime for a zesty twist. You could also add a sprinkle of edible glitter to the top for extra sparkle!
Frequently Asked Questions:
Q1: How can I achieve the best swirl effect for my Rainbow Cheesecake Swirl Bars?
To get those beautiful swirls, make sure your cream cheese mixture is smooth and not over-whipped. Divide the mixture into your desired colors and add the flavoring/coloring to each portion. Dollop spoonfuls of each color onto the crust randomly, then use a toothpick or skewer to gently swirl them together. Be careful not to over-mix, or the colors will blend into one muddy shade.
Q2: Can I make these Rainbow Cheesecake Swirl Bars ahead of time?
Yes, absolutely! These bars are an excellent make-ahead dessert. Once fully chilled and set, you can cut them into bars and store them in an airtight container in the refrigerator for up to 3-4 days. They often taste even better the next day as the flavors meld together.
Rainbow Cheesecake Swirl Bars-Easy Dessert Delight
Easy and delightful rainbow cheesecake swirl bars with a cake mix base.
Ingredients
-
1 box white cake mix
-
1/2 cup melted butter
-
1 large egg
-
2/3 cup milk, plus 9 extra teaspoons
-
Gel food colors: pink, orange, yellow, green, blue, and purple
-
12 oz cream cheese, softened
-
1/3 cup granulated sugar
-
1 large egg
-
1 teaspoon pure vanilla extract
Instructions
-
Step 1
In a medium bowl, combine the entire box of white cake mix with the 1/2 cup of melted butter, 1 large egg, and 2/3 cup of milk. Stir until just combined. Prepare a 9×13 inch baking pan by greasing it or lining with parchment paper. Spread about two-thirds of this cake mixture evenly into the bottom of the prepared pan. Reserve the remaining one-third. -
Step 2
Preheat your oven to 350°F (175°C). Bake the cake mixture in the preheated oven for 15 minutes. -
Step 3
In a large mixing bowl, beat the softened cream cheese until smooth. Add 1/3 cup of granulated sugar and 1 large egg. Beat until well combined and fluffy. Stir in 1 teaspoon of pure vanilla extract. -
Step 4
Divide the cream cheese mixture evenly into six smaller bowls. Add a tiny drop of one gel food color (pink, orange, yellow, green, blue, purple) to each bowl and stir until uniform. -
Step 5
Remove the pre-baked crust from the oven. Stir the remaining one-third of the cake mixture with the 9 extra teaspoons of milk until pourable. Pour this over the pre-baked crust and spread gently. Dollop spoonfuls of each colored cheesecake mixture randomly over the thinner cake layer. Gently swirl the colors together with a butter knife or skewer to create a marbled effect. -
Step 6
Bake in the 350°F (175°C) oven for an additional 25-30 minutes, until the cheesecake is set. Let cool completely on a wire rack, then cover and refrigerate for at least 4 hours or overnight. Lift from pan using parchment paper overhang and cut into bars.
Important Information
Nutrition Facts (Per Serving)
It is important to consider this information as approximate and not to use it as definitive health advice.
Allergy Information
Please check ingredients for potential allergens and consult a health professional if in doubt.